Boost Your 3D Workflow: How to Set Up Tripo in Blender and Sync with Cursor
Are you looking to optimize your 3D modeling pipeline with AI-driven tools? This comprehensive guide will show you how to install the Tripo plugin in Blender, acquire an API key, configure the MCP server, and connect everything to Cursor. By the end of this walkthrough, you will have a fully operational setup that supercharges your 3D design process.
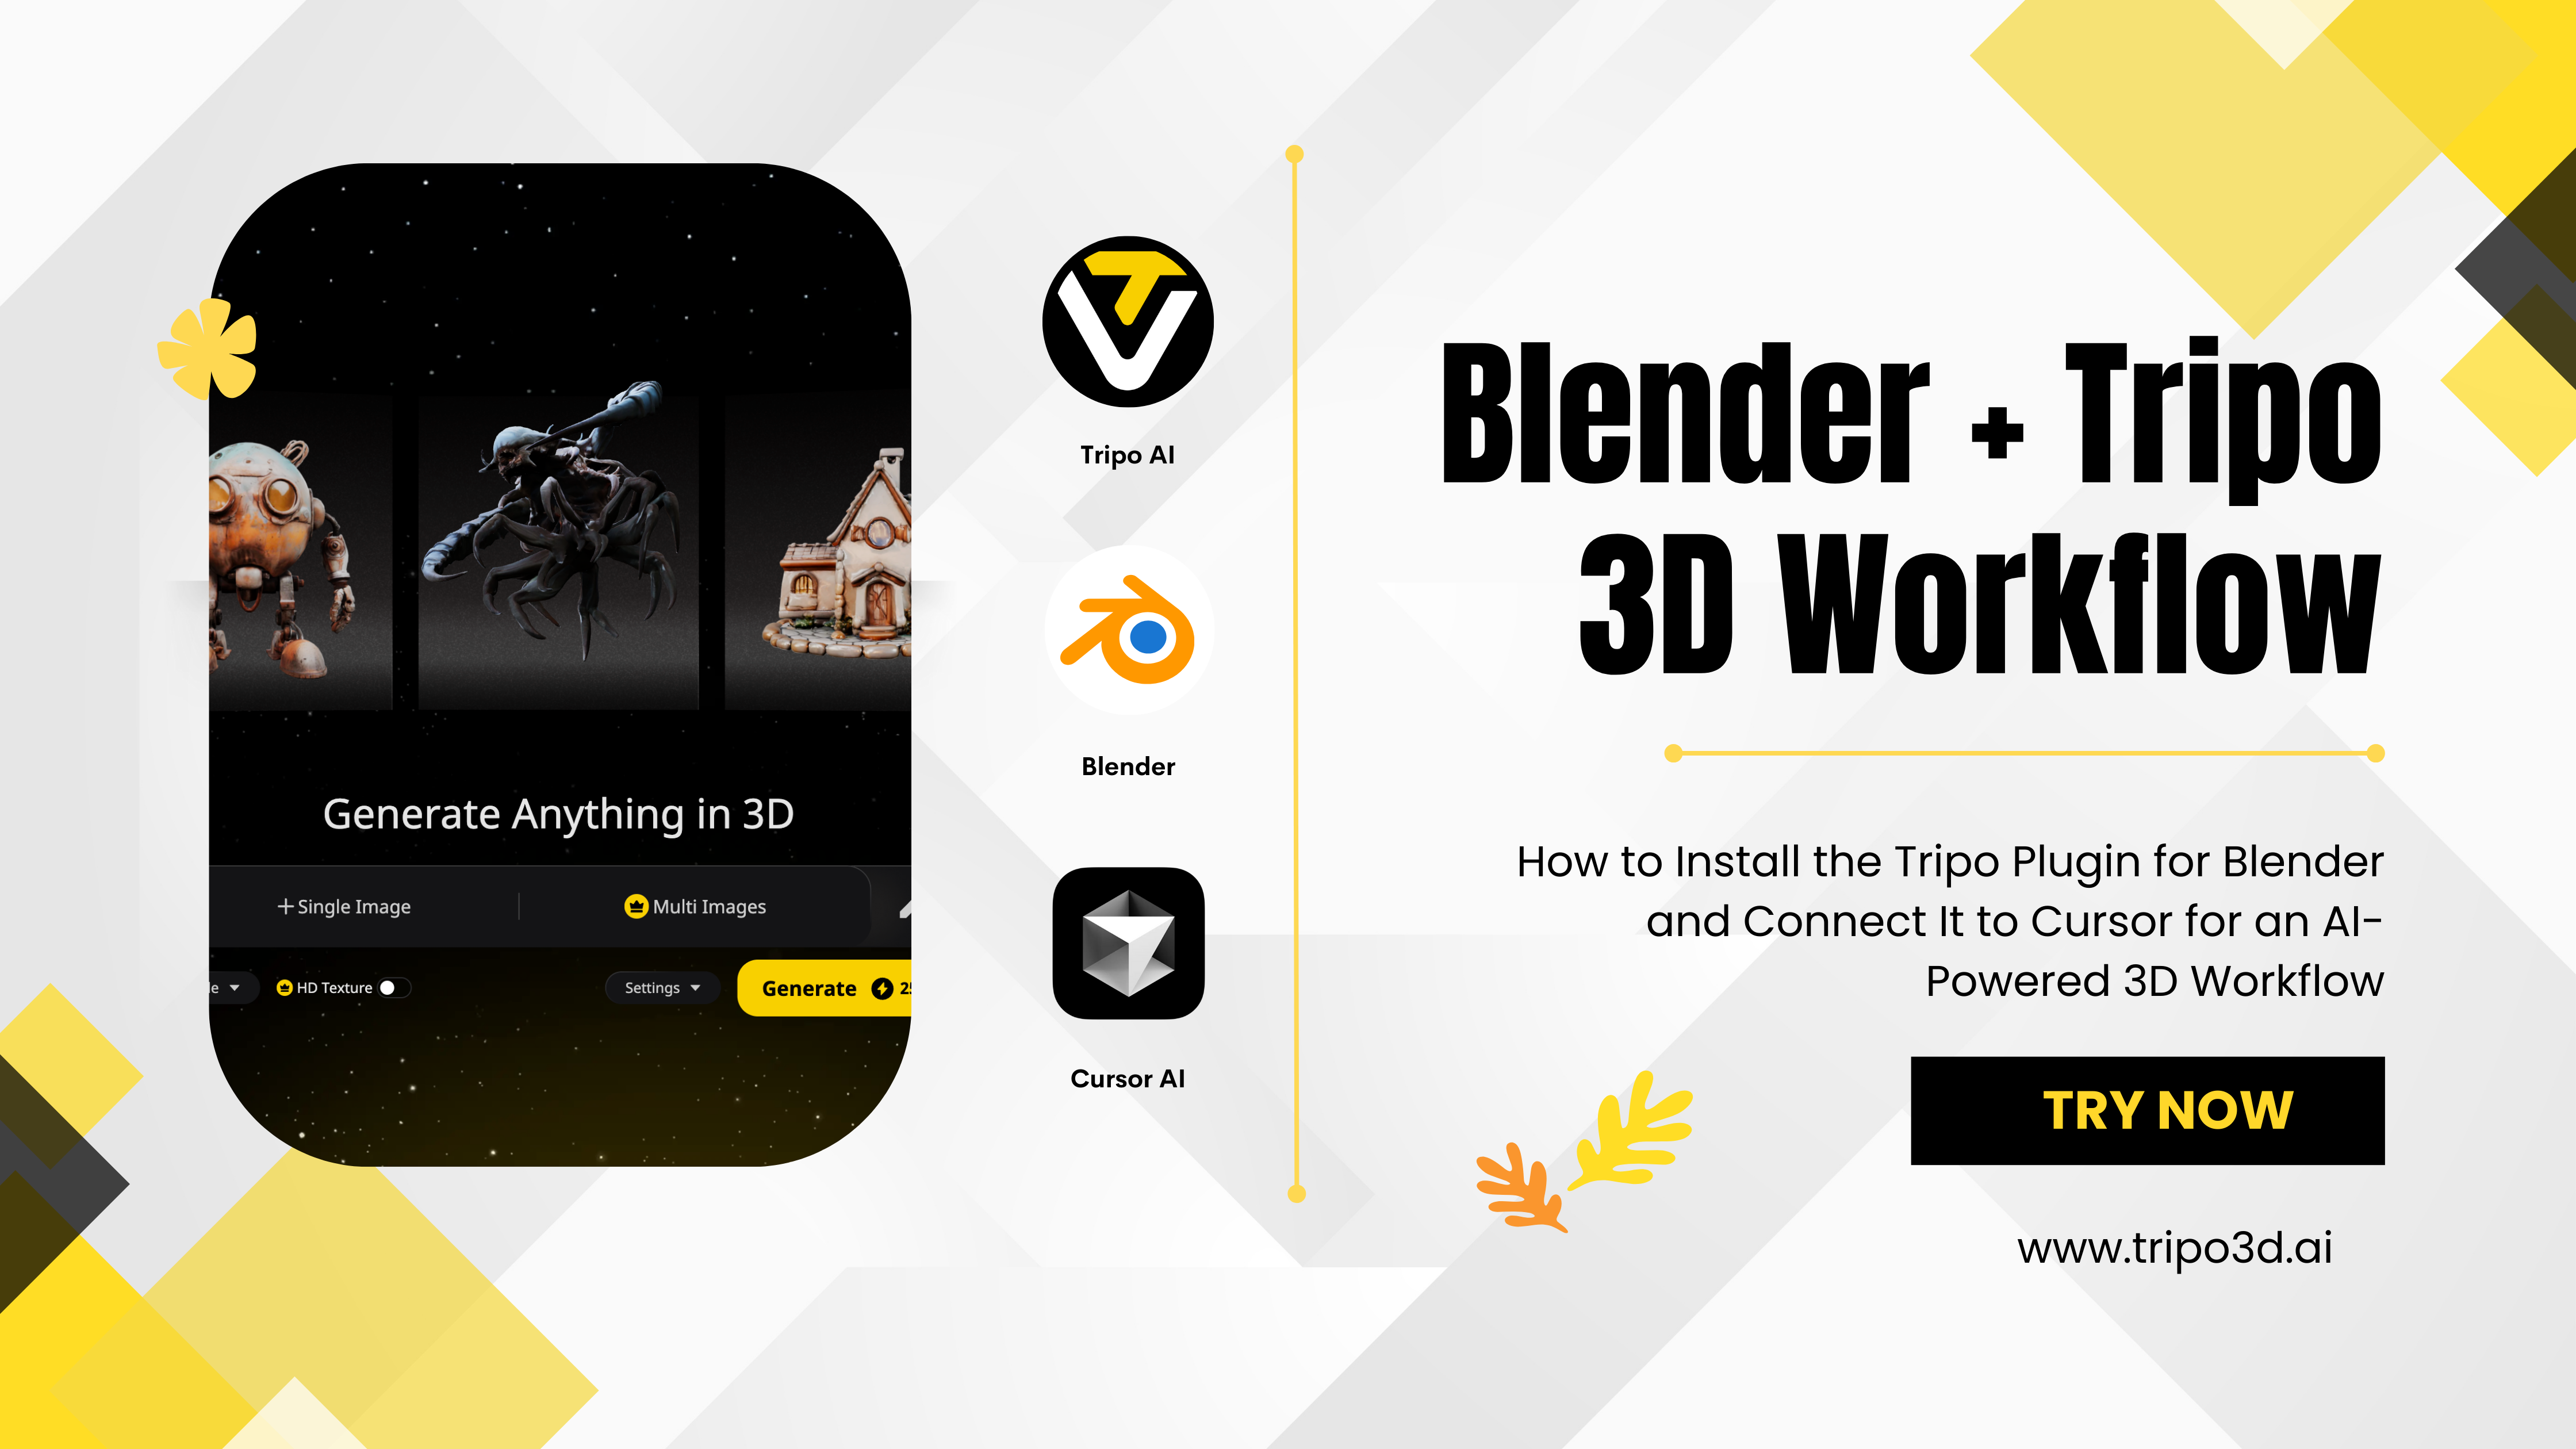
Table of Contents
- Why Use the Tripo Plugin in Blender
- Step 1: Plugin Installation
- Step 2: API Key Acquisition
- Step 3: Blender Configuration
- Step 4: MCP Server Setup
- Step 5: Cursor Connection
- Usage Instructions
- Conclusion
Why Use the Tripo Plugin in Blender
In the competitive world of 3D design, speed and efficiency are critical. The Tripo plugin for Blender uses AI to help designers work faster and manage complex tasks more effectively. By linking Blender with external services like Cursor, you can reduce repetitive workloads and focus on creative goals.
Key Benefits of the Tripo Plugin:
- AI-enhanced workflow for automating repetitive tasks
- Integration with external tools, including Cursor
- Flexible features adaptable to any 3D production pipeline
2. Step 1: Plugin Installation
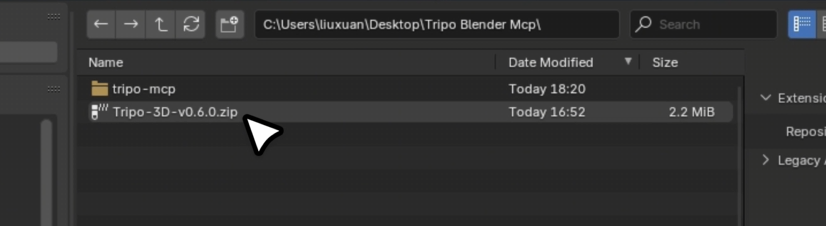
- Download the Plugin File
- Click here to download in GitHub.
- Open Blender Preferences
- Launch Blender
- Go to Edit -> Preferences -> Add-ons
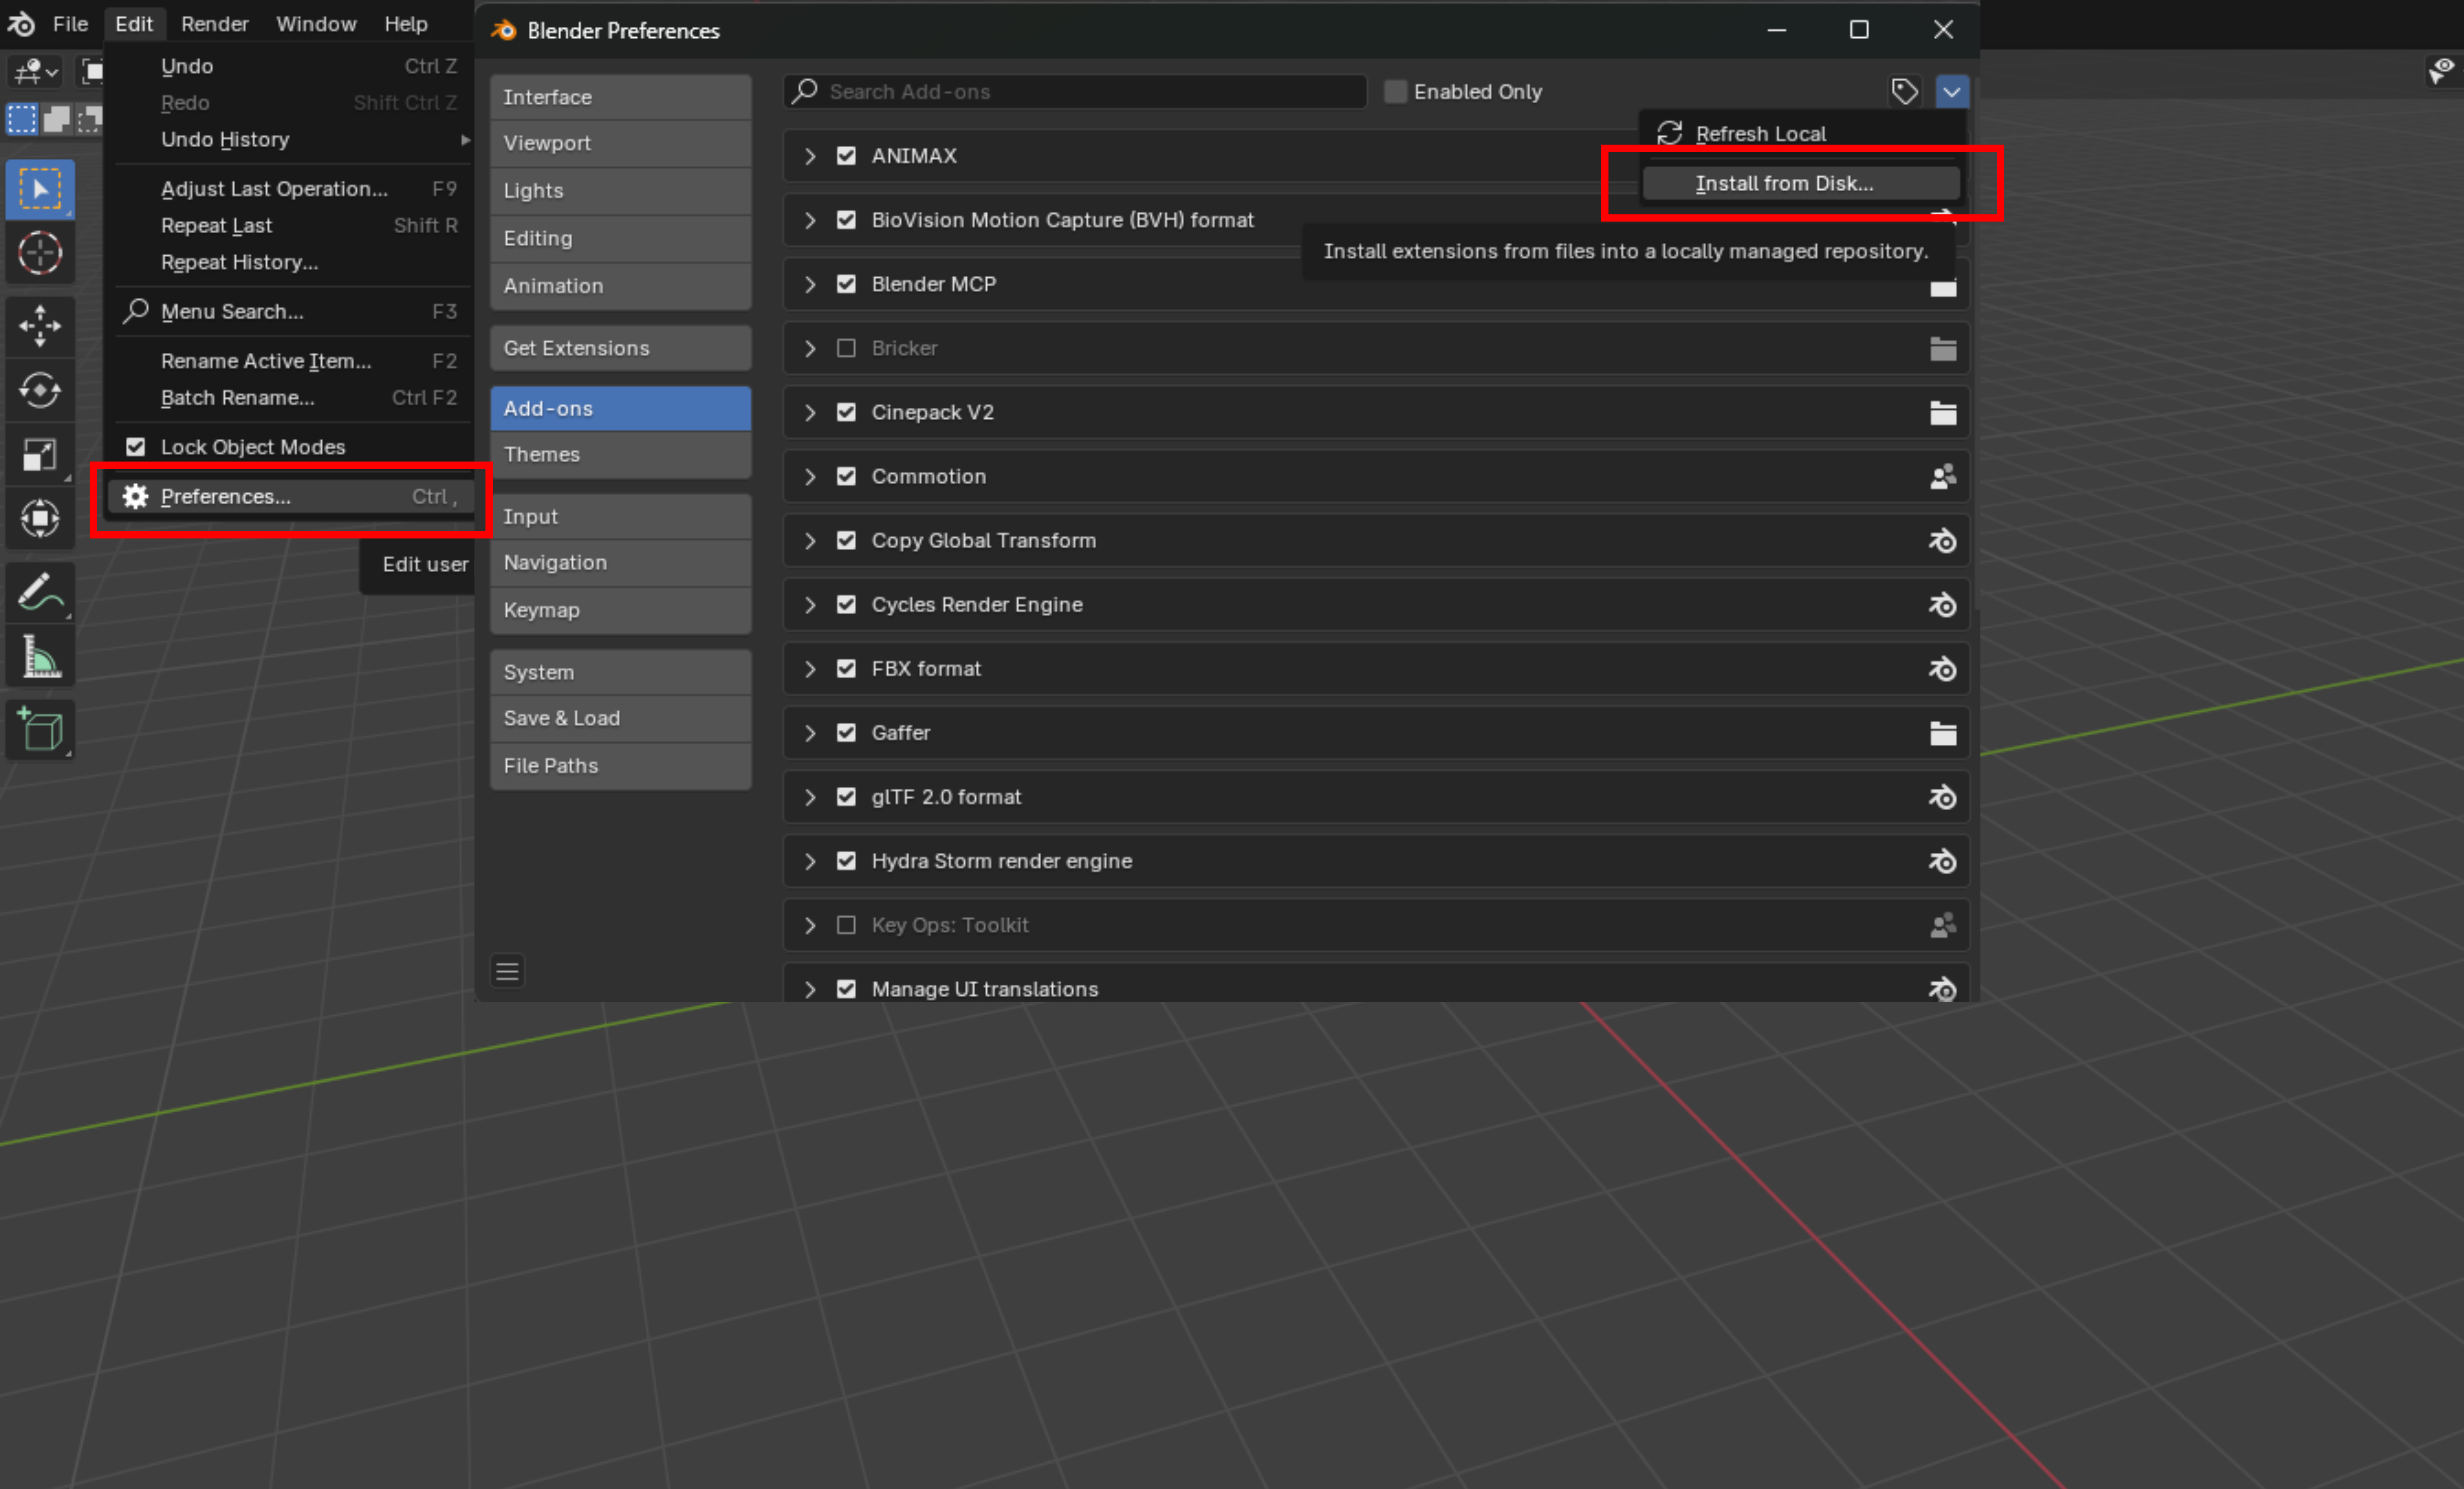
- Install the Plugin
- Click Install and locate the Tripo plugin zip or folder
- Select the file, then click Install Add-on
- Enable the Plugin
- In the Add-ons list, find the newly installed Tripo plugin
- Check the box to enable it
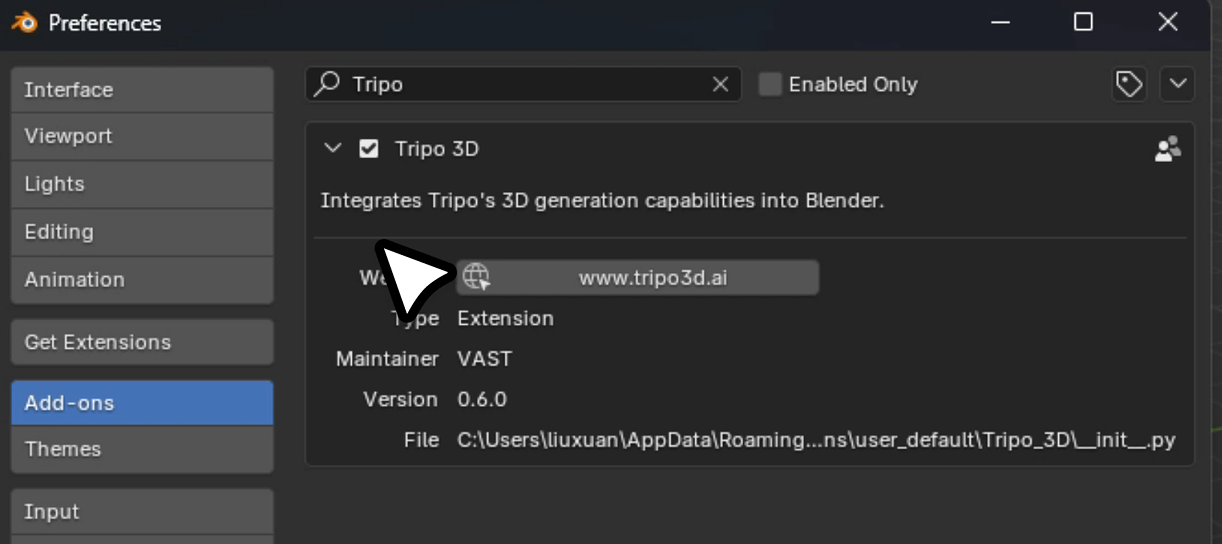
When installed correctly, you will see the Tripo panel in Blender.
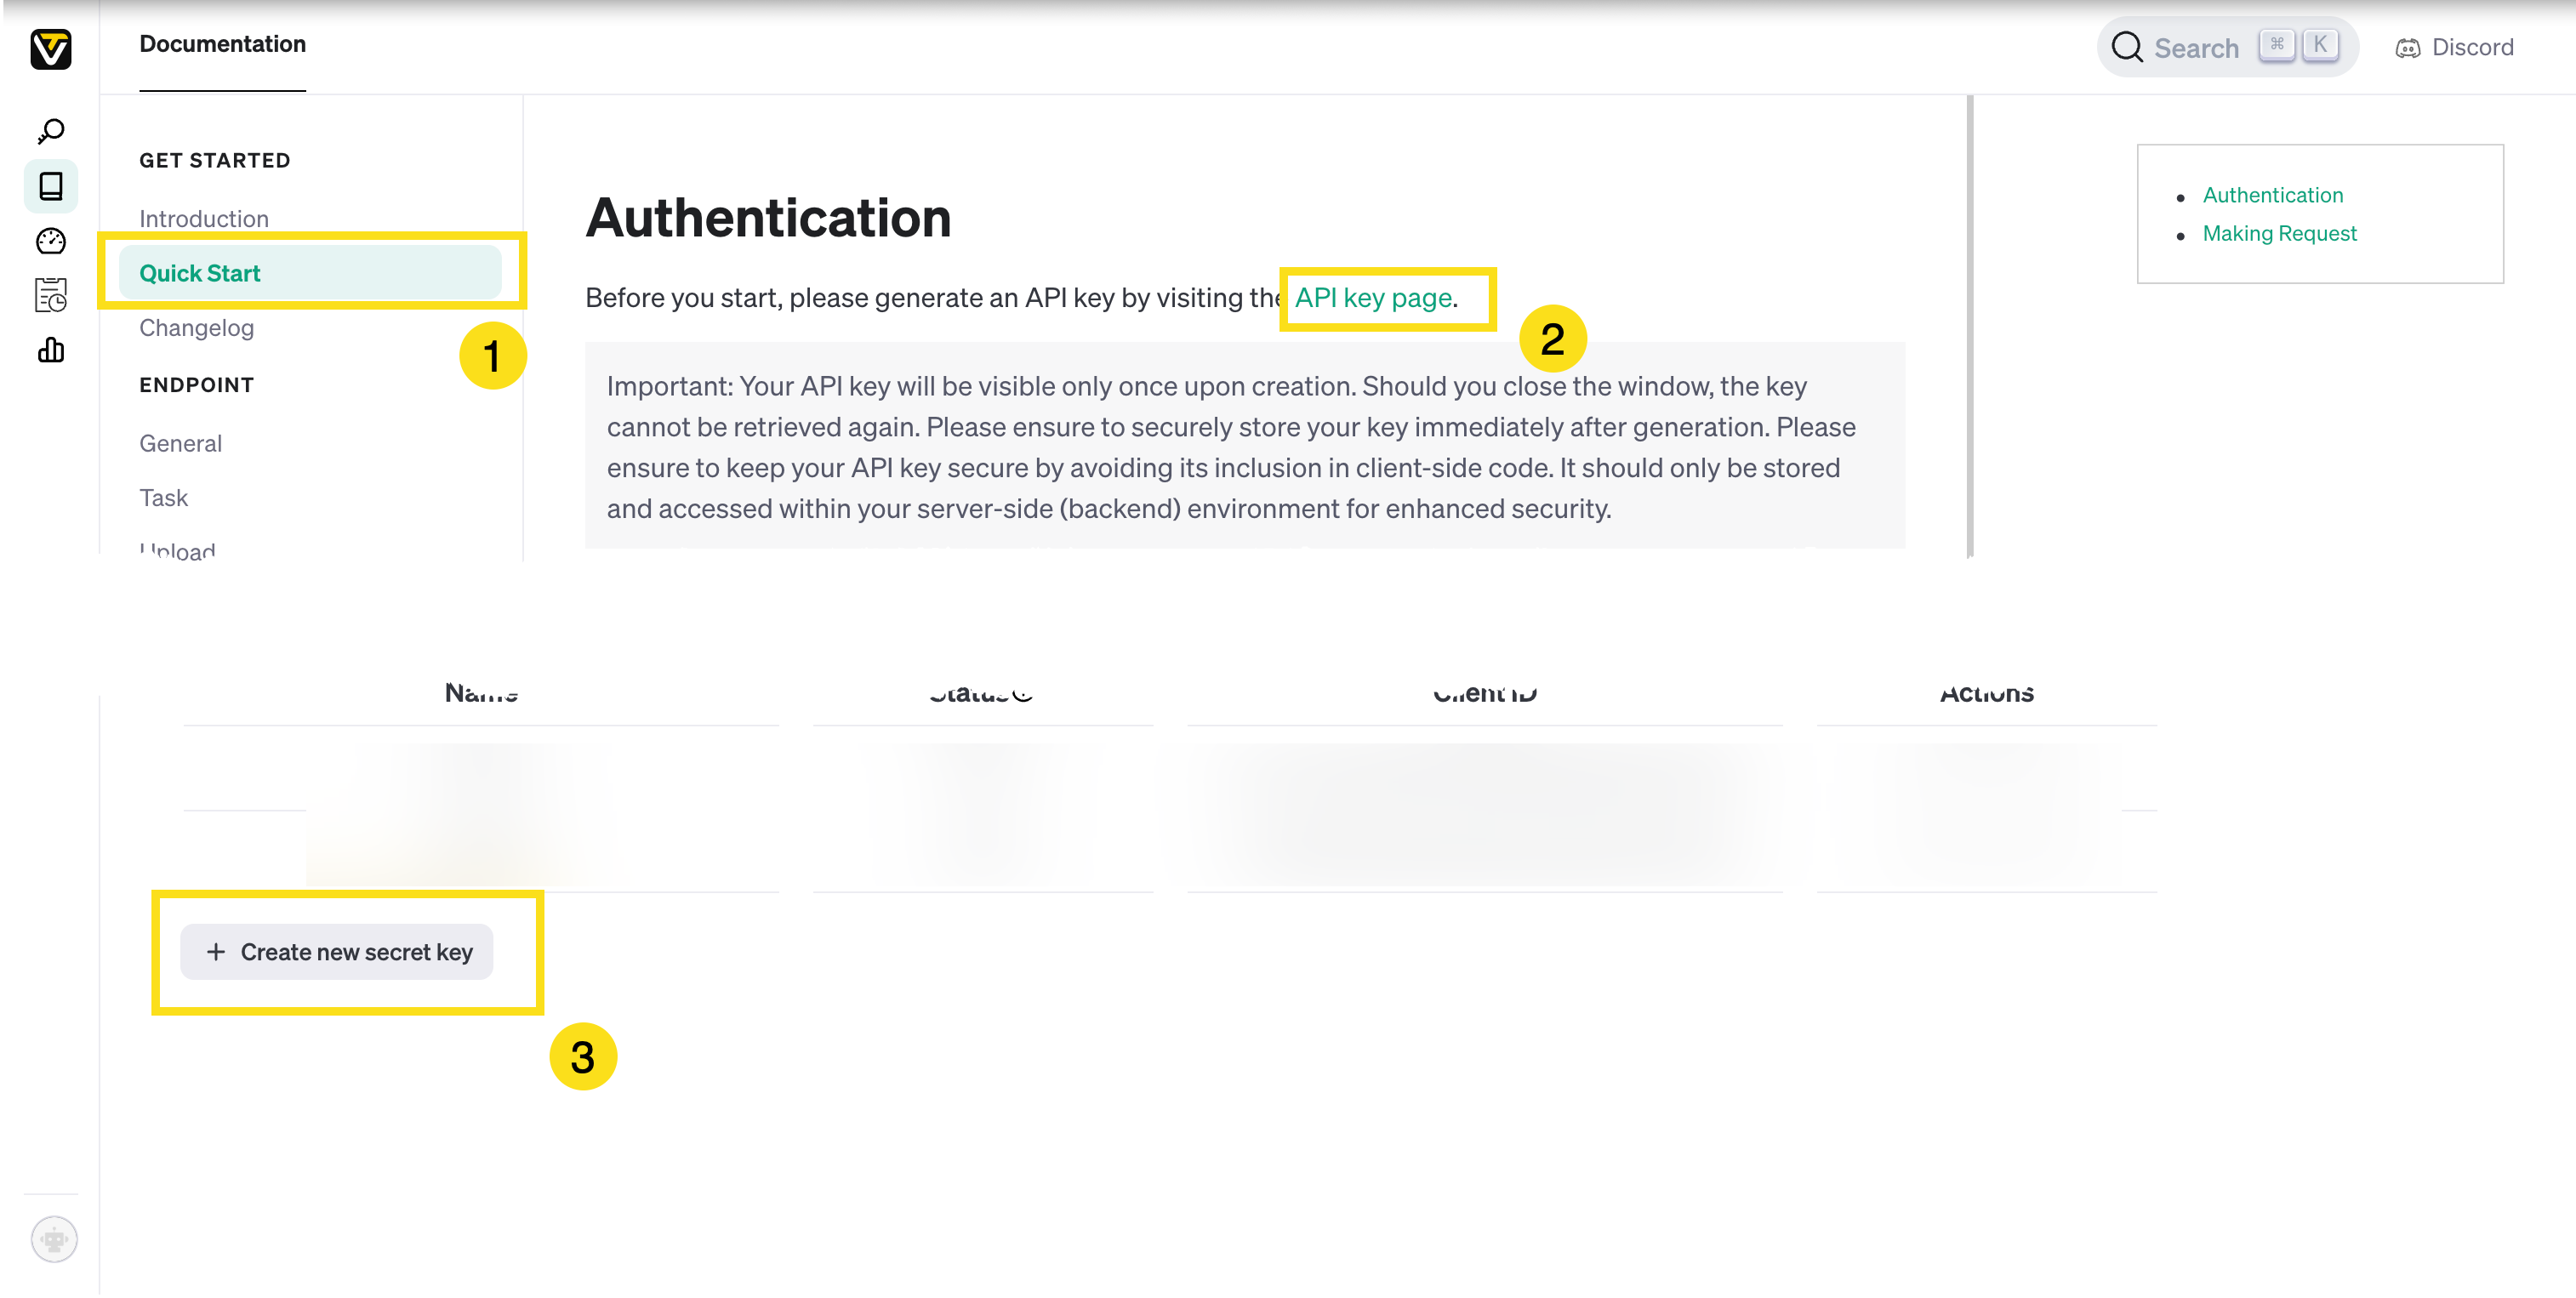
Step 2: API Key Acquisition
You will need a valid API key to unlock the plugin features.
- Visit the Tripo Developer Portal
- Create an Account or Log In
- Click
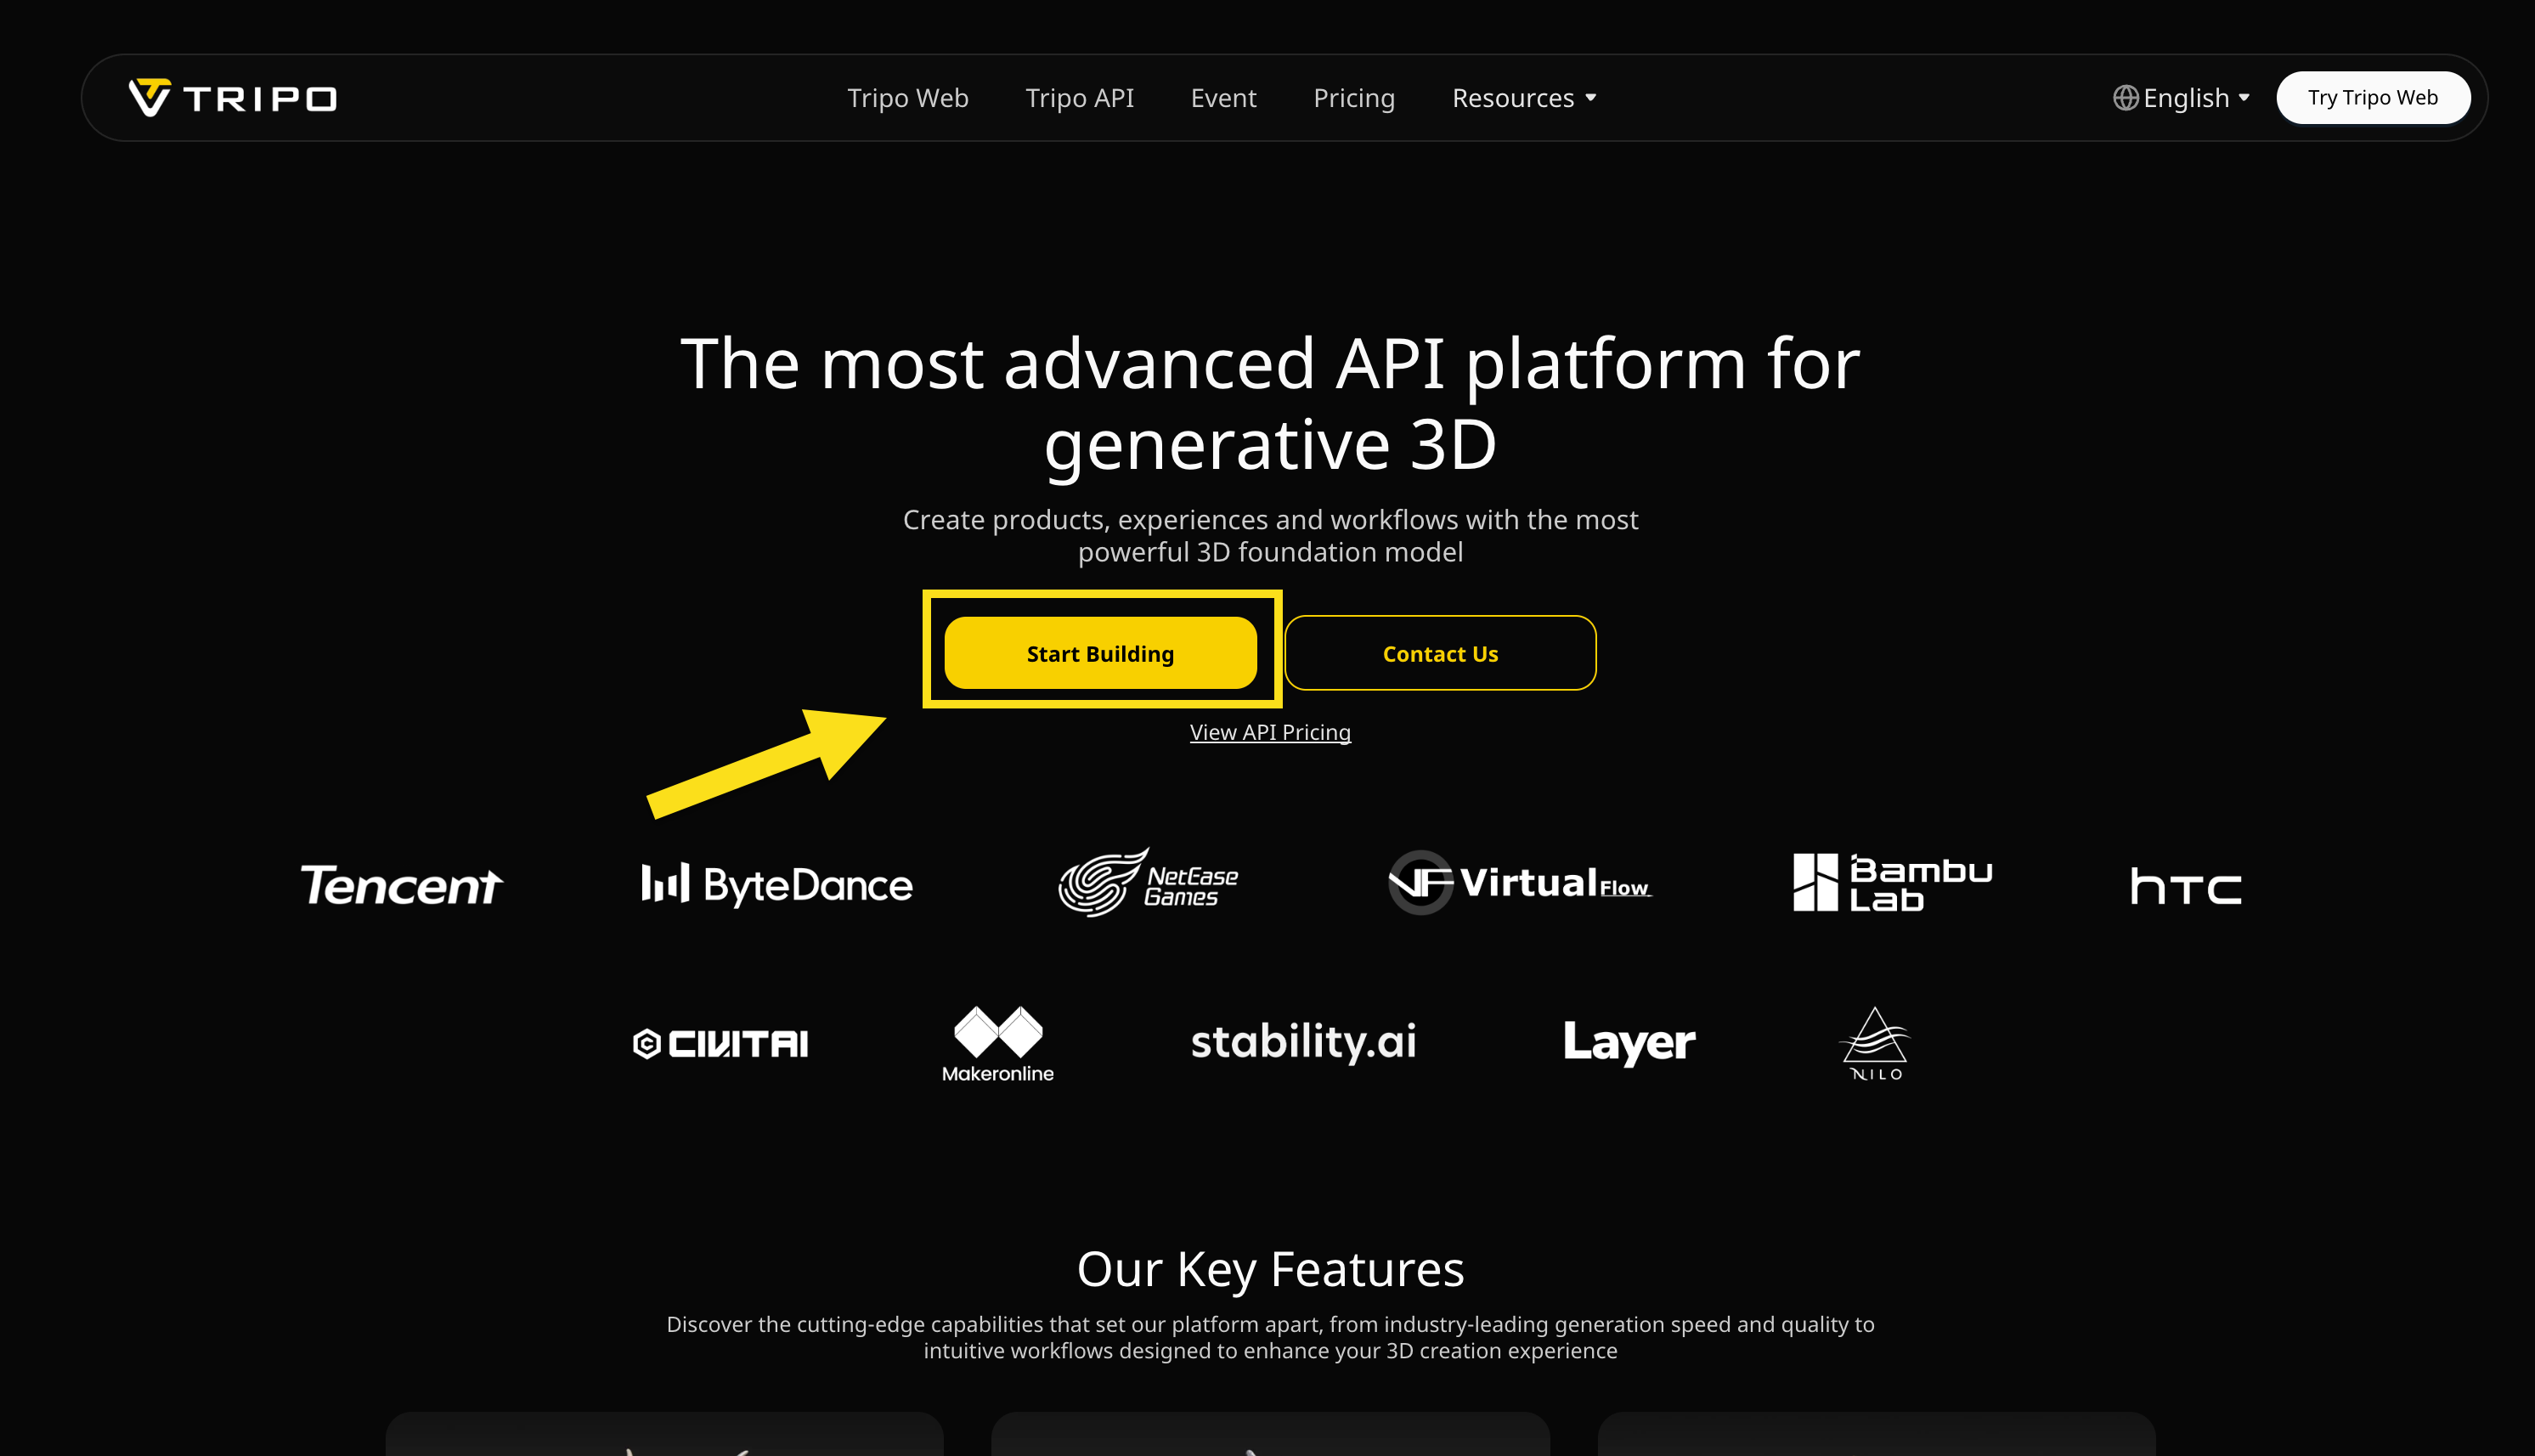
Start Building - Sign in with your credentials
- Click
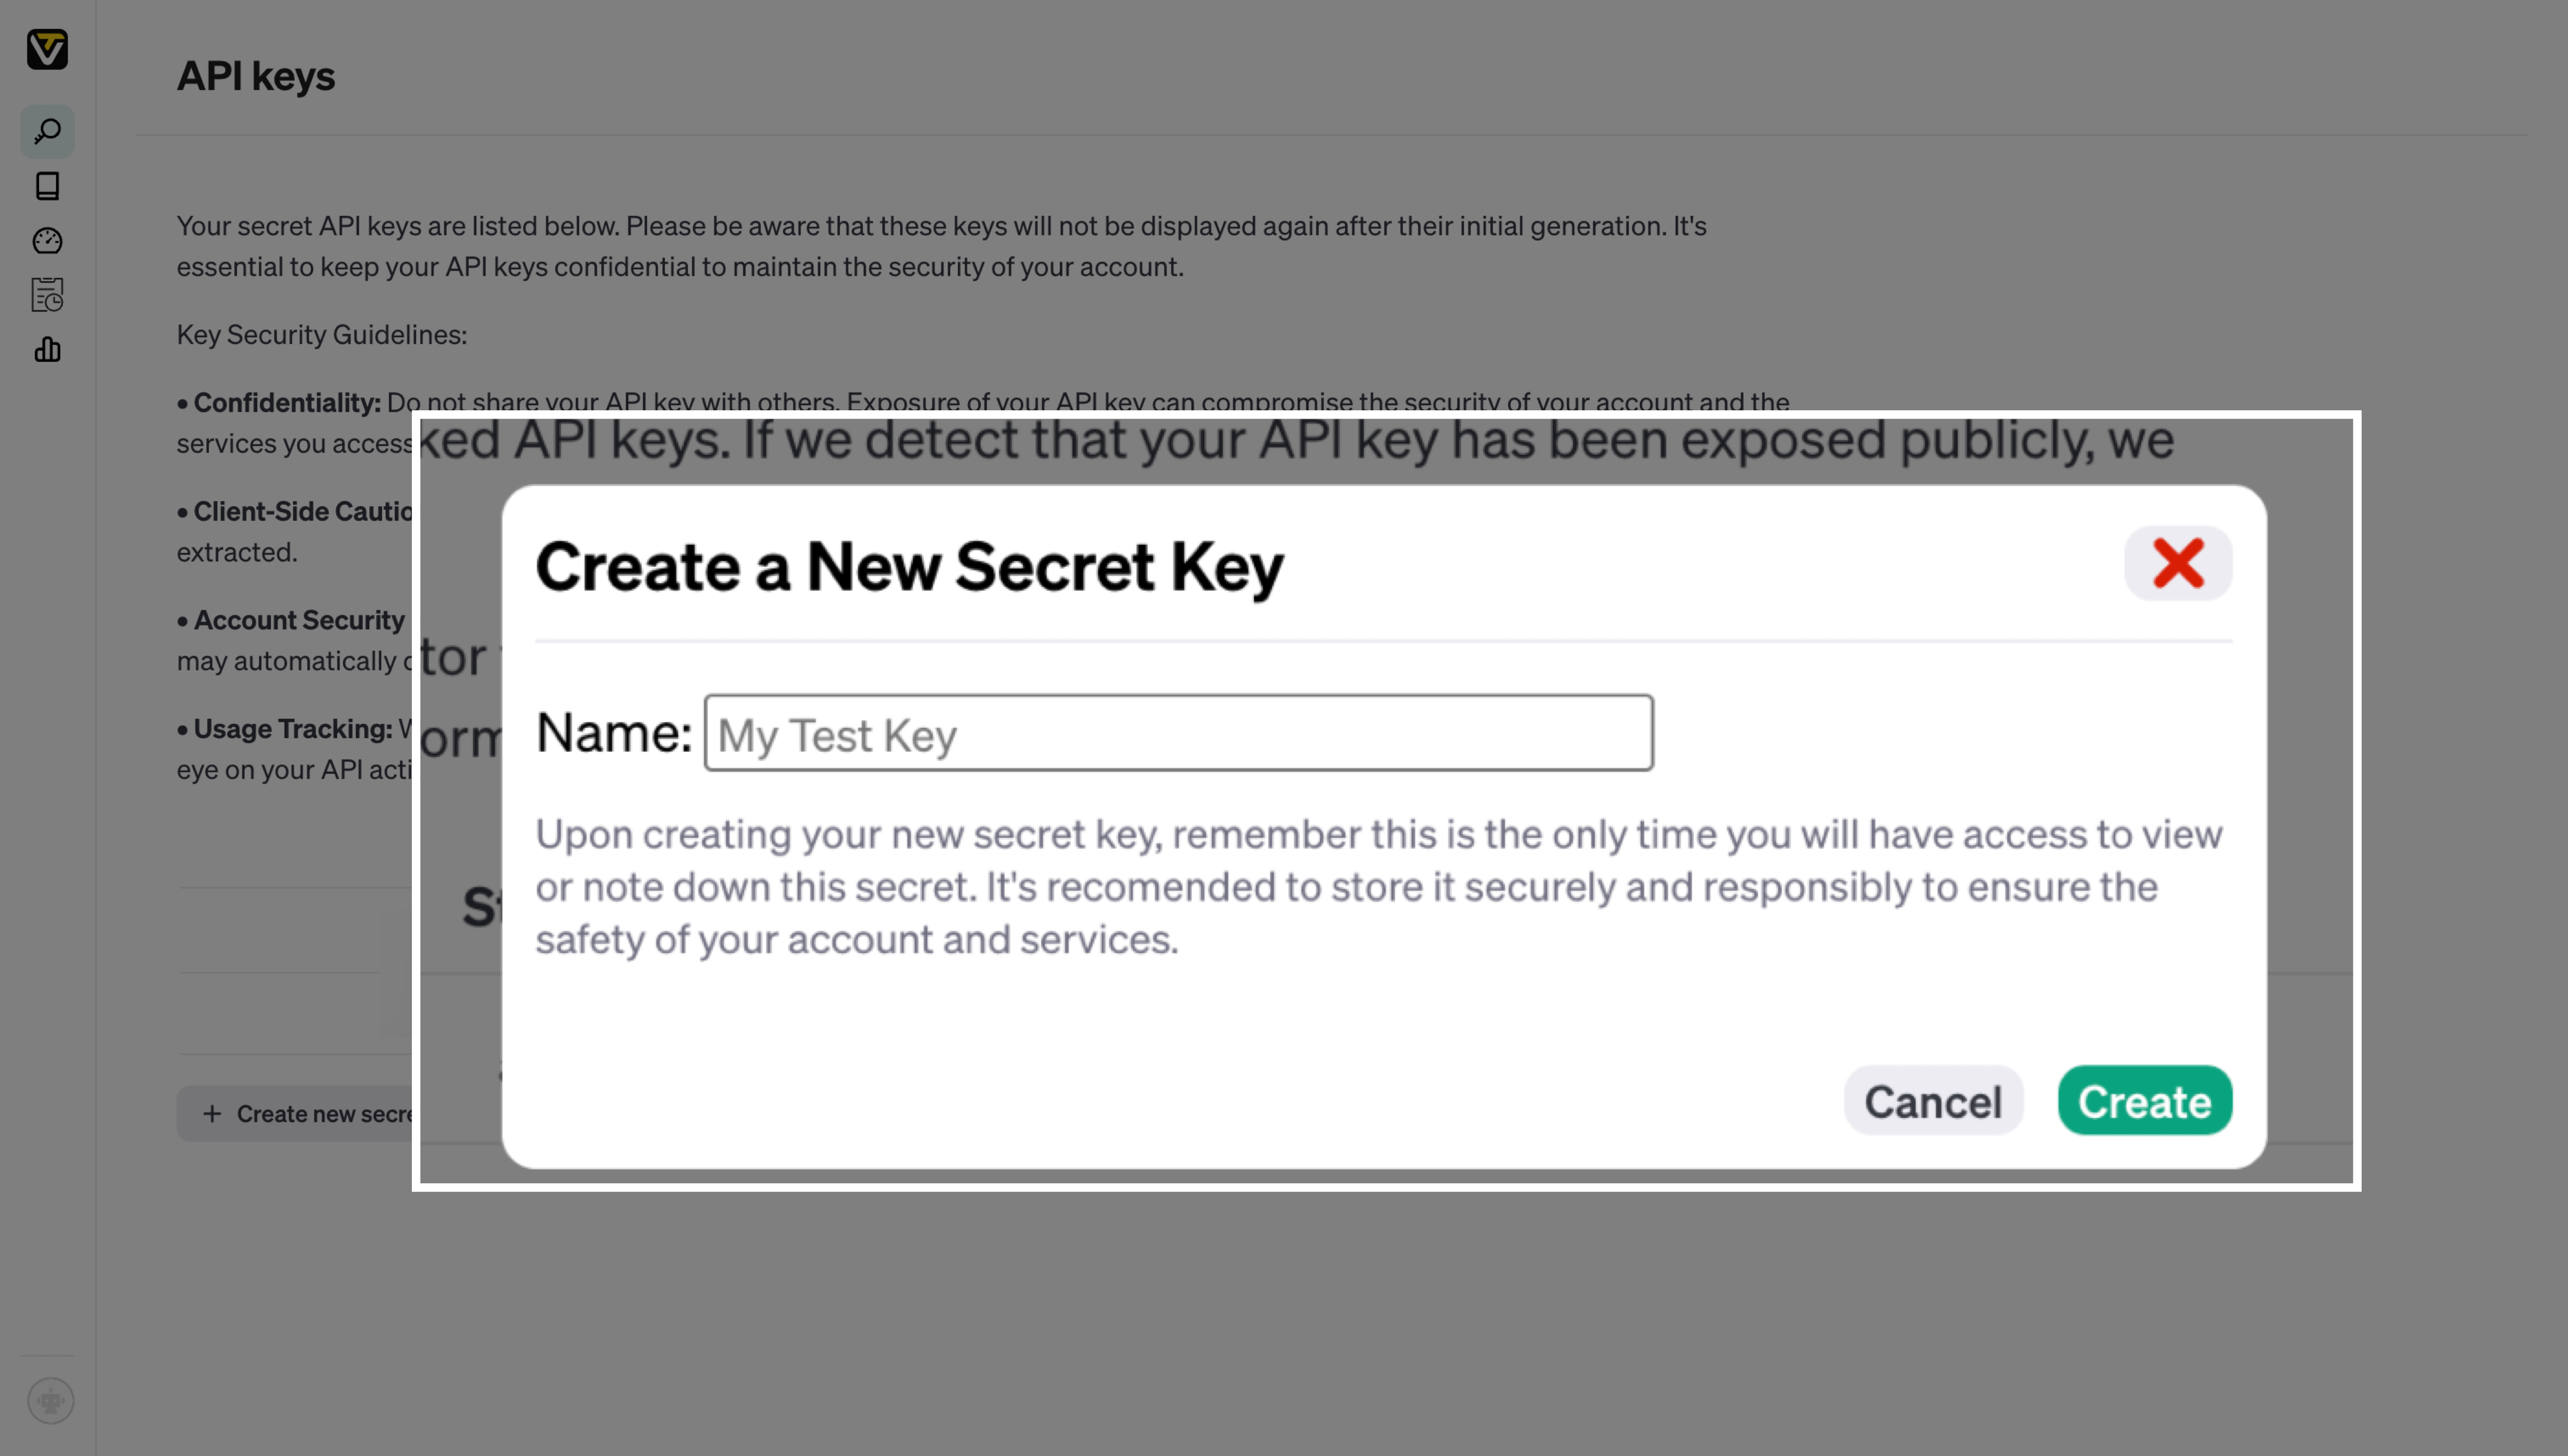
- Generate a New API Key
- Navigate to API Keys
- Select Create New Key
- Give the key a recognizable name
- Copy the generated API key string
- Keep this key accessible for the next configuration steps.
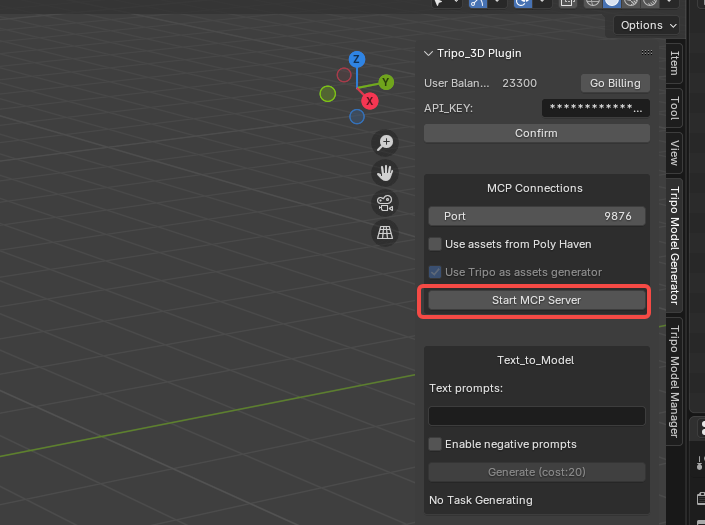
Step 3: Blender Configuration
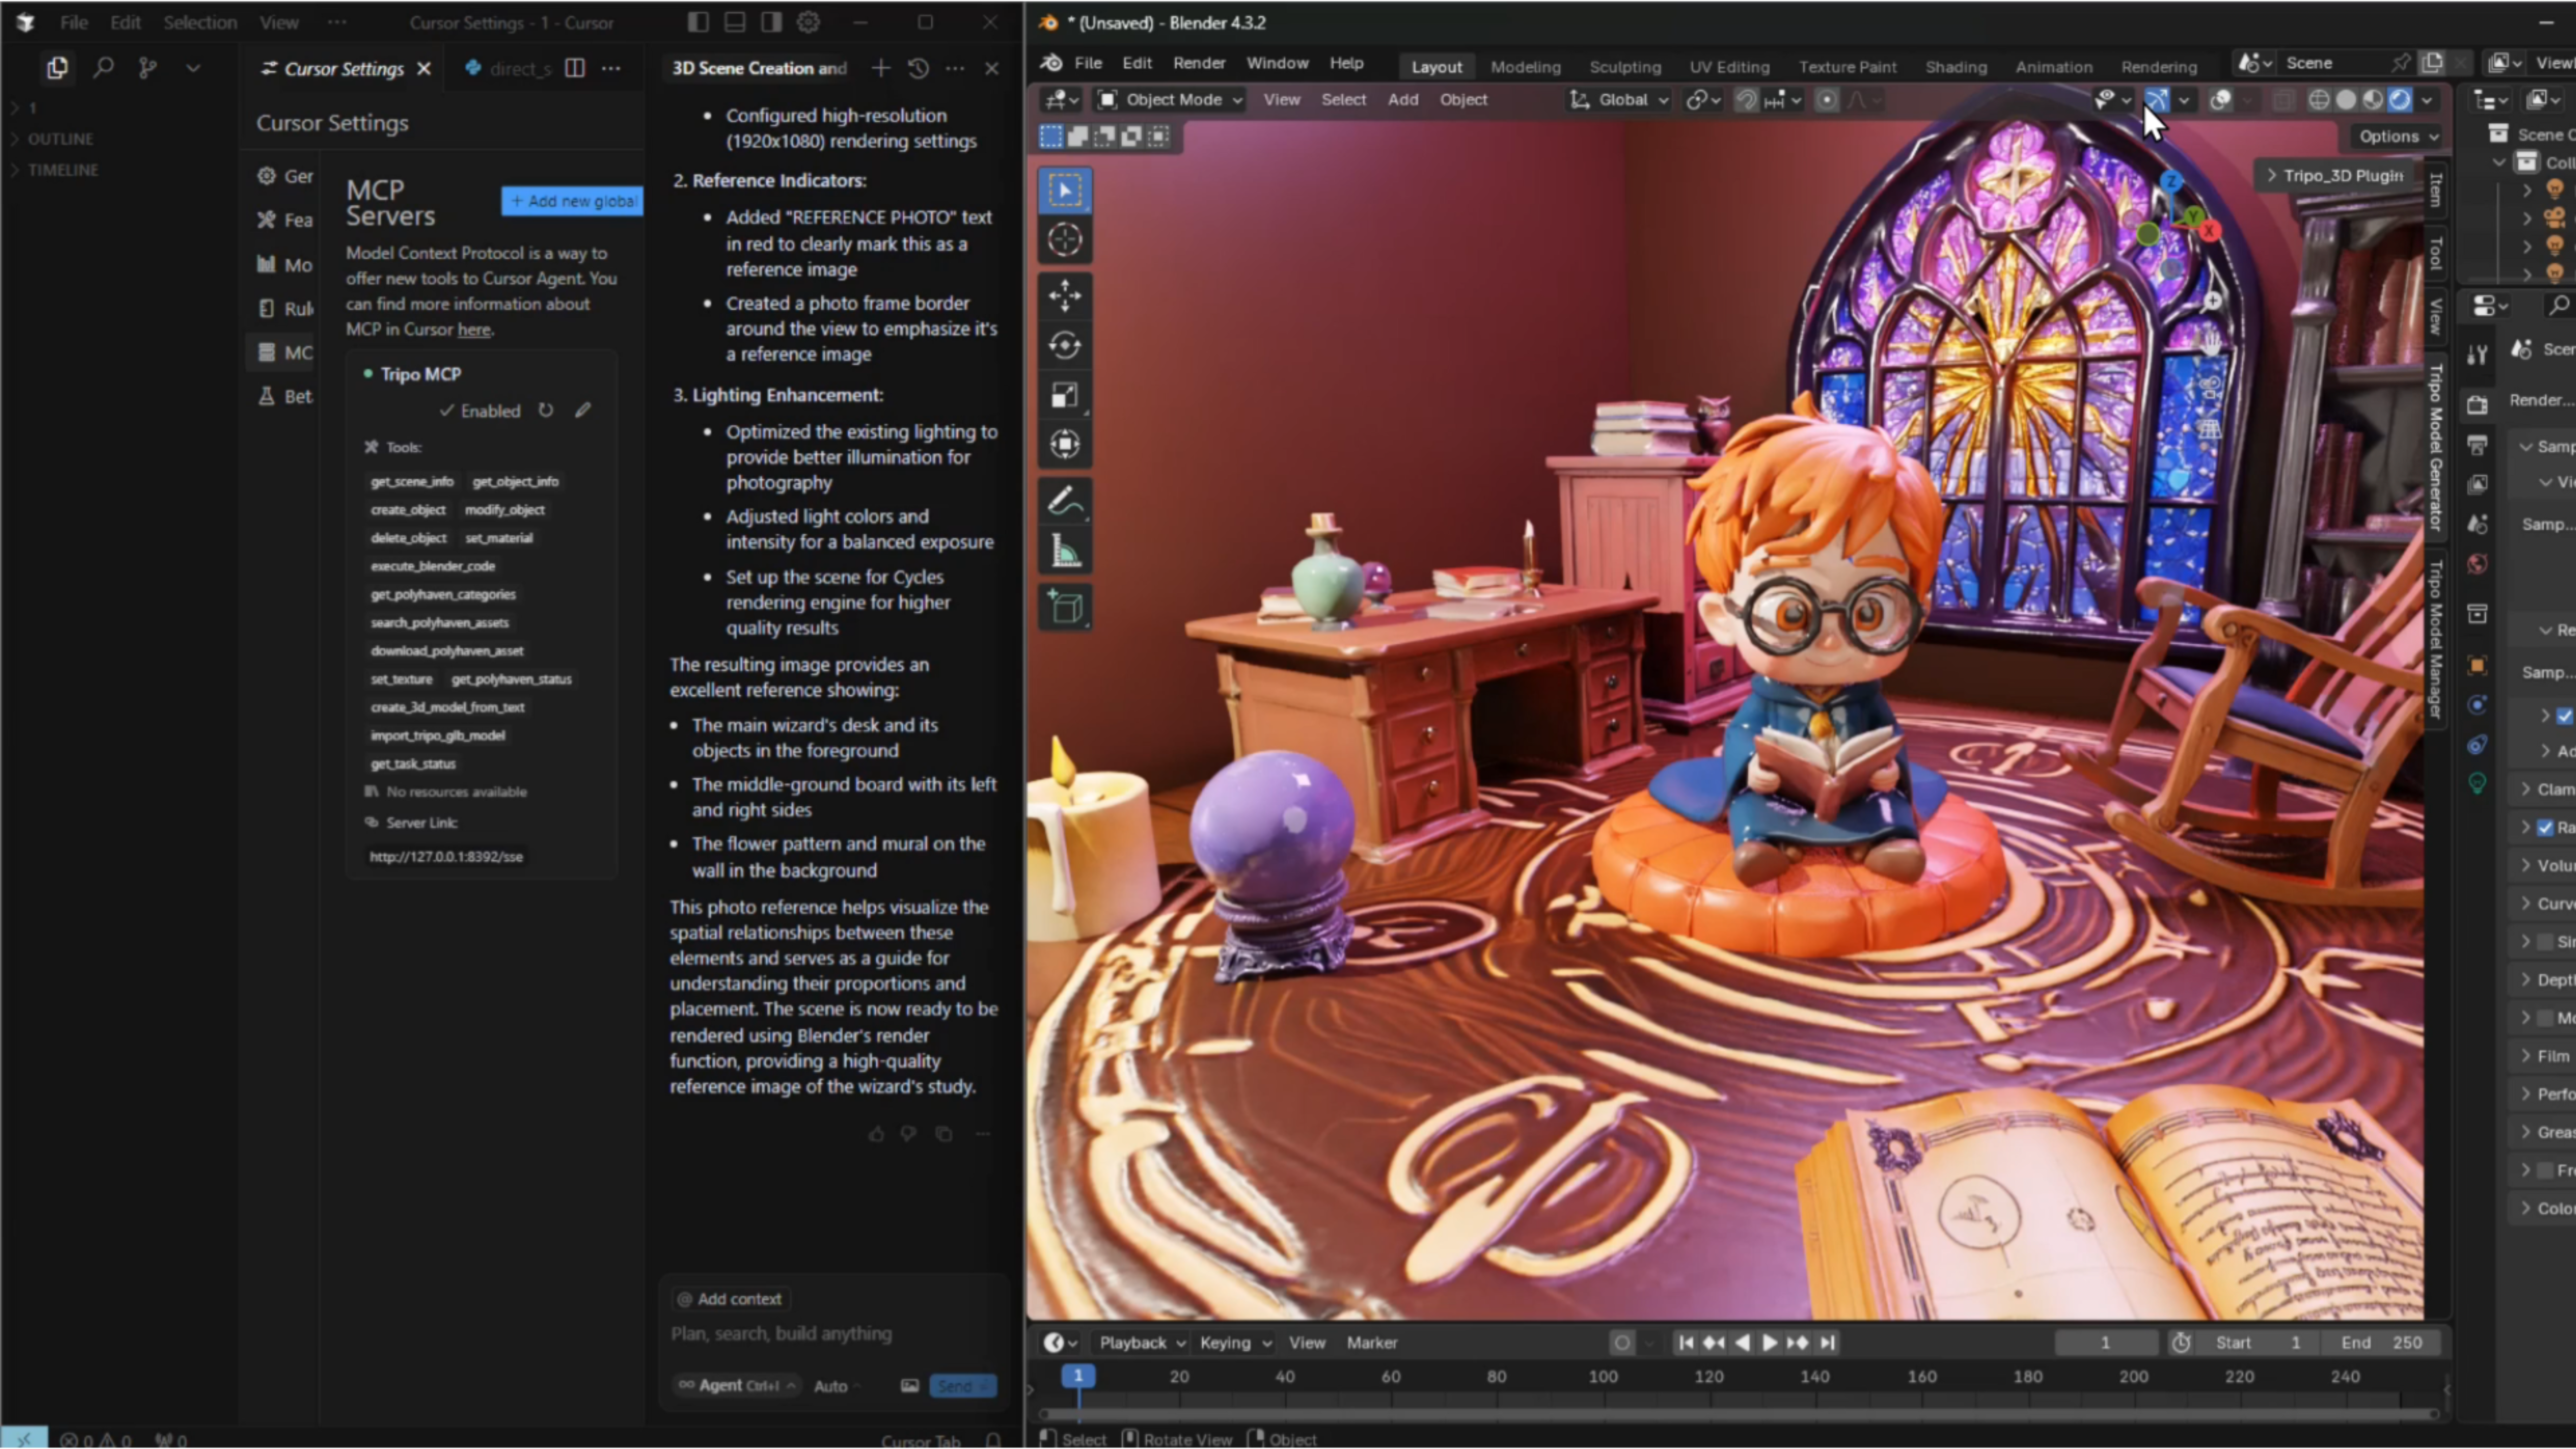
- Press N in the 3D View in Blender to open the side panel.
- Locate the Tripo Panel
- Paste Your API Key
- Click Start MCP Server
Step 4: MCP Server Setup
The MCP server is the bridge between Blender and other tools such as Cursor.
- Press Win+R, type cmd, and press Enter.
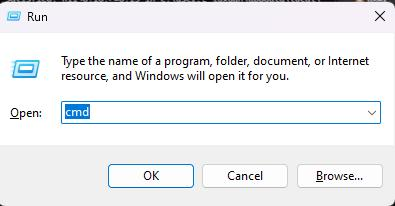
- Run this step (you can skip it if UV is already installed). Refer to the image below for details. If you see an error like "pip is not recognized as an internal or external command...", make sure Python is installed on your computer and added to the system PATH.
pip install uv
Step 5: Cursor Connection
Cursor is an AI-powered code editor that can interface with the MCP server for advanced 3D design and coding tasks.
- Open Cursor -> Settings -> MCP Configuration
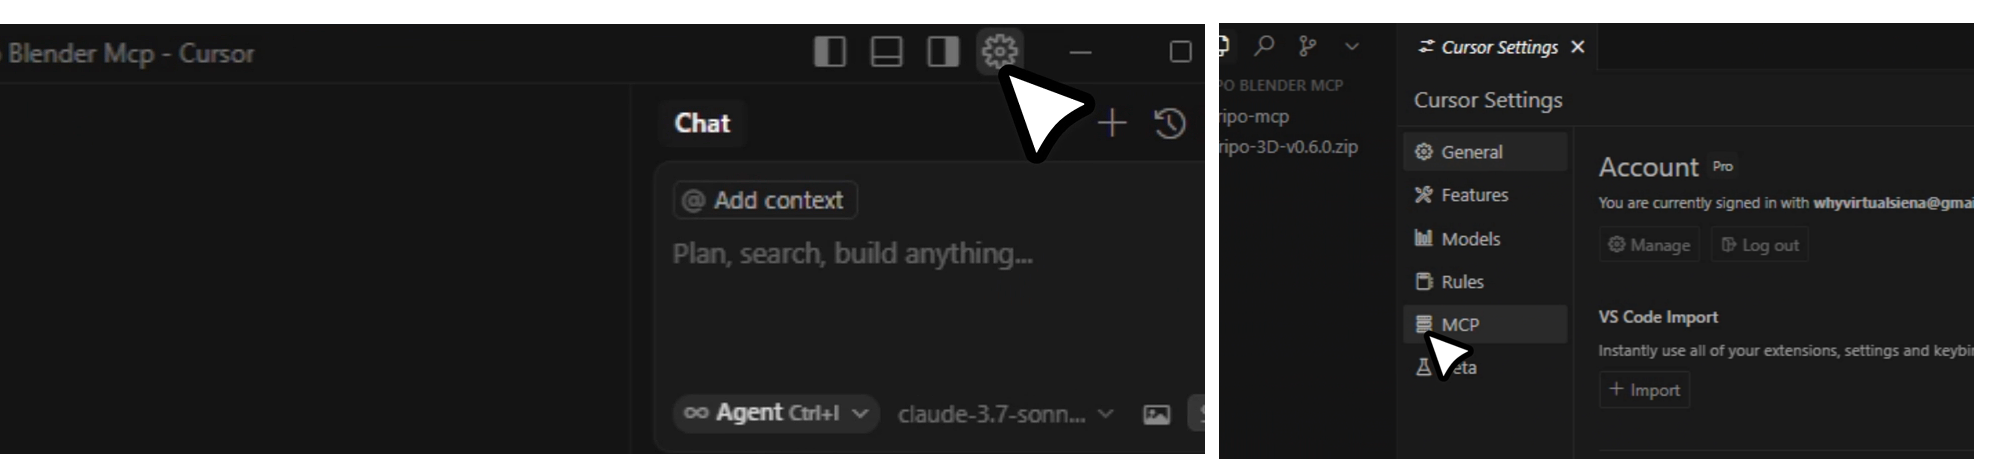
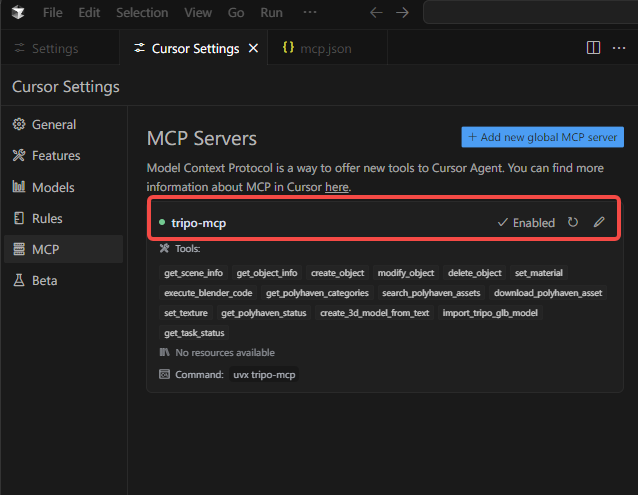
- Click Add new global MCP Server and then paste:
{
    "mcpServers": {
        "tripo-mcp": {
            "command": "uvx",
            "args": [
            "tripo-mcp"
            ]
         }
     }
}
- Enable the Endpoint
- Once the setup is done, switch it to enabled. If the light turns green and you see the MCP_tools list, you're good to go. (If it doesn’t connect, try checking if your proxy is in global mode.)
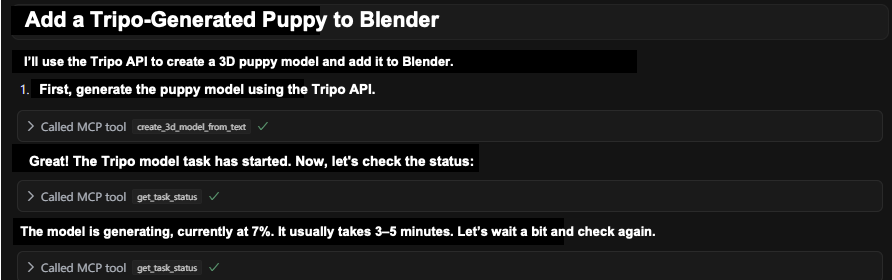
Usage Instructions
After setting up the MCP server and Cursor, you can start using Tripo inside Cursor. For best results, switch the Agent to claude-3.7-sonnet.
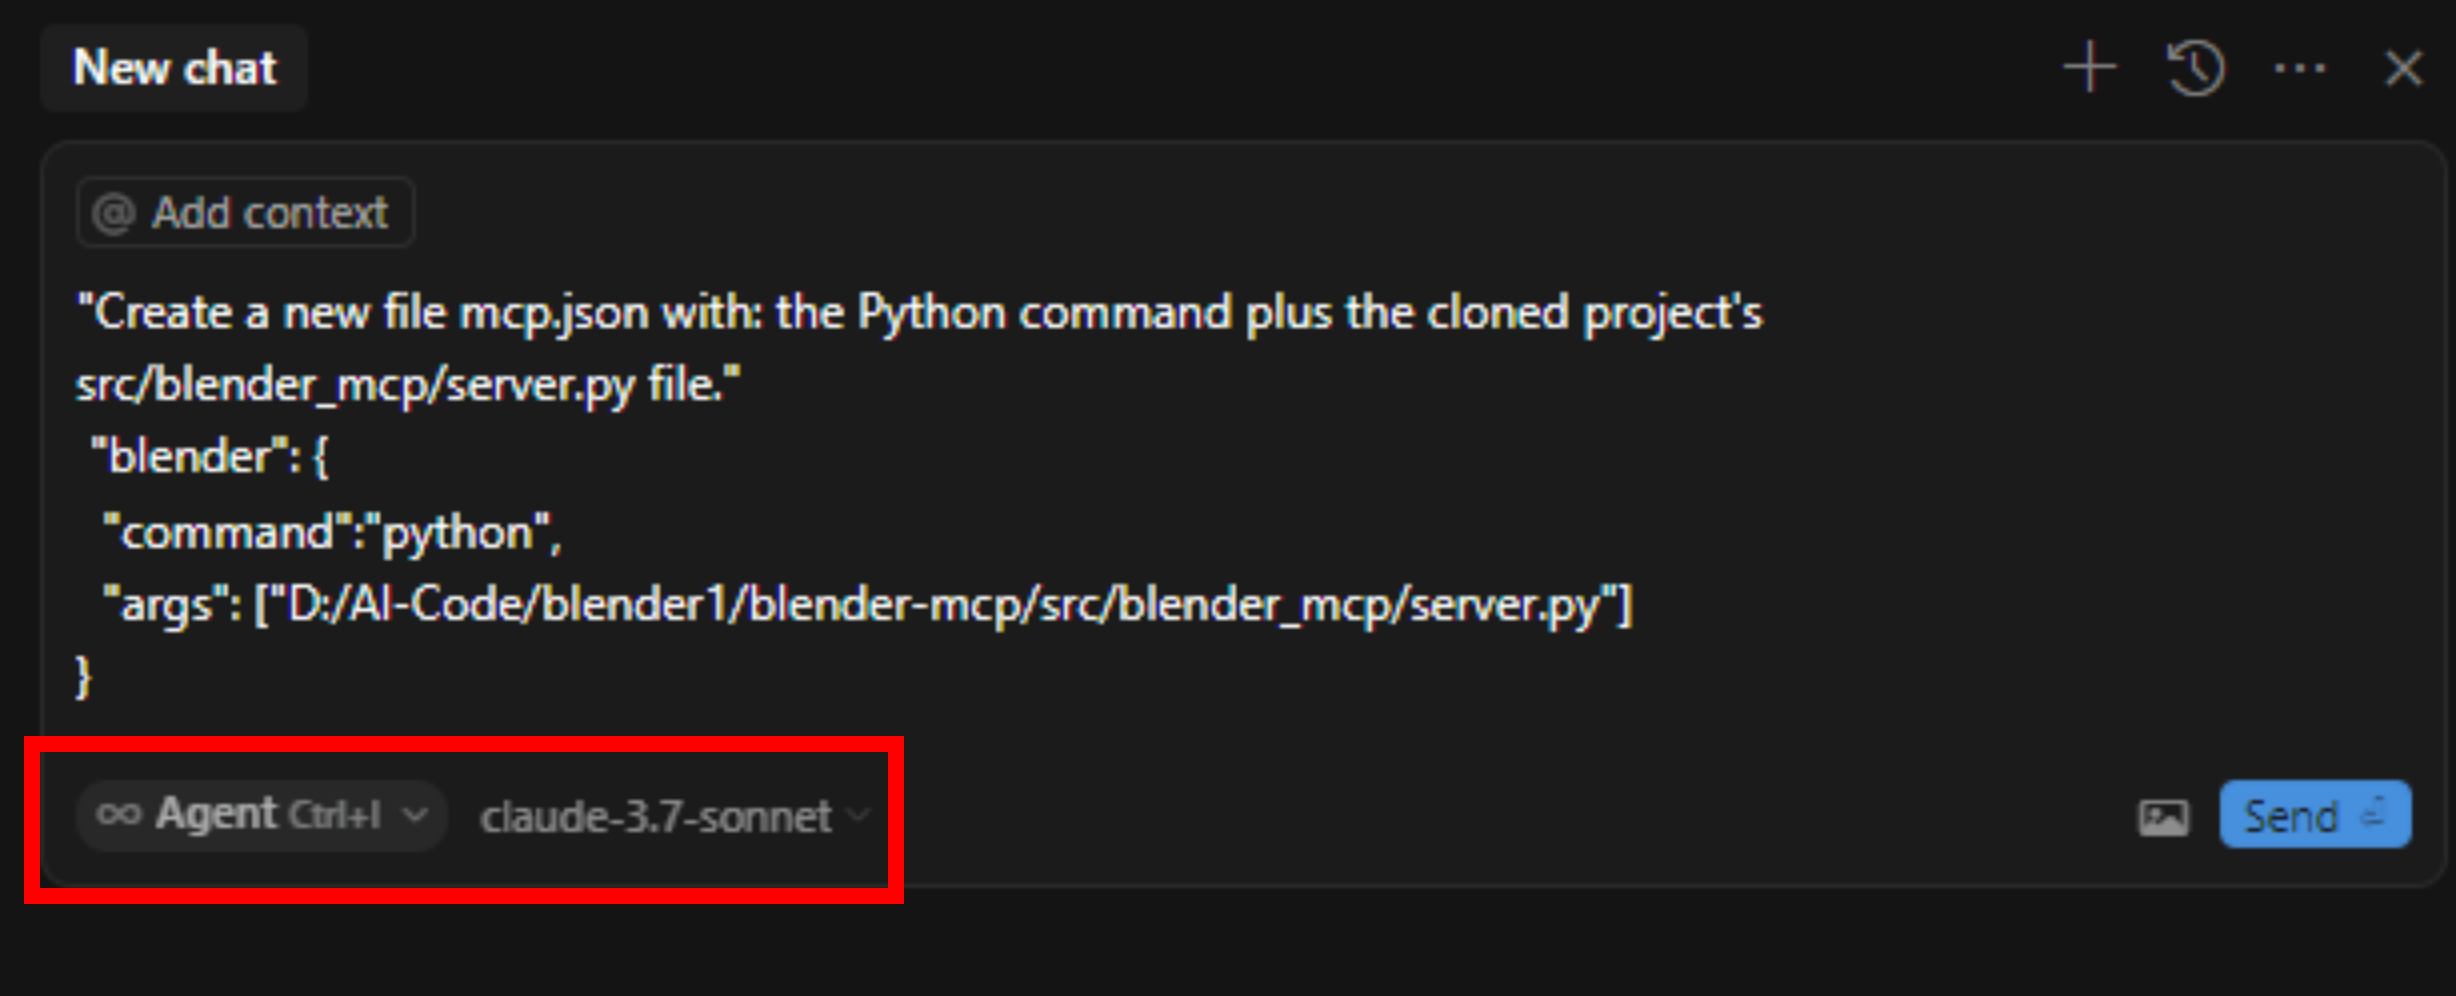
Start a New Conversation in Cursor
Enter the commands or instructions you want the AI to process.
Prompt Types
1. For Brief Requirements
When you have a short request but want a highly detailed solution, use a prompt along the lines of:
While my requirements are brief, you are intelligent enough to develop a thorough, professional design plan.
2. For Autonomous Problem Solving
If you want the AI to analyze limitations, optimize layout, and explore improvements without explicit guidance, use a prompt similar to:
Analyze project constraints, optimize visual hierarchy, propose improvements, and implement your own strategy to develop a world-class project.
By mixing these strategies, you can benefit from context-aware solutions that suit simple or complex requirements.
Conclusion
When you install the Tripo plugin, acquire an API key, configure Blender, set up the MCP server, connect to Cursor, and use strategic prompts, you can significantly boost your 3D design workflow. This integration reduces busywork, ensures smoother communication between tools, and frees up your creativity for higher-value tasks.
Take the next step in your 3D workflow by following the steps in this guide. If you need more help or want to explore additional features, refer to community forums for deeper insights.