3D Modeling for 3D Printing: Top Tips & Tools
3D modeling is now key for designers and hobbyists. This guide will help you master 3D modeling for 3D printing. You'll learn important tips, tools, and techniques to make your ideas real.
Starting or improving your skills in 3D modeling is crucial. It's the first step to great results in your projects.
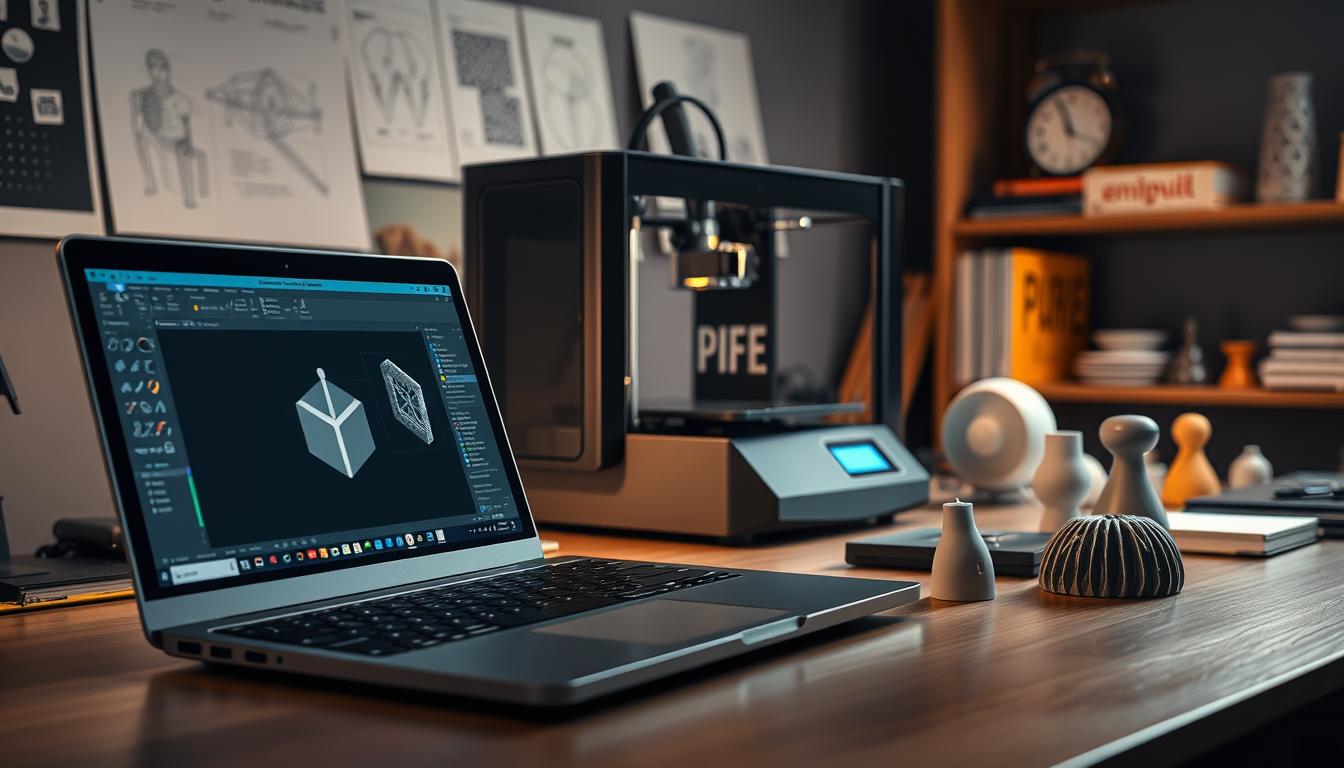
We'll cover everything from creating watertight models to optimizing for budget-friendly printers. With new tech, making detailed prints is easier than before. For example, the Form 1+ can match industrial models, making it a great tool for designers.
Get ready to learn essential tips and tools for better 3D modeling!
Key Takeaways
- Master the fundamentals of 3D modeling to improve your 3D printing results.
- Utilize specialized software like PreForm to ensure models are watertight.
- Understand different nozzle sizes and wall thicknesses for optimal prints.
- Hollow your models wisely to save material without compromising quality.
- Utilize effective post-processing techniques for cleaner, professional-looking prints.
- Be aware of common pitfalls to avoid during the modeling process.
Introduction to 3D Modeling for 3D Printing
The world of design and printing has changed a lot thanks to 3D modeling. What was once only for pros is now open to hobbyists and new creators. This guide shows how important good modeling is for making great prints.
Knowing the 3D printing basics is key for anyone starting out. It helps in making everything from buildings to fun projects. Good modeling makes sure the prints look as good as they can.
Today, 3D modeling has grown a lot, with more resources like online courses. For example, a well-liked course has 17,537 learners. It has four parts and takes 27 hours to finish, usually in three weeks.
When you start with 3D printing, you join a big community. Talking with others can help you learn more and work together. This is important for getting better at 3D modeling.
Understanding the Basics of 3D Printing
The basics of 3D printing are about turning digital designs into real objects. It uses different technologies. Knowing the 3D printing process is key for those who want to use it.
Fused Deposition Modeling (FDM) and Stereolithography (SLA) are important in 3D printing. FDM was patented in 1992 and uses melted plastic. SLA, from the 1980s, uses a laser to make solid shapes.
Print resolution, speed, and material choice are important in 3D printing technologies. High quality printing depends on layer thickness and speed. 3D printing can use up to 90% of materials, unlike traditional methods.
3D printing has become more accessible. Now, you can get a printer for under $1,000. In 2020, there were 652,000 3D printing devices. By 2030, this number will likely be over 2.7 million.
Click to Watch Video Tutorial.
Essential Tips for Successful 3D Modeling
Starting a 3D modeling project can be both exciting and tough. Using good 3D modeling tips is key to making high-quality prints. One important thing is to make manifold models. These models need to be solid and without any errors.
Tools like PreForm by Formlabs help a lot. They let users check models for any mistakes automatically.
Knowing about geometry in 3D printing is also very important. It helps avoid problems when printing a model. For example, making sure the model is thick enough is crucial. Thin parts might break during or after printing.
It's best to have walls that are 1-2mm thick for small parts and 3-4mm for bigger ones. Adding features like chamfers or fillets can also make the model stronger. This is because they help reduce stress points.
As you get better at 3D modeling, keep these tips in mind. Pay attention to details like tolerances, ventilation holes, and post-processing. This will help you get the best results in your projects.
Choosing the Right 3D Modeling Software
Choosing the right 3D modeling software is key for your 3D printing projects. There are many options, so think about your skill level, the software's features, and the cost. Many people find great software, from easy-to-use beginner tools to complex CAD programs.
Over 50% of 3D modeling software is free. This makes it easy for beginners and hobbyists to start. Tinkercad is great for newbies, with millions of files and an easy-to-use interface.
For more advanced needs, Fusion 360 is a good choice. It has a free version for personal use and startups. But, a commercial license costs $595 a year. Shapr3D also offers a free version for beginners and a pro version for $299 a year.
For professional-grade software, Inventor costs up to $1,995 a year. While it's more expensive, it offers powerful features.
Remember, solid modeling software ensures your models can be 3D printed perfectly. Polygon modeling might need extra steps for printing. Choose based on your project's needs.
Here's a comparison table of popular 3D modeling software:
| Software | Price | Skill Level | Notable Features |
|---|---|---|---|
| Tinkercad | Free | Beginner | User-friendly, extensive library |
| Fusion 360 | Free for personal use, $595/year | Intermediate | Solid modeling, cloud-based |
| Shapr3D | Free, $299/year for Pro | Beginner to Intermediate | Intuitive interface, professional tools |
| Inventor | $1,995/year | Advanced | Comprehensive CAD tools |
| Blender | Free | Intermediate to Advanced | Powerful polygonal modeling |
By comparing these options, you can find software that fits your goals and skills. This will make your 3D printing projects more enjoyable and successful.

Advanced Techniques in 3D Modeling
If you know the basics, diving into advanced 3D modeling can elevate your work. Boolean operations let you mix shapes in new ways. This is great for both soft and hard shapes.
Digital sculpting lets you work on detailed models with millions of points. It's perfect for detailed prints. Procedural modeling is great for things like leaves, needing lots of detail. Photogrammetry makes real things into models, which is popular now.
Getting your designs right means paying attention to small things. The right wall thickness is key for printing. Also, how you orient your models can save material and improve quality.
Using smart support tools makes creating supports easier. Keeping your models solid is crucial for good prints. Tools today help fix models to make them print better.
Using advanced 3D modeling can really improve your prints. You can try different ways like modular or subdivision modeling. Each way can make your prints better.
Designer Jeremy Ortiz says making solid models and knowing your build area is key. His tips can help you get better at 3D printing. For more, see his advice on 3D modeling for 3D.
Importance of Print Quality in 3D Modeling
Print quality is key to 3D modeling success. Many things can change how good the final product looks. For example, the material used affects how strong and shiny it is. The speed and detail settings also play a big role.
Knowing about print quality means looking at what makes a print good. The size of the nozzle affects how the material flows. A smaller nozzle means finer details, but it's slower. A bigger nozzle is faster but might not be as detailed.
| Factor | Impact on Print Quality |
|---|---|
| Nozzle Size | Affects detail level and filament flow rate |
| Wall Thickness | Determines strength and stability of the print |
| Layer Height | Affects surface finish; smaller heights yield higher quality |
| Infill Percentage | Influences material usage and mechanical properties |
| Print Orientation | Can enhance or weaken structural integrity |
Studies show that settings like layer height and infill percentage are very important. Using a layer height of 0.1 mm can make prints 30% better than 0.3 mm. Also, choosing the right print orientation can make prints stronger, with 80% of users seeing big improvements.
Understanding these factors helps designers make better models. Engineers who spend time on settings have fewer problems during printing. This shows how important good planning is for success.
Designing for Different 3D Printing Methods
Starting with 3D printing means knowing what each method needs. Fused Deposition Modeling (FDM) and Stereolithography (SLA) have their own rules. These rules affect how good your print will look.
FDM uses filament. This means you need to add supports for steep parts. Walls should be thick enough to be strong. Layer height is also key for a good print.
SLA is different. It uses resin for detailed prints. You need to manage supports well. After printing, you can smooth and cure the resin for a better look.
Trying out FDM and SLA will help you make better designs. Knowing how each method works lets you create prints that are both useful and beautiful.
3D Modeling for 3D Printing: Top Tools and Resources
Choosing the right tools for 3D modeling is key. It affects the quality and function of your designs for 3D printing. There are many tools for both beginners and pros, so everyone can find something useful.
Tinkercad is great for newbies. It's free and easy to use for basic models. Blender is also free and lets users learn advanced techniques. Both are good for beginners.
As skills grow, users might look for more advanced software. SketchUp offers subscriptions starting at $49.99 a month. But, it's not made for 3D printing and can cause problems.
For experts, Maya and NVIDIA Omniverse are top choices. Maya costs $245 a month but can have issues on Windows. NVIDIA Omniverse is $4,500 a year for each GPU, but it's great for teamwork.
In interior design, Coohom is a good choice at $25 a month. It's useful for making 3D models for printing. Adobe Dimension is also $49.99 a month, and Adobe has other tools like Substance 3D Sampler for textures.
Looking at the community around these tools shows their value. Strong support networks help users learn and grow. Whether for fun or work, finding the right tools is key.
Managing Support Structures in Your Models
In 3D printing, support structures are key for good designs. Models with overhangs need these supports to stay solid during printing. Knowing when to use supports is important.
For overhangs under 45 degrees, no extra support is needed. But, over 45 degrees, you must plan carefully.
When slicing your model, picking the right support type matters a lot. You can choose from None, Touch Platform Only, or ALL support. Adjusting the "Max Overhang Angle" helps decide when to add supports.
| Support Type | Description |
|---|---|
| None | No support structures are added to the model. |
| Touch Platform Only | Supports are only created where the model contacts the build platform, preventing unnecessary material use. |
| ALL | Complete support is provided for all suspended sections of the model to ensure stability. |
To keep prints looking good, manage support density and thickness. Use Detect Small Floated Features to catch small details.
For complex designs, supports are crucial. They help with stability and can save time and money. Try to reduce overhangs for better printing.
Removing supports can be hard. Heat treatment helps with some materials. Soluble supports, like PVA, make removal easy. Be careful not to damage your model.
Post-Processing Techniques for 3D Prints
Post-processing is key to getting high-quality 3D prints. Many techniques can make prints look better, work better, and be more durable. Knowing these methods helps creators make their designs shine.
Cleaning 3D prints first is important. It removes dirt that could mess up the finishing touches.
Resin prints need special care after printing. Use isopropyl alcohol or Formlabs Resin Washing Solution to clean them. Sometimes, parts need two cleanings. Then, post-curing is needed for safety. How long you cure the resin affects the print's strength.
Finishing techniques vary by printing method. For FDM prints, sanding can remove layer lines. Polishing and vapor smoothing can almost get rid of them. SLA prints often have support marks. Sanding or chemical treatments can fix this.
Improving strength is also important. Annealing can make parts up to 50% stronger. In SLS, dyeing and infiltration work well, with over 80% success. Proper finishing also makes parts more resilient and accurate.
In short, learning post-processing techniques is crucial. It not only makes prints look better but also stronger. Knowing the right methods for your printing technology is essential for any 3D printing fan.
Common Mistakes to Avoid in 3D Modeling
Many designers make 3D modeling mistakes that waste time and materials. A big problem is guessing wall thickness wrong. This is often why models can't be printed.
Too thin walls make parts weak. Too thick walls cause stress and can crack. It's best to keep wall thickness around 0.01 mm for good prints.
Another issue is the printer's build area. Models that are too big can't be printed. To fix this, use smart layouts to fit within the limits.
It's also important to not make STL files too big. Keep them under 100 MB to avoid printing problems.
Choosing the right material is key. Different materials, like ABS or Polyamide, need special care. About 30% of failed prints are due to wrong wall thickness. Always check material guides before starting.
Also, wrong mesh resolution hurts print quality. Low resolution causes rough edges. High resolution slows down printing. Make sure measurements are right to avoid scaling mistakes.
Scaling errors waste about 15% of materials and time. By knowing these common mistakes, designers can improve their 3D modeling. This helps avoid wall thickness errors and fit within build area limits.
Conclusion
We've looked at the key parts of making great models for 3D printing. It's important to know the basics and pick the right software. Also, learning advanced techniques is crucial.
Every step, from designing to printing, is vital. It helps make sure prints are good, saves resources, and lets you customize more.
New technologies and cloud-based tools are changing 3D printing. They help users explore new ideas. Working with tools like Tinkercad and Blender makes it easier for everyone.
Features like watching prints live and advanced cutting tools are very important. They help a lot, whether you're in industry or education.
To keep up with 3D printing, join the community and keep learning. The need for 3D printing is growing. This means a bright future for those with the right skills.
Remember, trying new things is important. Be creative, use the tools we talked about, and start your next project!
FAQ
What is the significance of 3D modeling in 3D printing?
3D modeling is like a blueprint for 3D printing. It makes sure designs work with different printing methods. These methods turn digital designs into real objects.
How do I ensure my 3D model is suitable for printing?
Make sure your model is solid and complete. Use tools like PreForm from Formlabs to check for any problems.
What factors affect the quality of my 3D prints?
Material, print speed, and resolution matter a lot. Nozzle size and wall thickness also play a big role. Knowing these helps get better prints.
What are the best software options for beginners in 3D modeling?
Tinkercad and SketchUp are great for beginners. They are easy to use and help you learn the basics.
How can I improve my prints using advanced techniques?
Try using boolean operations and parametric modeling. These methods help make detailed and complex designs.
What should I consider when designing for FDM vs SLA printing?
For FDM, think about support structures. For SLA, focus on support and base structures. This helps get detailed prints.
Are there specific resources that can help me enhance my 3D modeling skills?
Yes! Tinkercad, SolidWorks, and educational sites offer great learning chances. They help both new and experienced users.
What are effective post-processing techniques for my 3D prints?
Cleaning, smoothing, and painting can make your prints look better. Properly curing resin and removing supports also helps a lot.
What common mistakes should I avoid in 3D modeling?
Don't underestimate wall thickness and ignore build area limits. Make sure your designs are strong and fit your printer.