How to Create High-Quality AI Images with Flux & ComfyUI For Free
Have you ever felt frustrated when your AI-generated images turned out with distorted hands, blurry text, or awkward compositions? You're not alone. Despite rapid advancements, AI image generation still faces stubborn challenges, leaving creators and designers searching for better solutions.
Thankfully, Flux—a cutting-edge AI image generation model—paired with ComfyUI, a powerful yet intuitive user interface, is here to revolutionize your creative workflow. Flux excels precisely where other AI models falter: realistic human anatomy (especially hands), sharp text rendering, and complex visual compositions.
But the creative journey doesn't stop at images. Imagine effortlessly converting your AI-generated visuals into detailed, interactive 3D models—without any prior 3D modeling experience. This is exactly what Tripo offers, enabling you to transform your Flux-generated images or simple text prompts into detailed, interactive 3D models, ready for 3D printing and even shipped directly to your doorstep.
In this comprehensive guide, you'll learn step-by-step how to integrate Flux with ComfyUI on Windows, macOS (including Apple Silicon M1/M2/M3 Macs), and Linux. By the end, you'll have a fully functional local setup capable of generating stunning AI images—and the knowledge to effortlessly elevate your creations into immersive 3D experiences using Tripo.
🎁 Want to Turn Your AI Images into Real-Life 3D Gifts with Tripo?
Imagine creating a beautiful AI-generated image and instantly transforming it into a stunning, tangible 3D model perfect as a personalized gift or keepsake. With Tripo, it's easier than ever:
- ✨ Generate your dream image using Flux & ComfyUI.
- 🖼️ Convert your image into a detailed, lifelike 3D model effortlessly.
- 📦 Order a physical 3D print and have your unique creation shipped directly to your doorstep!
No complicated software, no technical headaches just your creativity brought to life.
👉Tripo Create Your First 3D Gift Today at Tripo AI!
Ready to unlock your full creative potential? Let's dive in!
Understanding Flux and ComfyUI: A Quick Overview
Before we jump into the installation process, let's briefly clarify what Flux and ComfyUI are and why they're worth your attention.
What is Flux?
Flux is an advanced AI image generation model developed by Black Forest Labs. It leverages state-of-the-art diffusion techniques to produce incredibly detailed, realistic images. Flux is particularly notable for:
- Accurate Human Features: Flux excels at rendering realistic human anatomy, especially hands, which have historically posed significant challenges for AI image generators.
- Exceptional Text Rendering: Unlike many AI models, Flux can accurately render readable text within generated images.
- Complex Compositions: Flux handles intricate visual compositions effortlessly, making it ideal for professional design and creative projects.
What is ComfyUI?
ComfyUI is an open-source, node-based graphical user interface designed specifically for AI image generation workflows. Its intuitive drag-and-drop interface allows users to visually build and manage complex image generation pipelines without writing extensive code. Key benefits include:
- Ease of Use: Visual node-based workflow simplifies complex tasks.
- Flexibility: Easily customizable workflows tailored to your creative needs.
- Community Support: Active community providing custom nodes, workflows, and continuous updates.
System Requirements: Ensuring Your Setup is Ready
Before installation, confirm your system meets these minimum requirements:
- Operating Systems: Windows, macOS (including Apple Silicon M1/M2/M3), or Linux
- Memory: At least 24-64GB unified memory (CPU + GPU combined)
- GPU: Dedicated GPU recommended (24GB combined memory ideal for optimal performance)
- Software: Python 3.10/3.11, Git, and relevant package managers
Step-by-Step Installation Guide: Flux & ComfyUI Integration
Let's now proceed step-by-step through the installation and integration process for each operating system.
Step 1: Installing Prerequisites
For macOS Users (Including M1, M2, M3 Macs):
Open your terminal and execute these commands sequentially:
- First, create a separate folder
mkdir ~/AI
cd ~/AI
- Now install Homebrew
Install Homebrew (macOS package manager)
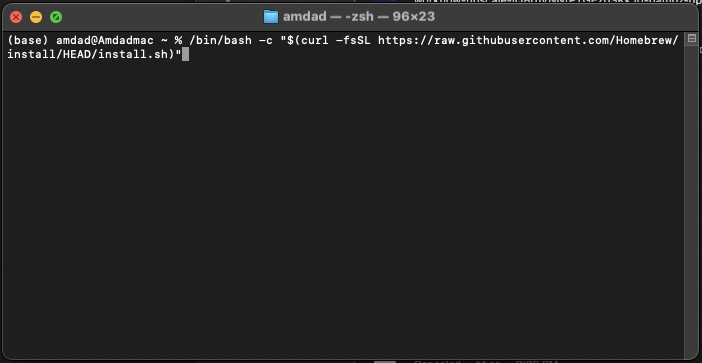
/bin/bash -c "$(curl -fsSL https://raw.githubusercontent.com/Homebrew/install/HEAD/install.sh)"
Add Homebrew to your PATH
echo 'eval "$(/opt/homebrew/bin/brew shellenv)"' >> ~/.zprofile
eval "$(/opt/homebrew/bin/brew shellenv)"
- Install Python if you don't have it already.
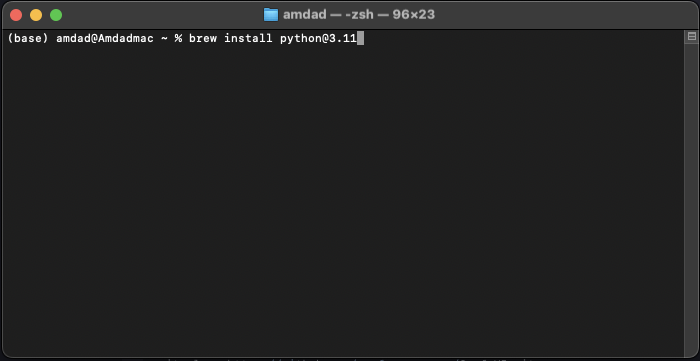
Install Python 3.11
brew install python@3.11
Upgrade setuptools and pip
python3 -m pip install --upgrade setuptools pip
- Install PyTorch on your system.
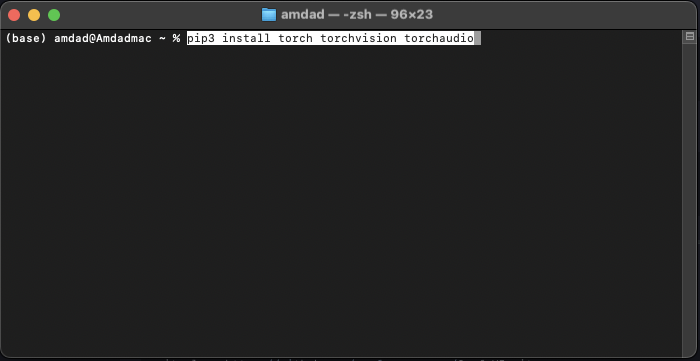
Install PyTorch with Metal support (optimized for Apple Silicon)
pip3 install torch torchvision torchaudio
For Windows Users:
- Install Git: Download and install Git from git-scm.com. During installation, ensure "Add Git to PATH" is selected.
- Install Python: Download Python 3.11 from python.org. During installation, select "Add Python to PATH."
For Linux Users:
Open your terminal and run:
sudo apt update
sudo apt install python3 python3-pip git wget
If you're using an AMD GPU (Linux only), install PyTorch optimized for ROCm:
pip install torch torchvision torchaudio --index-url https://download.pytorch.org/whl/rocm5.6
Step 2: Installing ComfyUI
Now, let's install ComfyUI across all platforms. Now to install comfyUI on Mac, open your Terminal app, change your directory to the comfyUI directory where you want to install it and then paste this command.
git clone https://github.com/comfyanonymous/ComfyUI.git
Once you clone your repository, after that, we need to install the dependency. so on your terminal, paste this command.
pip3 install -r requirements.txt
After that, it's time to launch comfyUI. To launch ComfyUI, open your Terminal app and paste this command.
python3 main.py
(macOS users might need to specify the Python version explicitly: python3.11 main.py)
ComfyUI will launch locally at http://127.0.0.1. Open this URL in your browser to verify successful installation.
Step 3: Installing ComfyUI Manager (Highly Recommended)
ComfyUI Manager simplifies installing Flux models and managing custom nodes.
Navigate to your ComfyUI directory and execute:
Windows:
cd ComfyUI\custom_nodes
git clone https://github.com/ltdrdata/ComfyUI-Manager
macOS/Linux:
cd ComfyUI/custom_nodes
git clone https://github.com/ltdrdata/ComfyUI-Manager
Restart ComfyUI completely. You'll now see a "Manager" button in the top menu bar of the ComfyUI interface.
Step 4: Downloading and Installing Flux Models
You have three straightforward methods to obtain Flux models:
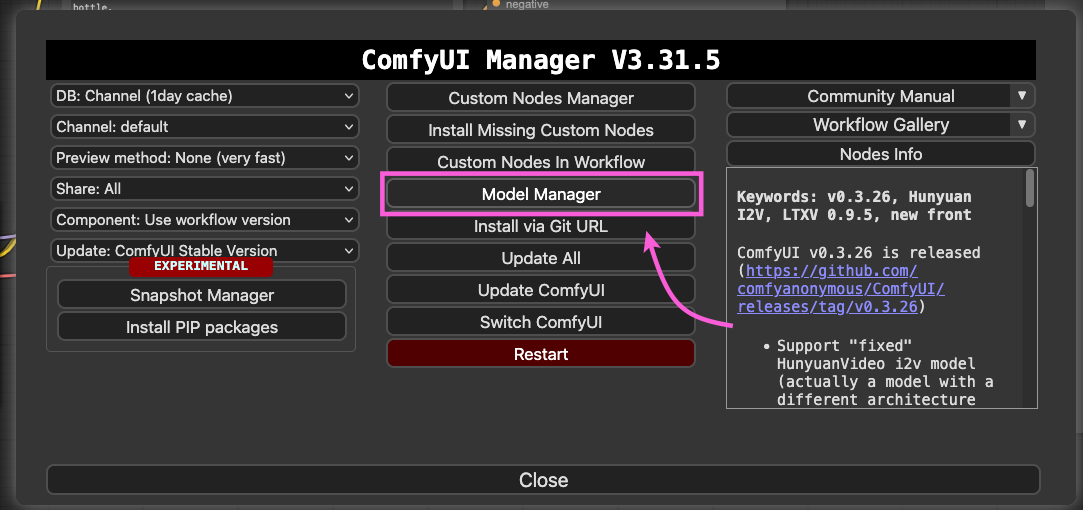
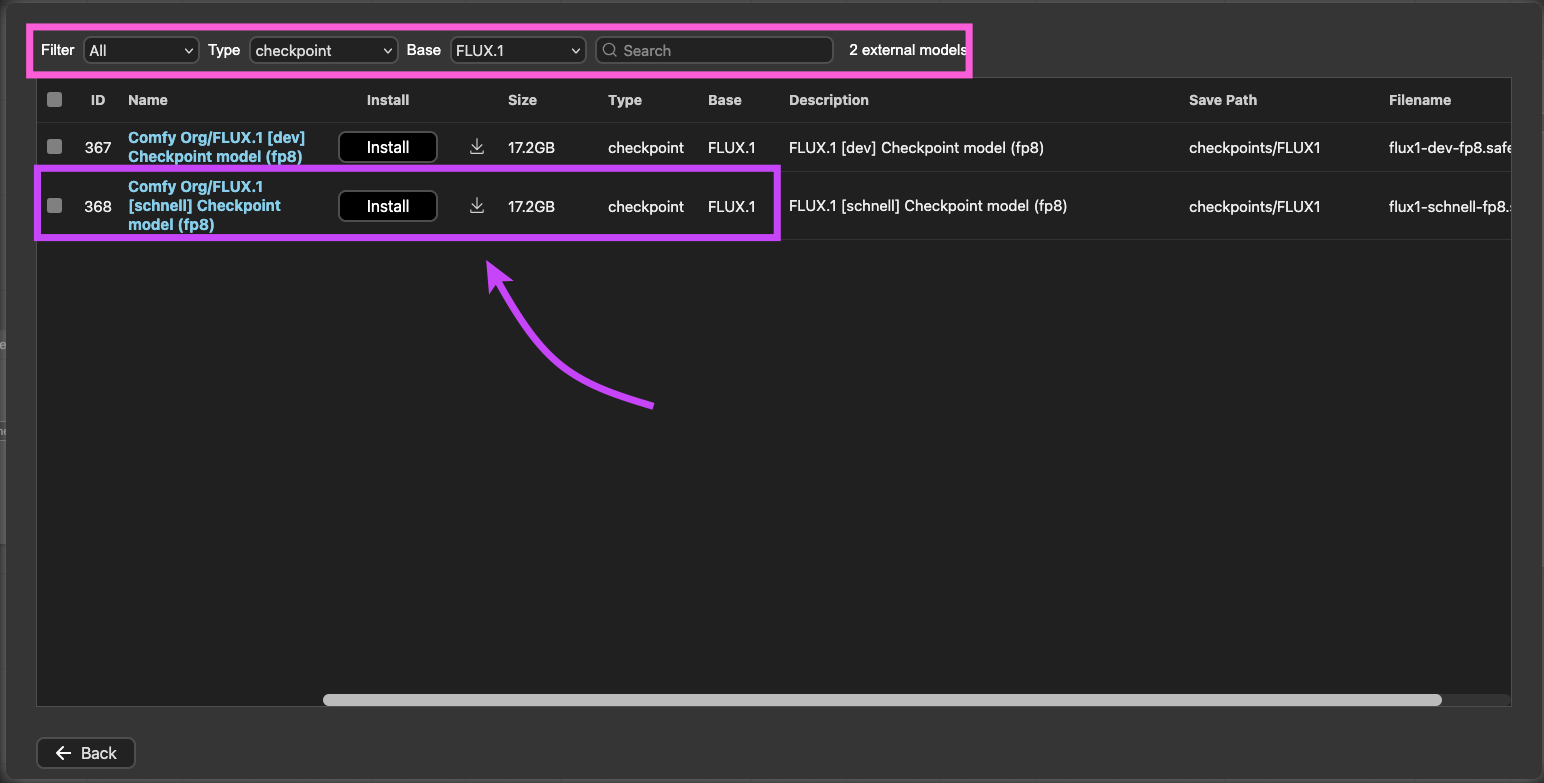
Method 1 (Recommended): Using ComfyUI Manager
Click "Manager" → "Model Manager" in ComfyUI.
Search "flux" and click "install" next to your chosen Flux model variant.
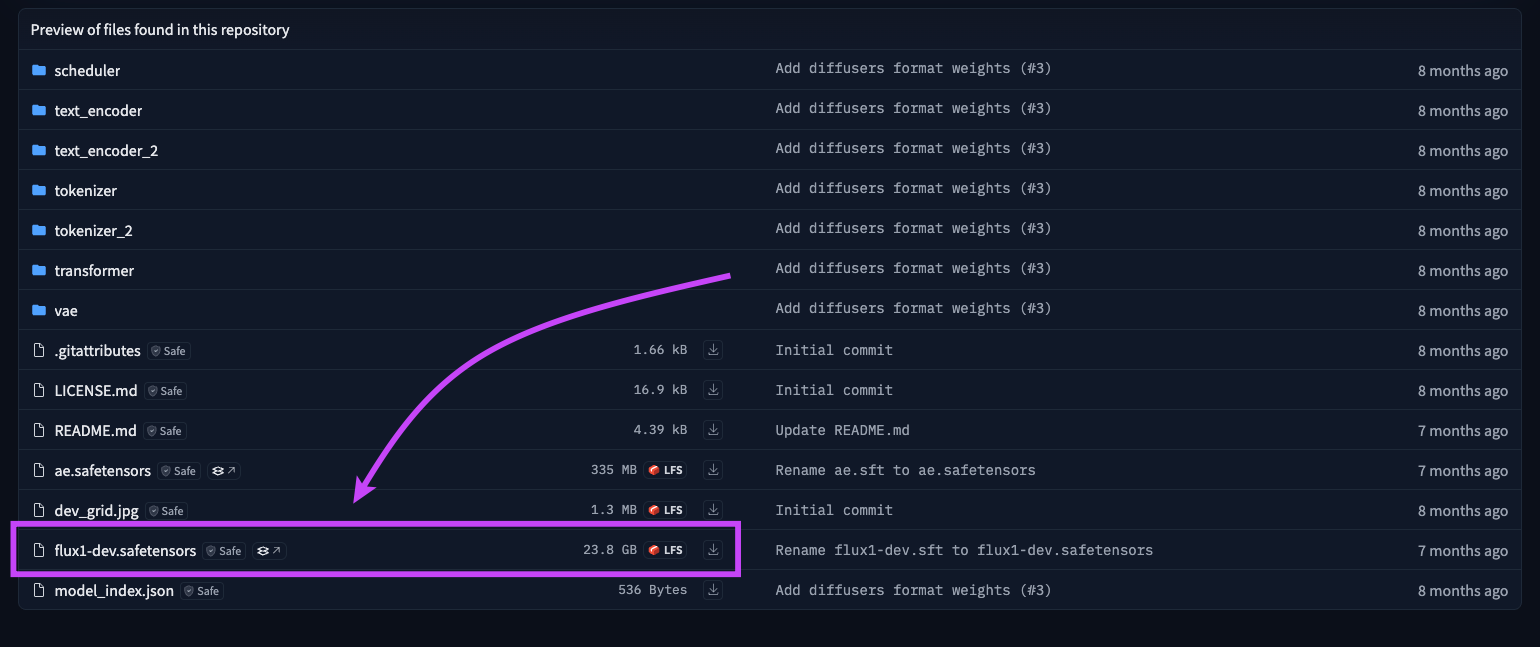
Method 2: Downloading from Hugging Face
- Visit Flux on Hugging Face.
- Download .safetensors files.
- Place files correctly (explained below).
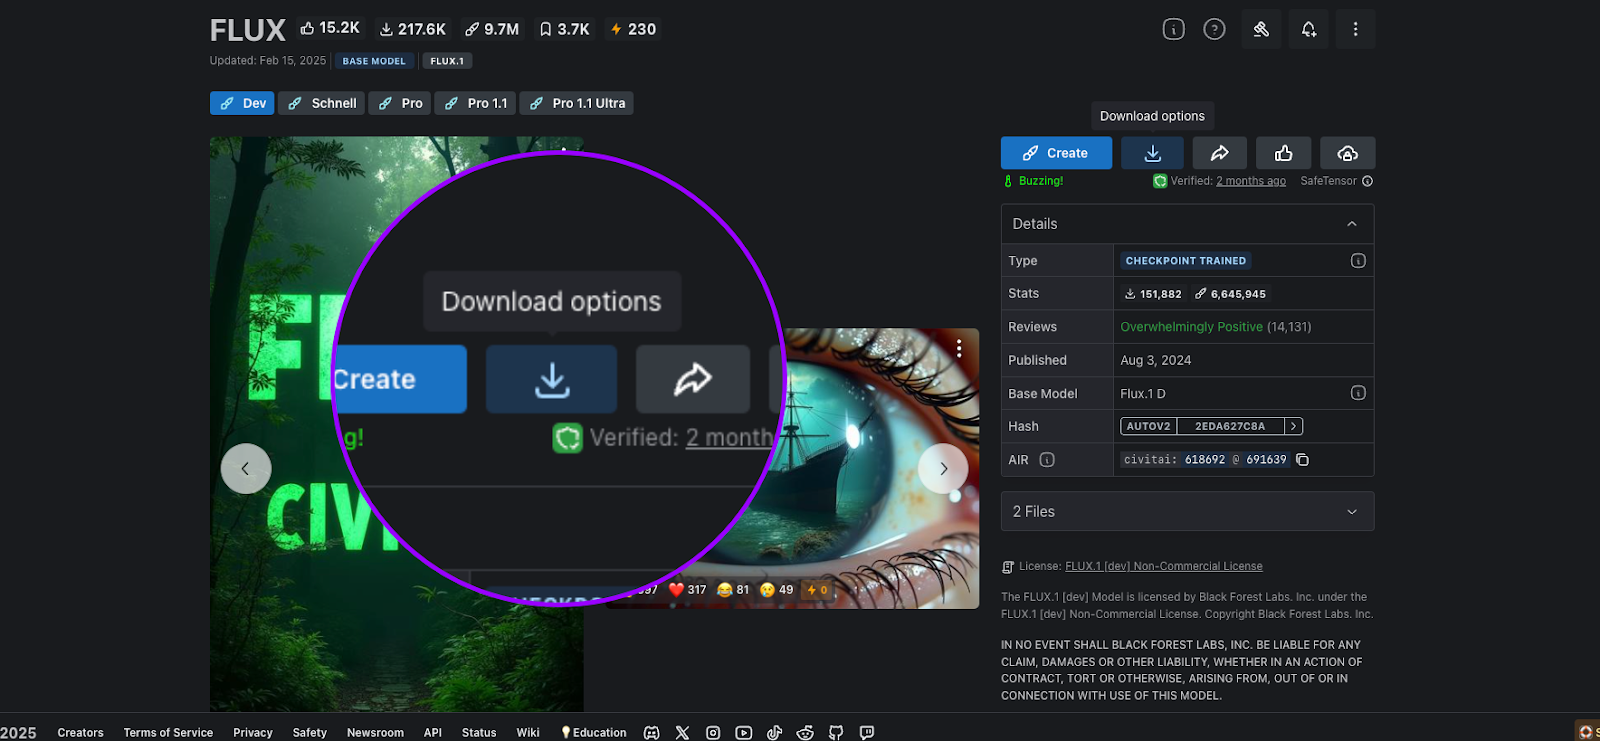
Method 3: Downloading from Civitai
- Visit Civitai and download Flux models.
- Place files as described below.
Step 5: Proper Flux Model Placement (Critical!)
Flux models require specific directories:
- Core Flux models (.safetensors): ComfyUI/models/unet/
- T5XXL or CLIP_L files: ComfyUI/models/clip/
- VAE files: ComfyUI/models/vae/
- All-in-one Flux checkpoints (16GB): ComfyUI/models/checkpoints/
- Incorrect placement will result in loading errors. Ensure files are correctly placed.
Creating Your First Flux Workflow in ComfyUI
Now, let's create your first Flux-powered image:
Open ComfyUI
Click on Workflow Browse Templated. You will find a lot of pre-defined work to use. Also you can add your downloaded workflow.
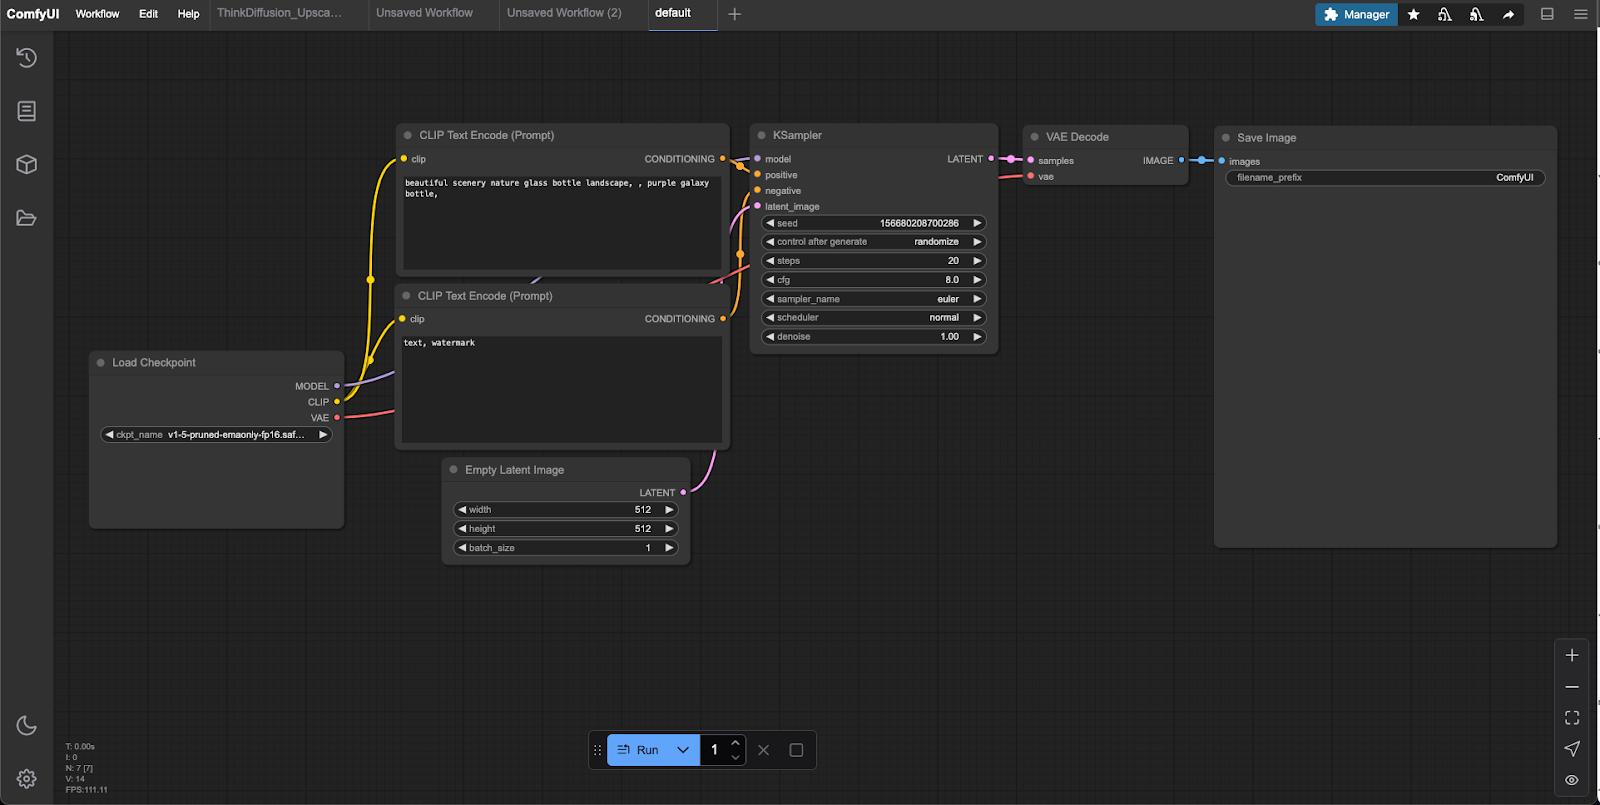
Basic workflow nodes include:
- Load Checkpoint: Select your Flux model.
- CLIP Text Encode: Enter your image prompt.
- KSampler: Adjust generation parameters (steps, CFG scale, sampler type).
- VAE Decode: Converts latent images to visible images.
- Preview Image: Displays generated results.
Enter your prompt, tweak parameters, and click "Generate."
Congratulations! You're now generating stunning AI images locally.
Let's Create Stunning Images with Flux & ComfyUI: Real Examples
Now, let's walk through creating actual images using Flux and ComfyUI.
Example Workflow: Portrait Photography
Prompt:
"A natural photo of a young woman standing in front of a wooden door in a tropical garden, wearing a sleeveless orange top with a v-neckline and olive green high-waisted pants. She stands casually with one hand on her hip and the other resting on her thigh. Background filled with lush greenery."
Workflow Nodes Used:
- Load Checkpoint: Flux model selected.
- CLIP Text Encode: Enter the prompt above.
- Empty Latent Image: Set dimensions (e.g., width: 832, height: 1216).
- KSampler: Adjust sampler (Euler, DDIM), steps (30–50), CFG scale (7–9).
- VAE Decode: Converts latent image to visible image.
- Preview Image: Displays final result.
- After configuring, click "Generate".
Results:
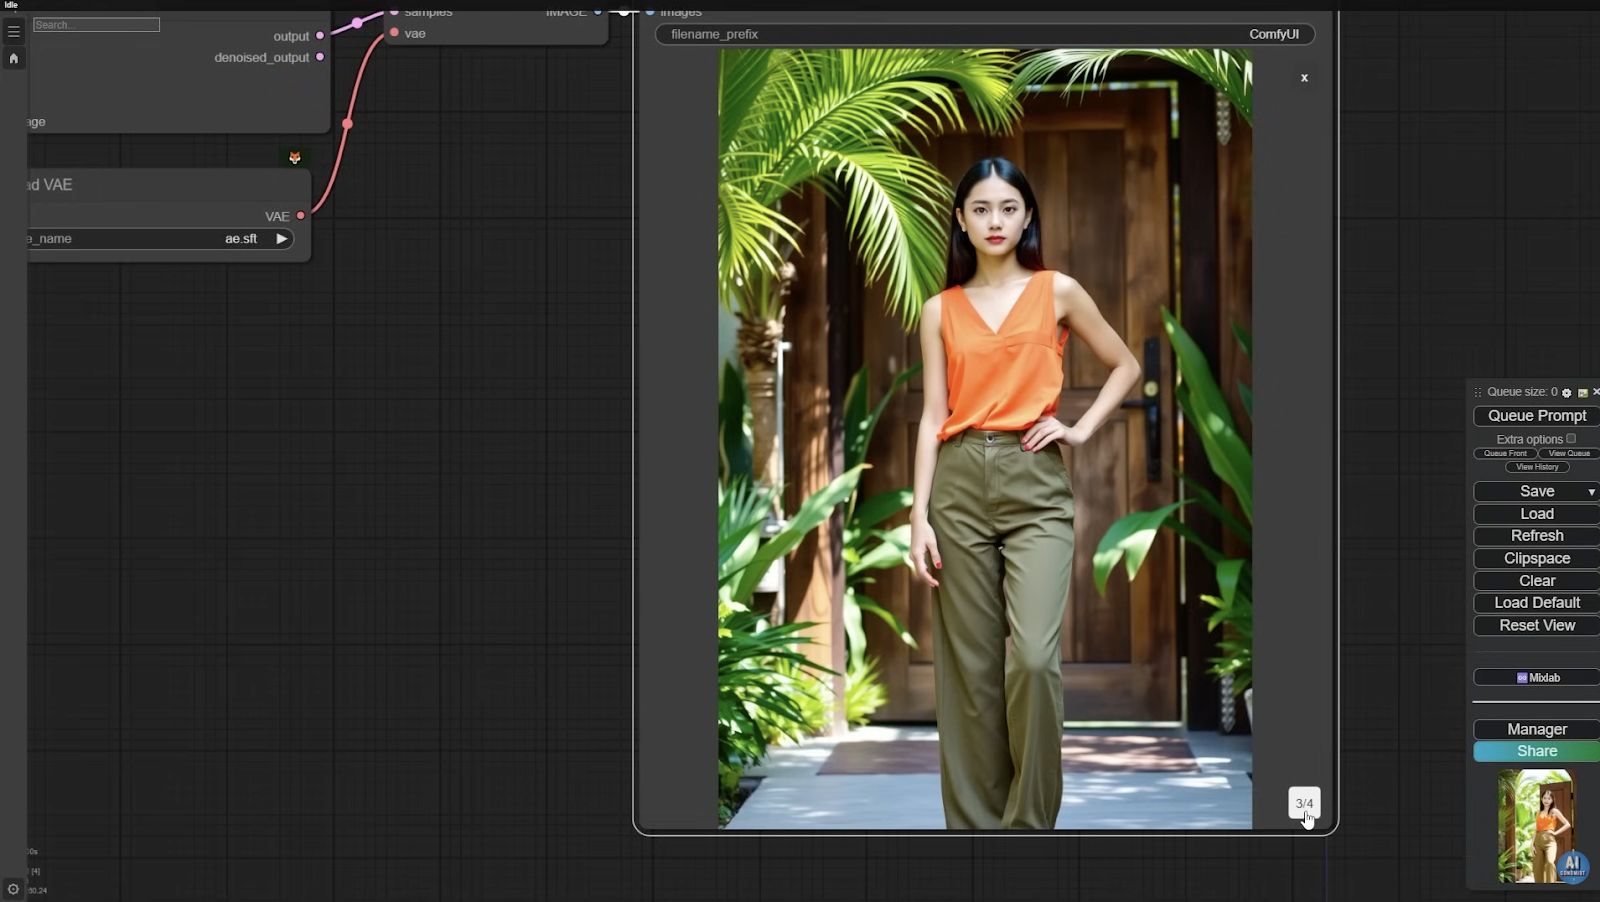
Using this workflow, we successfully generated the following images:
Image 1: A clear, vibrant portrait with accurate human anatomy and natural lighting.

Example 2: Two smiling women wearing hats, showcasing Flux's capability to render realistic expressions and clothing textures.

Example 3: A vibrant, stylized portrait showcasing Flux's versatility with bold colors, fluid brushstrokes, and mixed artistic styles. The background features the word 'FLUX' in dynamic, artistic typography, blending seamlessly with abstract patterns and glowing effects.
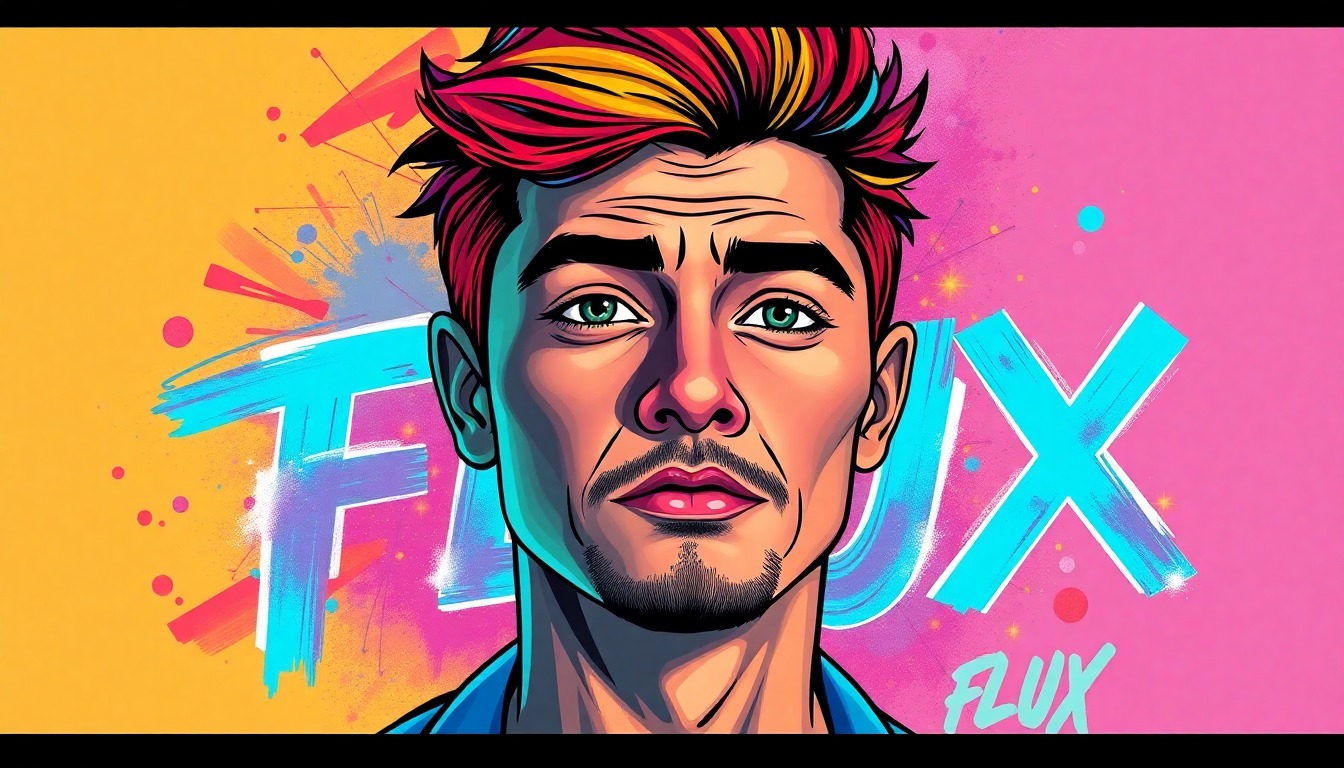
These images clearly demonstrate Flux's strengths—realistic human features, accurate anatomy, clear text, and complex visual scenes—all generated locally and entirely free.
Taking Your Flux & ComfyUI Creations Further: Transform Images into Real-Life 3D Models with Tripo
You've now mastered creating stunning, high-quality AI-generated images locally using Flux and ComfyUI. But what if you could take your creativity one step further—turning your digital masterpieces into tangible, real-world objects?
That's exactly where Tripo comes in. Tripo is an innovative AI-powered platform that effortlessly converts your AI-generated images into detailed, realistic 3D models. Whether you're looking to create personalized gifts, memorable keepsakes, or unique decorative items, Tripo makes the process simple and accessible—even if you've never touched traditional 3D modeling software like Blender or Maya.
Here's how easy it is to elevate your Flux & ComfyUI creations with Tripo:
Step 1: Generate Your Image
- Use Flux and ComfyUI to create your ideal image—be it a portrait, a unique design, or a special gift idea.
Step 2: Upload to Tripo
- Simply upload your generated image to Tripo.ai. Their advanced AI technology will instantly transform your 2D image into a detailed, lifelike 3D model.
Step 3: Bring Your Creation to Life
- Once your 3D model is ready, you can view, customize, and even order a physical 3D print directly from Tripo. They'll handle the printing and shipping, delivering your unique creation straight to your doorstep or to someone special.
Real-Life Example: Turning Our Groot Image into a Stunning 3D Model
To illustrate just how powerful and intuitive Tripo is, we decided to put it to the test ourselves. After creating a vibrant and detailed AI-generated image of Groot using Flux and ComfyUI, we uploaded our image directly to Tripo.ai.
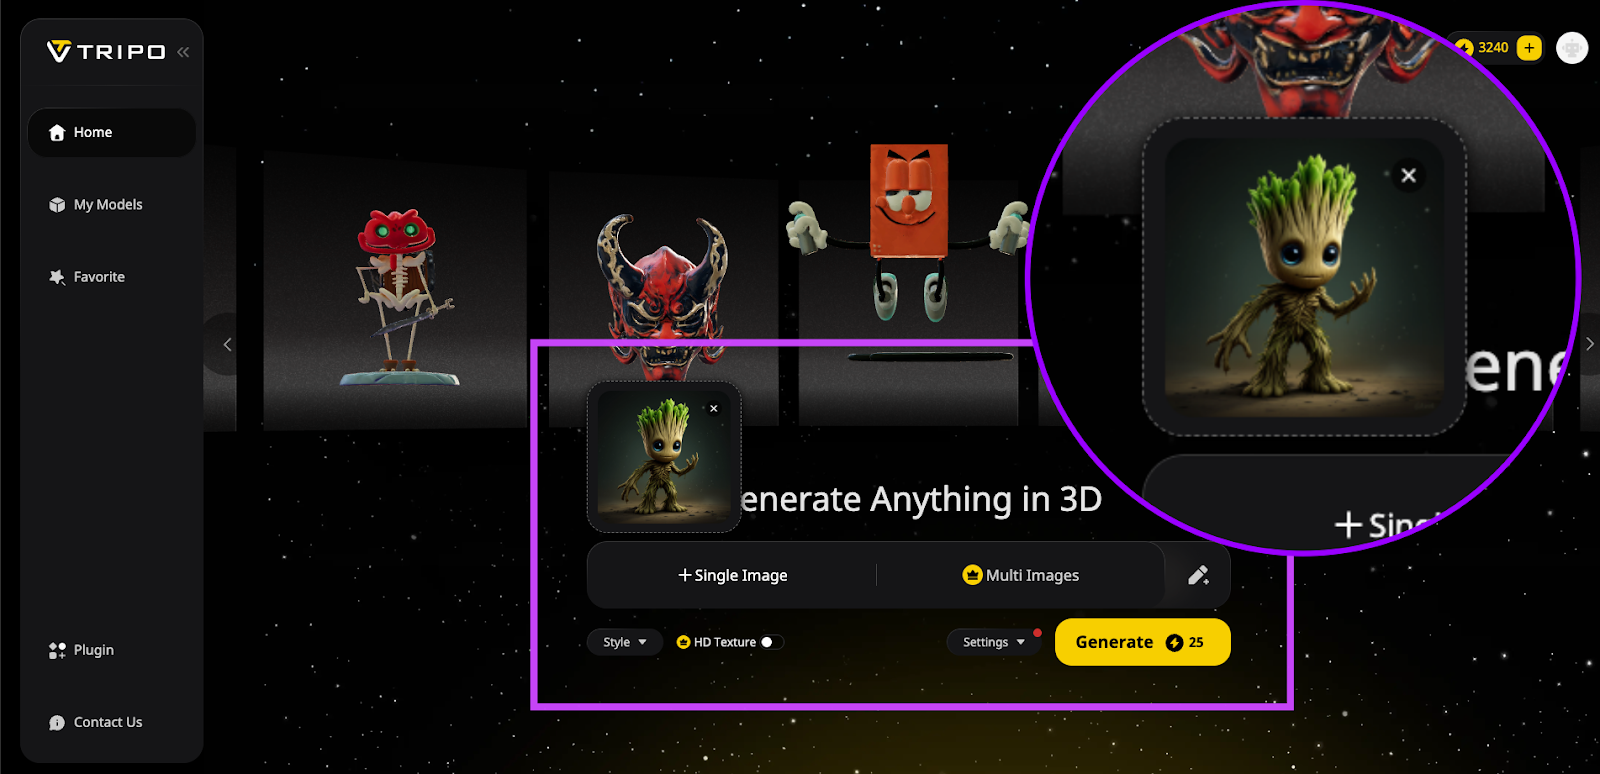
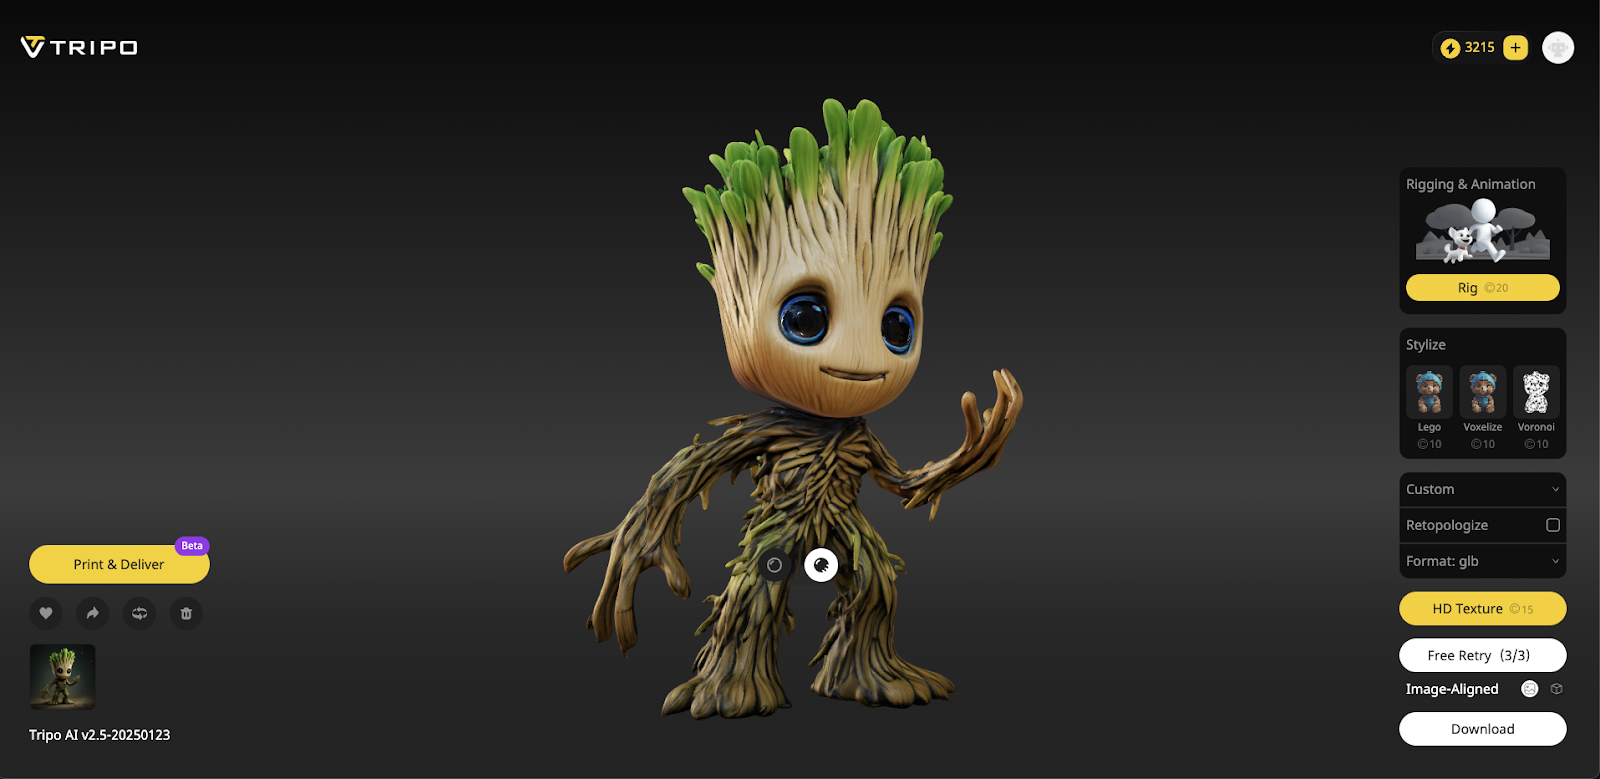
Within moments, Tripo's advanced AI technology transformed our Groot image into an incredibly detailed, lifelike 3D model. The textures, colors, and intricate details were captured beautifully, showcasing the impressive capabilities of the platform.
Even better, Tripo provided us with the option to customize, animate, and stylize our Groot model further. We could easily choose to print and ship our creation directly to our doorstep, turning our digital artwork into a tangible, memorable keepsake.
Animate and Stylize Your 3D Models with Ease
One of the standout features of Tripo is its intuitive animation and styling options. With just a few clicks, you can breathe life into your 3D models, animating them in various engaging ways, including:
Standing, Walking, Running, Idle poses, Climbing
Somersaults and many more exciting actions!
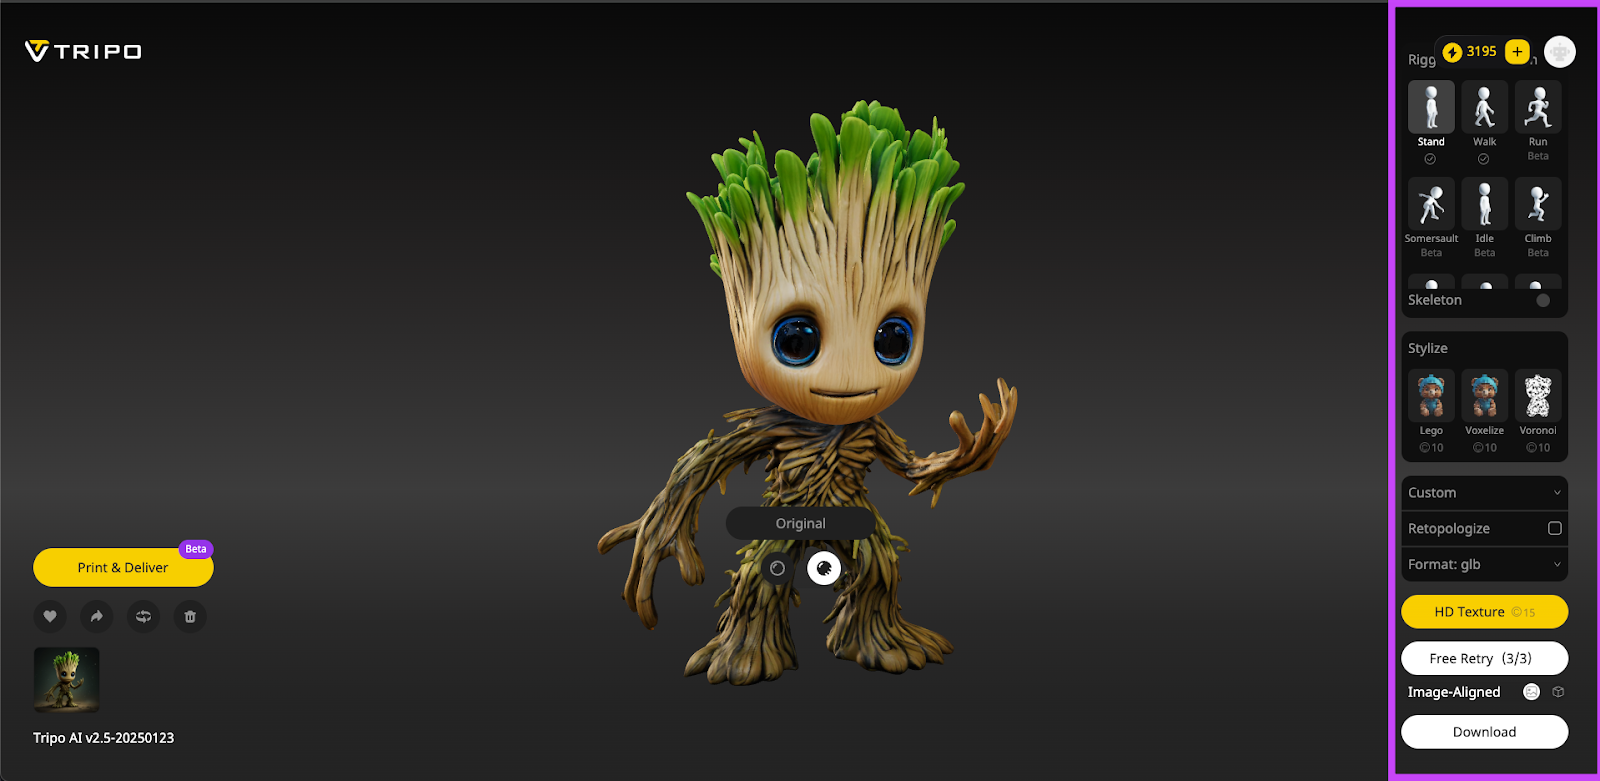
Additionally, Tripo offers unique styling options to further personalize your creations:
- Lego Style: Give your models a playful, blocky Lego-like appearance.
- Voxelize: Transform your models into charming, pixelated voxel-art.
- Voronoi: Create intricate, artistic patterns for a distinctive visual effect.
Whether you're aiming for realism, playful creativity, or artistic flair, Tripo provides the tools to perfectly match your vision.
With Flux, ComfyUI, and Tripo combined, your creative possibilities are truly limitless—taking you seamlessly from imaginative ideas to animated, stylized, and even physically printed 3D masterpieces.
🎁 Ready to Turn Your AI Images into Animated, Real-Life 3D Creations?
👉 Visit Tripo and Bring Your Ideas to Life Today!
Troubleshooting Common Issues
-
Installation Failures
- Manager installation errors: Failed ComfyUI Manager installations due to missing Git, incorrect directory permissions, or incomplete dependencies
- Port conflicts: Default port 8188 is already in use (especially common after previous installations)
- Python path issues: Wrong Python version (requires 3.10/3.11) or PATH environment variable misconfiguration17
-
Dependency Problems
- PyTorch installation failures: Network timeouts during large dependency downloads (common with 2GB+ PyTorch packages)
- CUDA errors: Mismatched CUDA versions or insufficient VRAM (especially with 8GB GPUs
- Missing system tools: GIT not installed/configured properly
-
Model Management Issues
- Incorrect model placement: Flux models placed in checkpoints instead of unet directory
- Missing supporting files: T5XXL/CLIP_L models not in clip folder, VAEs not in vae directory
- Model corruption: Partial downloads from Civitai/Hugging Face causing load failures
-
Update Challenges
- Update failures: Custom nodes blocking ComfyUI core updates
- Version conflicts: Manager showing "outdated" warnings despite recent updates
- Auto-update interruptions: Update dialog pausing active render queues
-
Workflow Errors
- Missing custom nodes: Red node highlights in workflows requiring uninstalled extensions
- LoRA compatibility issues: Model-specific requirements not met
- Resolution mismatches: CUDA out-of-memory errors from oversized images
-
File System Problems
- Permission errors: Windows file blocking ("Unblock" checkbox needed in properties)
- Hidden config files: extra_models_config.yaml/config.json conflicts in %APPDATA%
- Path length limits: Windows 260-character path limit causing installation failures
-
Network-Related Issues
- Firewall blocks: Preventing Git clone operations and model downloads
- Slow connections: Timeouts during dependency installation (common with PyTorch)
- CDN failures: "Failed to fetch" errors in Manager interface
-
Git-Specific Errors
- Authentication failures: When cloning private repositories
- SSL certificate issues: Particularly on older Windows installations
- Shallow clones: Partial repository copies from interrupted operations
-
Extension Conflicts
-
Node incompatibilities: Custom nodes breaking after ComfyUI updates
-
Multiple manager instances: Conflicts from manual and Manager-installed nodes
-
Deprecated nodes: Extensions not updated for latest ComfyUI version.
-
Pro Tip: Always check ComfyUI's terminal output first - 90% of issues show error messages here before appearing in the UI. For persistent problems, many users report success with complete reinstallations using the portable version.