Importing AI Generated 3D Models into Blender with Tripo3D

AI-generated 3D models are revolutionizing the design industry, enabling anyone to effortlessly create breathtaking visuals. Blender, a leading choice for 3D modeling, offers features that rival those of commercial software. With a community of over 1.2 million artists and developers, Blender is a hub of creativity and innovation. In this realm, Tripo, an advanced AI 3D model tool, stands out by generating textured 3D mesh models swiftly, thereby cutting down on costs and storage requirements. Understanding how to import a model into Blender is crucial for maximizing these tools. Immerse yourself in the world of AI 3D models with Tripo and Blender, and let your creativity soar.
Setting Up Your Environment
Installing Blender
System Requirements
Before diving into the world of 3D modeling, make sure your computer can handle Blender. Check if your system meets the minimum requirements. You need at least 8 GB of RAM to perform basic tasks. A 4-core CPU with SSE4.2 support is essential. A graphics card with at least 2GB RAM is necessary, but 8GB is better for smoother performance. Ensure you have a three-button mouse for easier navigation.
Downloading and Installing Blender
Ready to get started? Head over to the official Blender website. Look for the download section. Choose the version that matches your operating system. Click the download button. Once the file is downloaded, open it to start the installation process. Follow the on-screen instructions. In just a few minutes, you'll have Blender installed and ready to use.
Setting Up Tripo3D
Creating an Account
To harness the power of Tripo3D, you first need an account. Visit the Tripo3D website. Find the sign-up button. Click it to start the registration process. Fill in your details like name and email. Create a strong password. Confirm your email address by clicking the link sent to your inbox. Now, you're all set to explore AI-generated models.
Navigating the Interface
Once logged in, take a moment to familiarize yourself with the Tripo3D interface. Notice the dashboard where all tools are accessible. Look for the model generation section. Explore different options available for creating models. Spend some time clicking through menus and settings. Understanding the layout will make your experience smoother and more enjoyable.
Generating AI 3D Models with Tripo3D

Creating an AI 3D model with Tripo3D opens up a world of possibilities. The platform offers a seamless experience for generating and customizing models. Let's dive into the process.
Understanding AI Model Generation
Selecting Model Parameters
To start, head to the model generation section in Tripo3D. Here, you'll find options to set parameters for your AI 3D model. Choose from various styles and shapes. Adjust the complexity and details to fit your vision. Each parameter you tweak will influence the final outcome. Experiment with different settings to see what works best for your project.
Previewing Generated Models
Once you've selected the parameters, it's time to preview your creation. Tripo3D provides a real-time preview feature. This allows you to see the AI 3D model as it takes shape. Check the model from different angles. Ensure that the design aligns with your expectations. If adjustments are needed, go back and modify the parameters. The preview helps you perfect your model before moving forward.
Exporting Models from Tripo3D
Choosing Export Formats
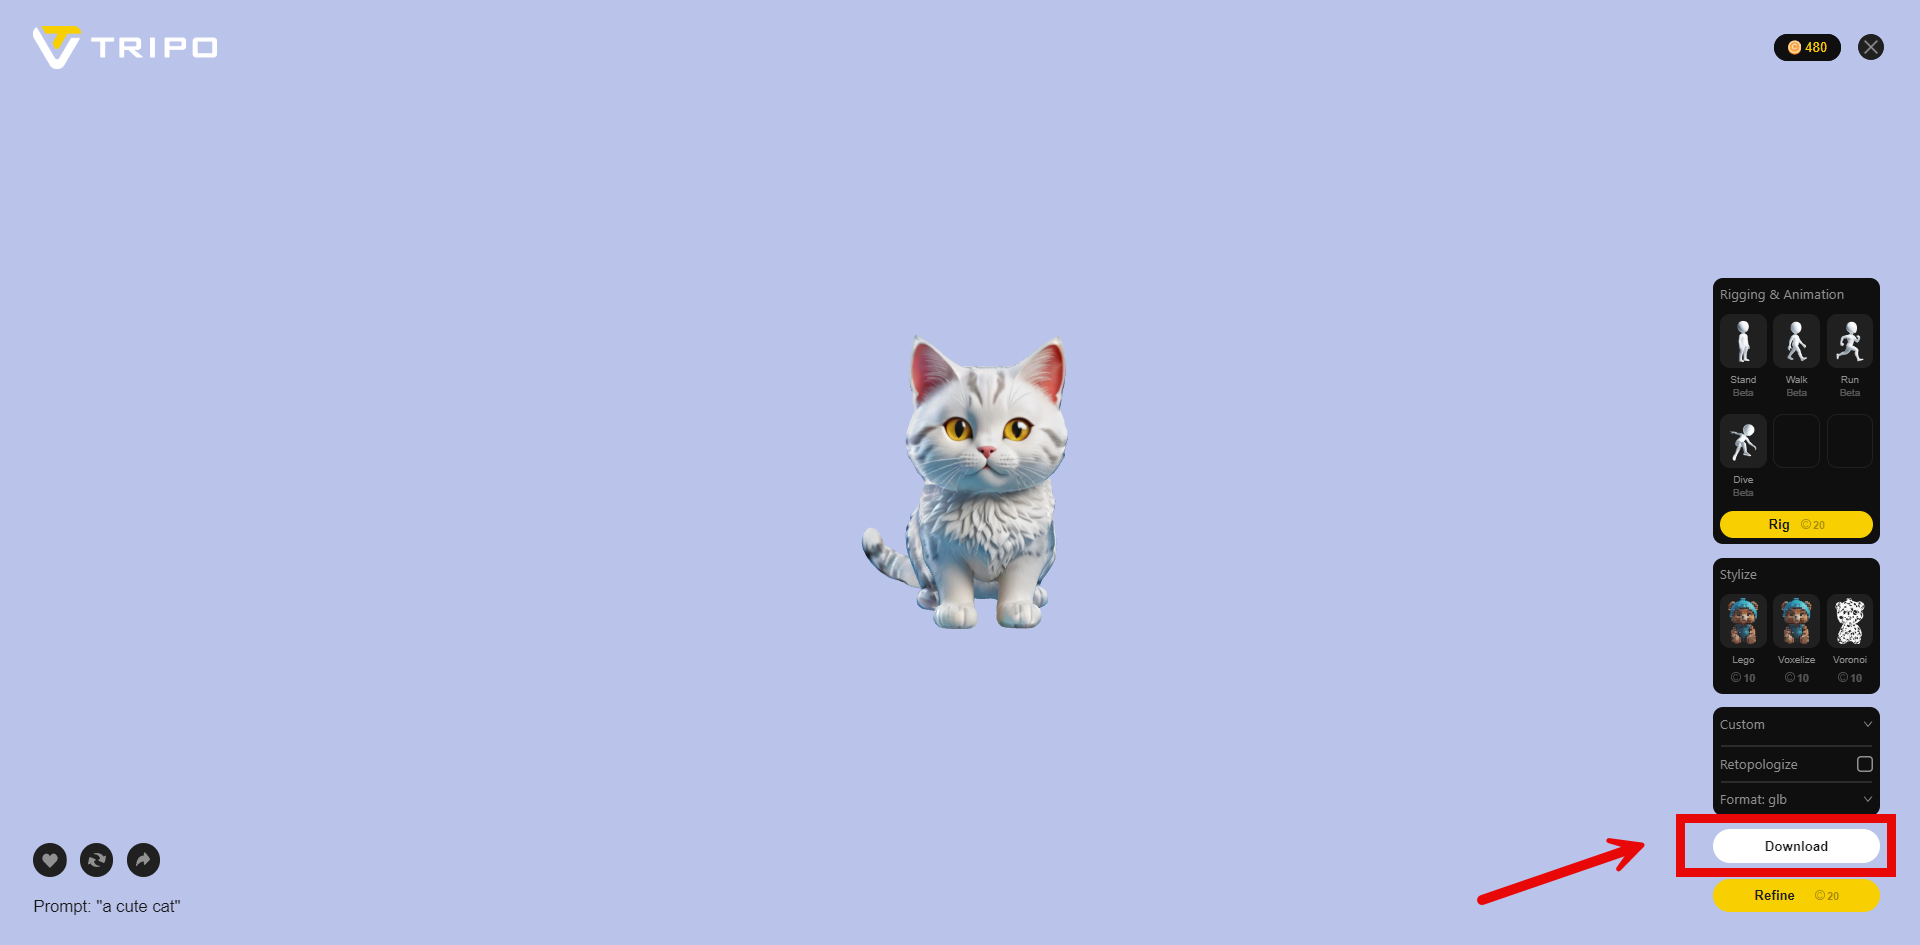
After finalizing your AI 3D model, the next step is exporting it. Tripo3D supports multiple export formats. Common choices include .obj, .fbx, and .stl. Select a format that suits your needs. Consider compatibility with Blender or other software you plan to use. The right format ensures a smooth transition to the next stage of your project.

Downloading the Model
With the format chosen, proceed to download your AI 3D model. Click the download button in Tripo3D. Save the file to a location on your computer where you can easily access it later. The downloaded model is now ready for import into Blender. Make sure to double-check the file to confirm everything exported correctly.
How to Import a Model into Blender

Embarking on the journey of importing your AI-generated 3D model into Blender can be exciting. Let's break down the steps to make this process smooth and enjoyable for you.
Preparing Blender for Import
Setting Up the Workspace
First, open Blender and set up your workspace. A clean workspace helps you focus on the task at hand. Remove any unnecessary objects from the scene. Use the N key to bring up the properties panel. Adjust the view to your liking. This setup ensures that you have a clear view when importing your model.
Import Settings
Next, configure the import settings. Go to the top menu and click on Edit. Select Preferences. In the Add-ons section, enable the necessary import formats. Blender supports various file formats like .obj, .fbx, and .stl. Choose the formats that match your model's file type. These settings prepare Blender to handle the import process efficiently.
Importing the AI 3D Model
Using the Import Function
Now, it's time to import your model. Click on the File menu. Select Import and choose the appropriate file format. Navigate to the location where you saved your AI-generated model. Select the file and click Import. Blender will bring your model into the workspace. You can now see your creation in the Blender environment.
Troubleshooting Common Issues
Sometimes, issues arise during the import process. If your model doesn't appear, check the scale and orientation settings. Use the S key to scale the model if needed. The R key allows you to rotate the model to the correct orientation. Ensure that textures are linked correctly. If problems persist, revisit the import settings. Make adjustments and try importing again. These steps help resolve common import challenges.
Enhancing and Editing Models in Blender
Basic Editing Techniques
Adjusting Model Geometry
Blender offers powerful tools for adjusting model geometry. You can start by selecting the model in the workspace. Use the G key to grab and move parts of the model. The S key scales the model to desired dimensions. Rotate the model with the R key for perfect alignment. These basic adjustments help refine the shape and structure of your 3D model.
Applying Textures and Materials
Textures and materials bring life to your models. Access the shading workspace in Blender. Select your model and open the material properties panel. Click New to create a new material. Adjust the color, roughness, and other properties to suit your design. Use the texture paint mode to apply detailed textures. This process enhances the visual appeal of your model.
Advanced Features
Rigging and Animation
Rigging adds movement to your models. Start by selecting the armature tool from the add menu. Position the bones within your model. Use the Pose Mode to test movements. Blender allows you to animate these movements. Set keyframes to create a sequence of actions. This feature brings dynamic life to your static models.
Rendering the Final Model
Rendering transforms your model into a polished image. Choose the render engine from the render properties panel. Adjust the lighting and camera angles for the best view. Use the Render button to start the process. Blender generates a high-quality image of your model. Save the rendered image for presentations or portfolios. This step showcases your work in its best light.
Explore More
- Introducing TripoSR by Tripo and Stability AI
- Turn Any Image into a 3D Model
- How AI Transforms Design and Creativity