How to Reduce Polygons in Blender: A Simple Guide
When working with 3D models, complexity often means one thing: too many polygons. While high-polygon models create smoother, more realistic shapes, they can also slow down your workflow and your computer. Luckily, Blender offers straightforward ways to simplify your models without sacrificing too much detail.
Why Reduce Polygons?
Most 3D models are built from polygons. You might have heard the term low poly — it refers to models with fewer polygons, often used for stylized or game-ready designs. On the other hand, high-poly models look more realistic but can drain performance and increase file sizes.
The goal is to balance realism and efficiency: make your models look good, but keep them light. Blender's powerful modifiers can help you do just that.
Quick heads-up:
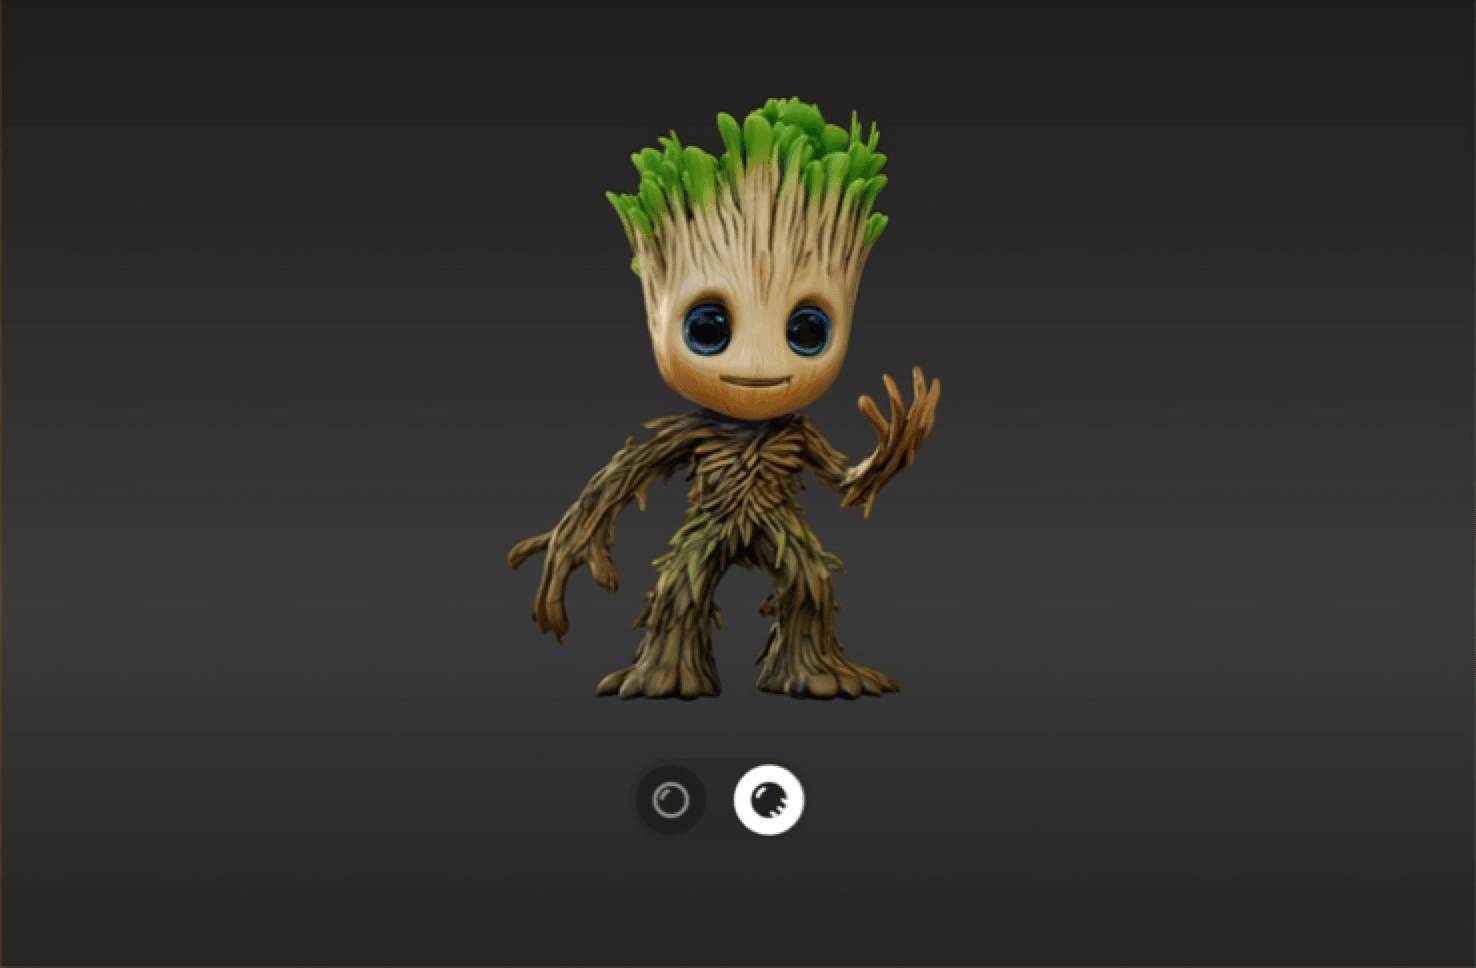
The example model in this article was generated by Tripo. With Tripo, you can create detailed 3D models just by typing a text prompt or upload an image— no complicated setup needed. Once you've got your models, you can further optimize them in Blender — like reducing the polygon count to make them lighter and more efficient for various projects.

Step 1: Add Blender's Object Modifiers
Modifiers in Blender act like layers on your mesh. They change your object without permanently altering its base structure — at least until you apply them. This means you can experiment freely. If you don't like the result, just remove the modifier!
To get started:
- Select your object.
- Go to the Modifier Properties tab (wrench icon).
- Click Add Modifier
- Click Generate ➡️ Decimate

Method 1: Collapse
The Collapse method works by progressively merging vertices, reducing the number of polygons while roughly maintaining the model's shape.
Key settings to tweak:
- Ratio slider: Controls how many edges are kept. 1.0 means no reduction, while lower values reduce more. Go easy — too low, and your model might fall apart!
- Triangulate: Converts polygons into triangles during reduction, which can help maintain size accuracy.
- Symmetry: Keeps both sides of your model identical. You can choose the axis for symmetry.
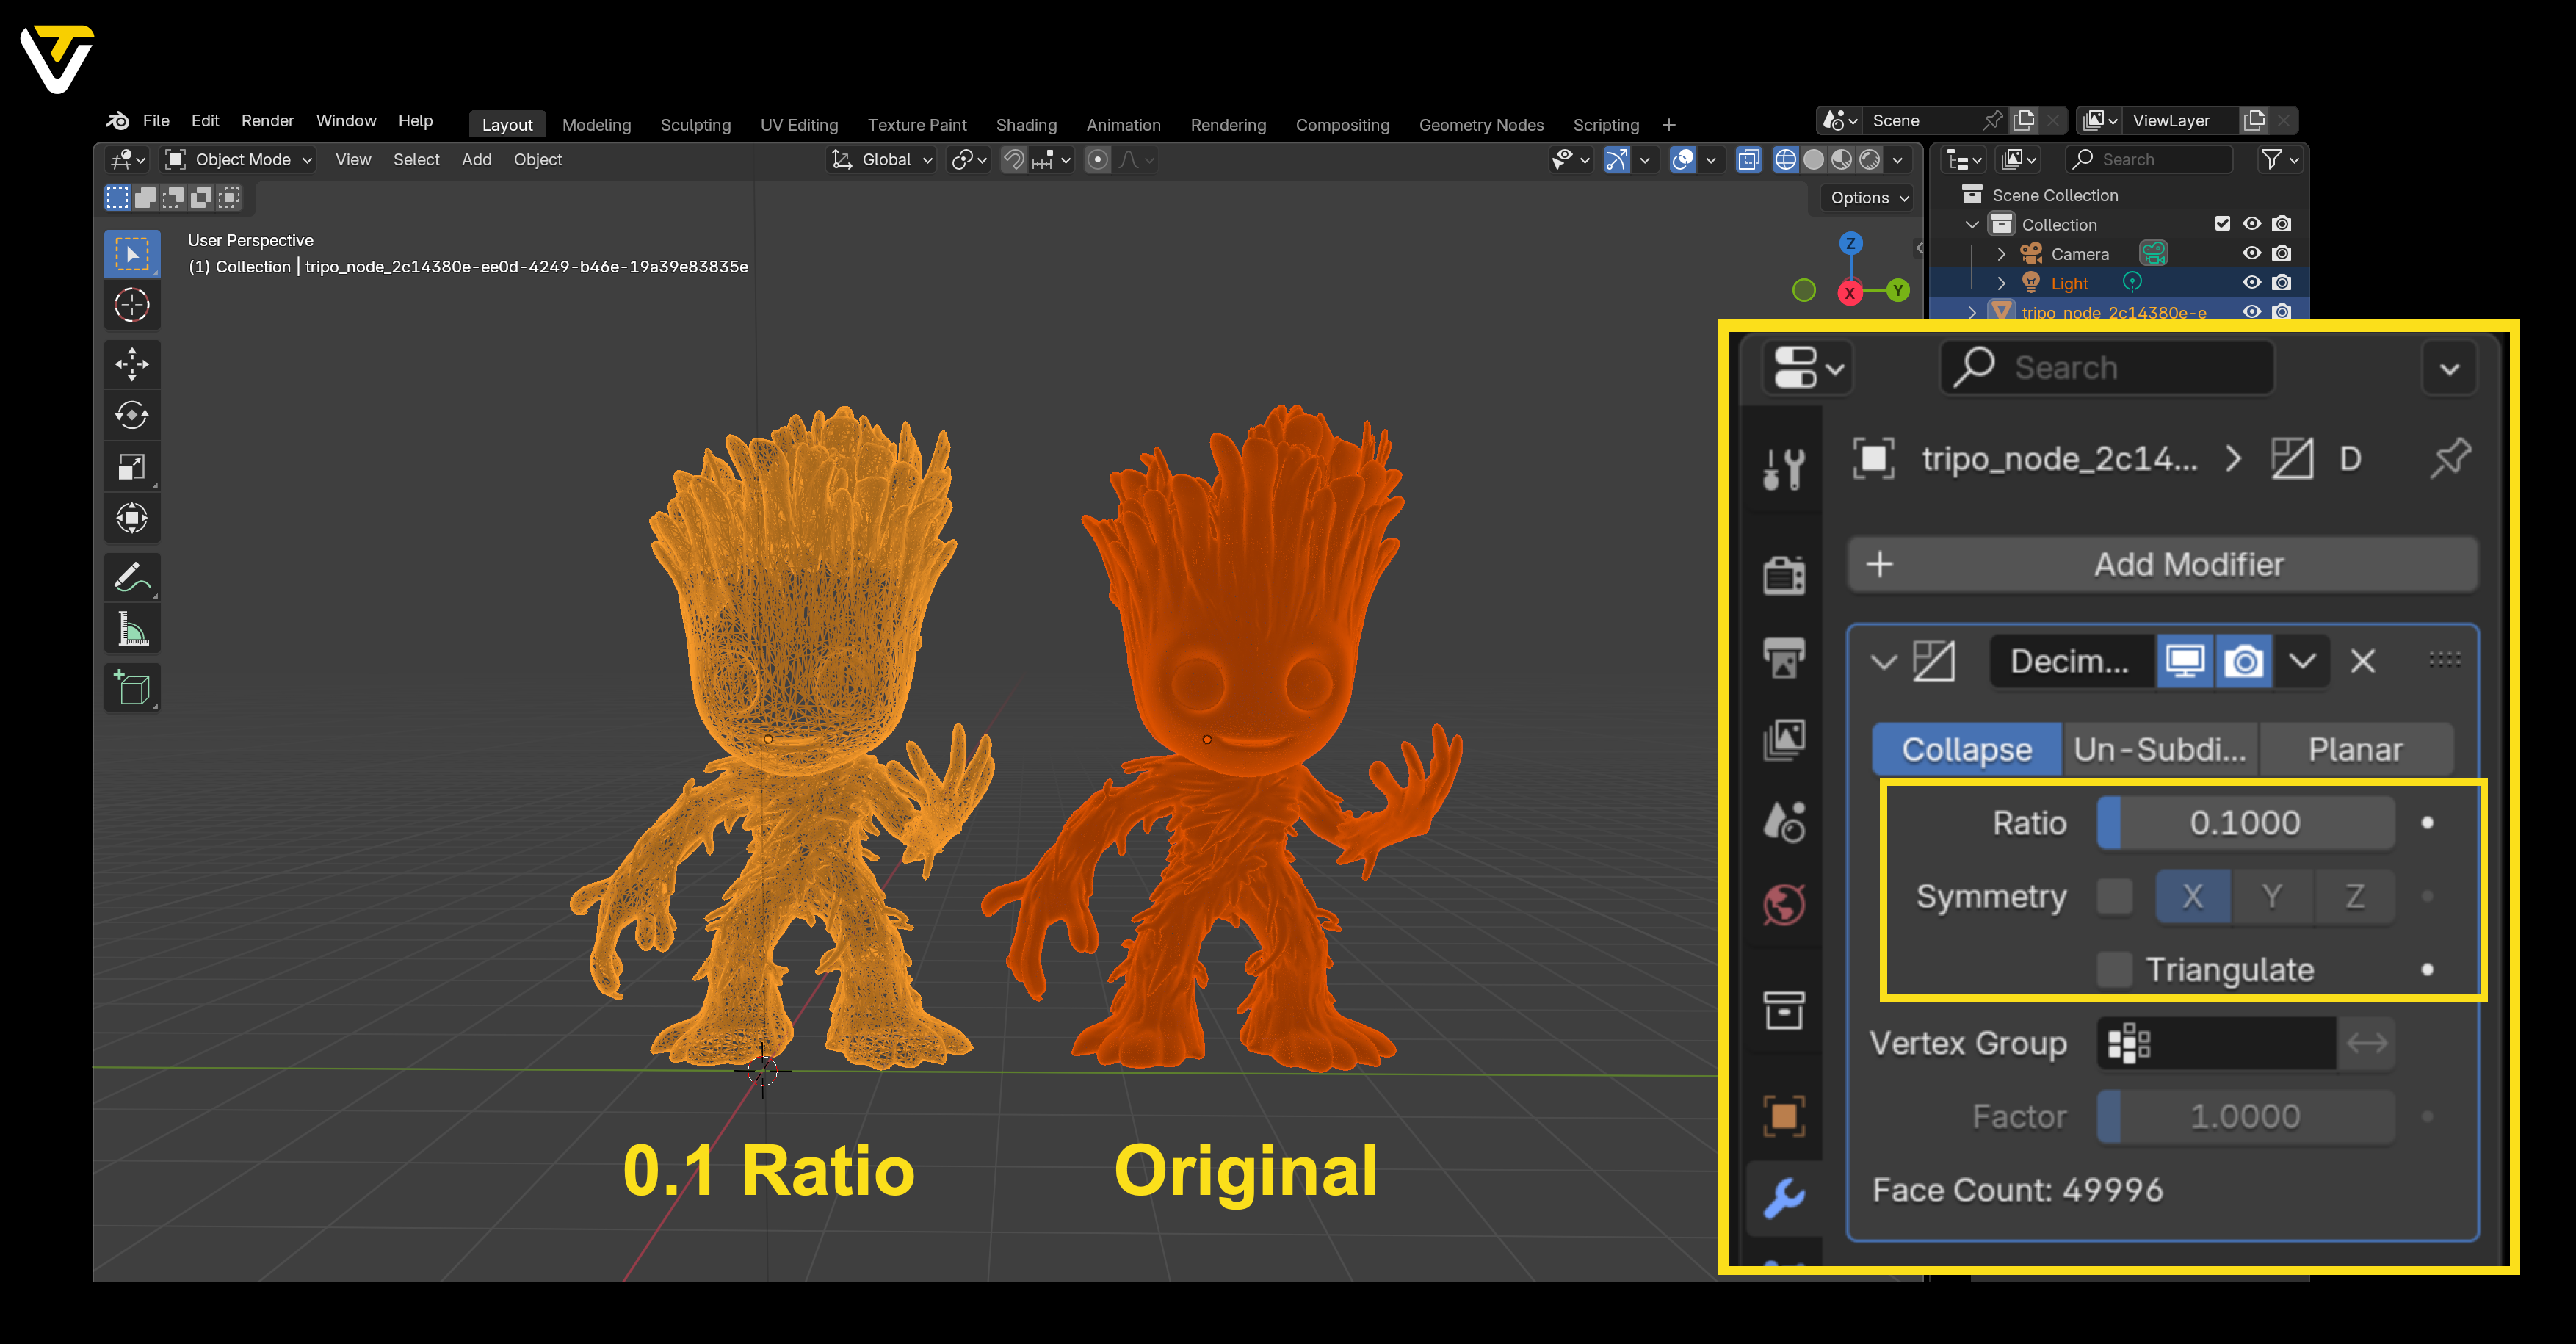
This method is great when you want fast results, especially for complex models. However, be cautious — extreme reductions might distort your object.
Method 2: Un-Subdivide
If you want to simplify your model while keeping its original shape more intact, try Un-Subdivide.
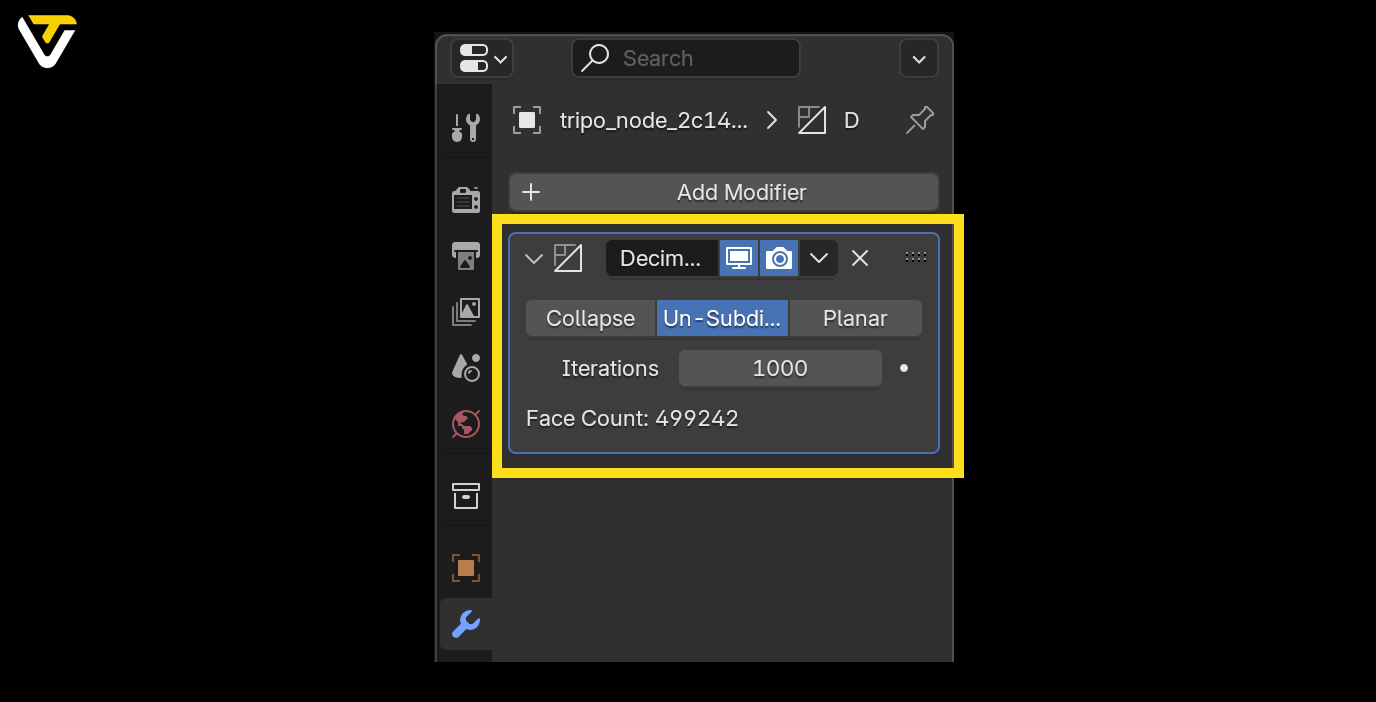
This method reverses subdivision by removing edges and merging faces back together. It's super easy to use:
- Just adjust the Iterations slider. Each increment further simplifies your model.
Note: While un-subdividing effectively reduces faces and edges, it doesn't do much for vertices. If vertex count is your priority, the Collapse method is your better bet.
Step 2: Apply Your Changes
Once you're happy with your simplified model:
- Click the dropdown next to the modifier's name.
- Select Apply.
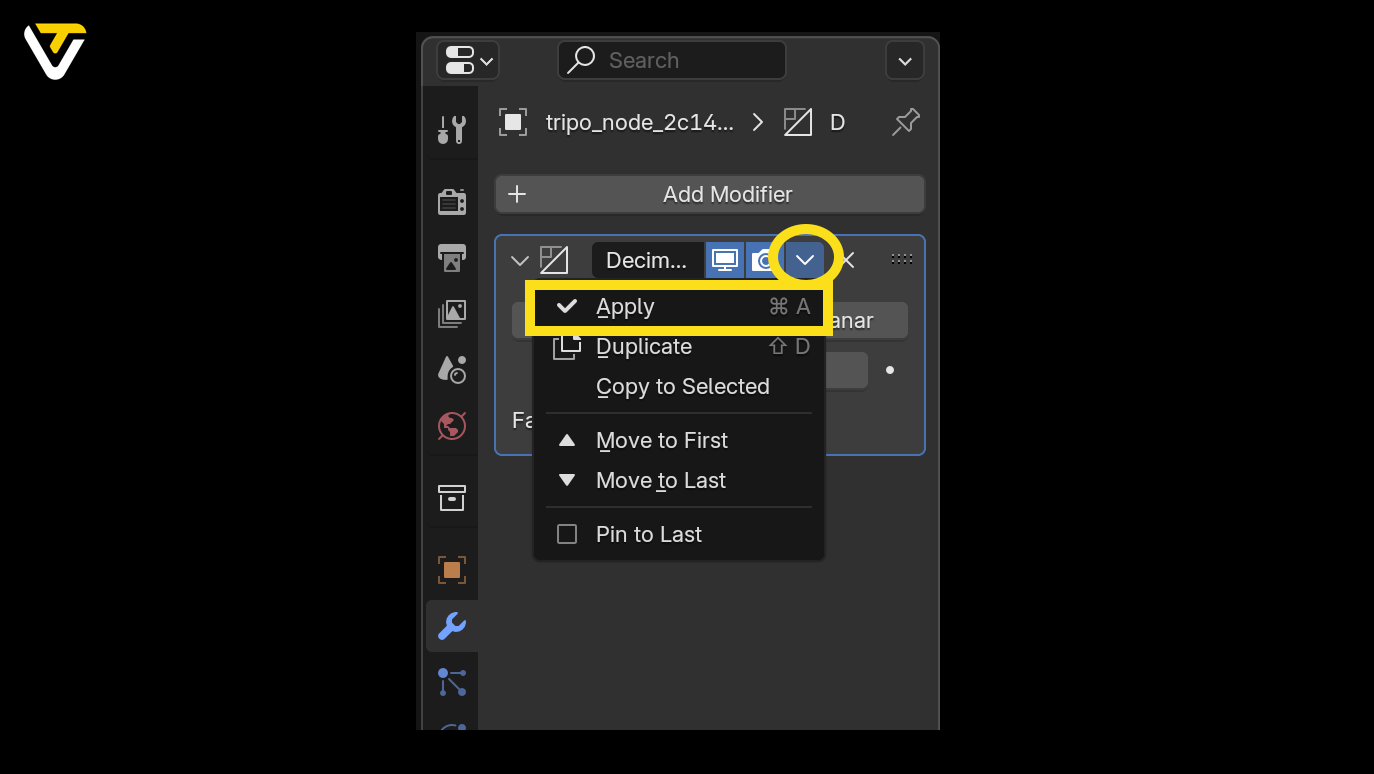
This finalizes the changes, baking them into your model. If you change your mind, you can still hit Undo — just make sure you do it before making other changes.
If you're not satisfied before applying, simply click the small X in the modifier window to discard it.
Bonus: Alternative Methods to Reduce Polygons in Blender
While the Decimate modifier is the go-to tool for polygon reduction, it's not the only method Blender offers. Depending on your model and goals, these alternative techniques might suit you even better.
Let's explore some extra ways to simplify your geometry.
Remesh Modifier
The Remesh modifier rebuilds your mesh from scratch, giving you a cleaner, more uniform topology.
It's great for:
- Sculpting workflows
- Organic shapes
- Models with inconsistent geometry
Use the Voxel mode for smoother results, and adjust the Voxel Size for finer or coarser detail. Just remember: this method may lose some sharp details, so it's best for stylized or organic models.
Manual Cleanup in Edit Mode
If you like precision, manual cleanup is your friend.
- Go into Edit Mode.
- Select and dissolve unnecessary edges or vertices.
- Merge vertices (shortcut M) to simplify tricky areas.
Manual cleanup is time-consuming but gives you full control, perfect for polishing after automatic reduction.
Decimate by Angle (Planar Mode)
Inside the Decimate modifier, switch the method to Planar.
- This option reduces polygons based on face angles.
- Ideal for models with large flat surfaces (like architecture or hard-surface objects).
- Preserves curves and details while simplifying planes.
Simplify Modifier (Scene-Wide)
For big scenes with multiple models, use the Simplify option in Blender's Render Properties.
- Reduces subdivisions and shadow complexity globally.
- Great for previewing complex scenes or speeding up renders.
This won't change the mesh permanently, but it helps manage performance-heavy projects.
Retopology
Retopology creates a clean, efficient mesh over your high-poly model.
Options include:
- Manual retopology using Blender's Shrinkwrap and snapping tools.
- Auto-retopo with add-ons like QuadRemesher or external tools like Instant Meshes.
Retopology is perfect for models that need smooth deformations, like animated characters.
Decimation During Export
Some file formats let you reduce polygons during export.
- FBX and OBJ formats often include decimation options.
- Useful for quick reductions before importing to game engines or other software.
It's a fast option, though not as customizable as Blender's internal tools.
Wrapping Up
Reducing polygons in Blender isn't just about saving performance — it's about making your workflow smoother and your models easier to manage.
Start with the Decimate modifier for quick results, but don't hesitate to explore these bonus methods when you need more control. Whether you're optimizing for games, animation, or faster renders, these tools help you strike the perfect balance between visual quality and efficiency.