User Guide(VI): A Comprehensive Guide to Creating Stunning Scenes without Artistic Expertise with Top Tool Recommendation
Introduction
Learning 3D can be both exhilarating and intimidating, and for many, Tripo AI has served as a guiding light, instilling curiosity and confidence in their discovery. However, the urge to progress beyond single figures on a 3D grid presents a new challenge: how to construct appealing sceneries without beginning from scratch in Blender. Fear not, as in this session, I'll show you two important tools, starting with Blockade Labs Skybox.
How to Build a Scene with Blockade Labs Skybox
Skybox is the ideal companion to Tripo AI, providing a simple solution for scene production. This browser-based tool not only lets you to enter instructions for your scenario, but it also includes a brush tool for direct sketching of your immersive environment, allowing you to quickly create immersive environments for your 3D characters, enhancing the overall presentation and storytelling of your 3D projects.
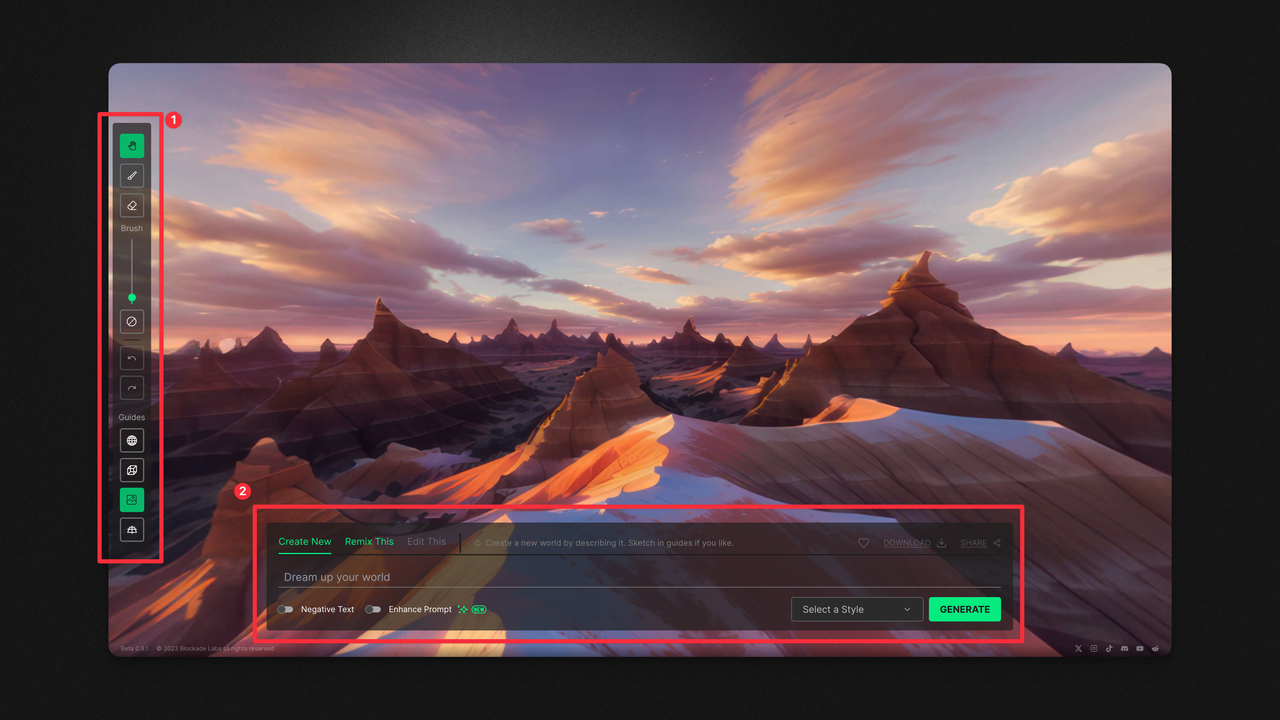
As shown in the image, number 1 represents the brush tool, among others, and number 2 is where you enter your prompts (including negative prompts).
Generate a New Scene
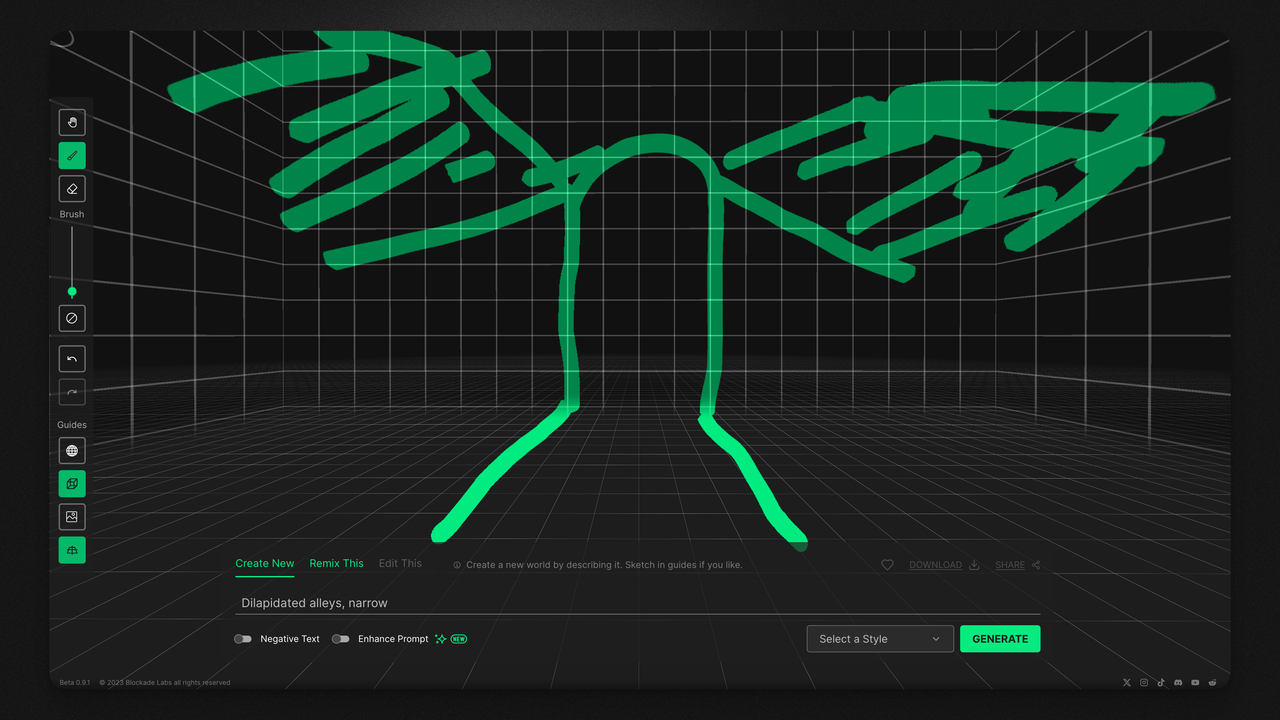
Now, let's generate a scene of a dilapidated alley. For example, use the prompt: "Dilapidated alleys, narrow." Then, select the second tool from the top in the left toolbar, which is the brush tool, and simply draw an outline. If there are elements you don't want to include in your scene, avoid using prompts like "without xxx" or "No xxx." Instead, check the Negative Text option and enter these unwanted elements in the corresponding text box without using negative words.
This approach helps the AI understand your requirements more clearly, ensuring that the generated scene aligns more closely with your vision, without unwanted elements.
Select a Style
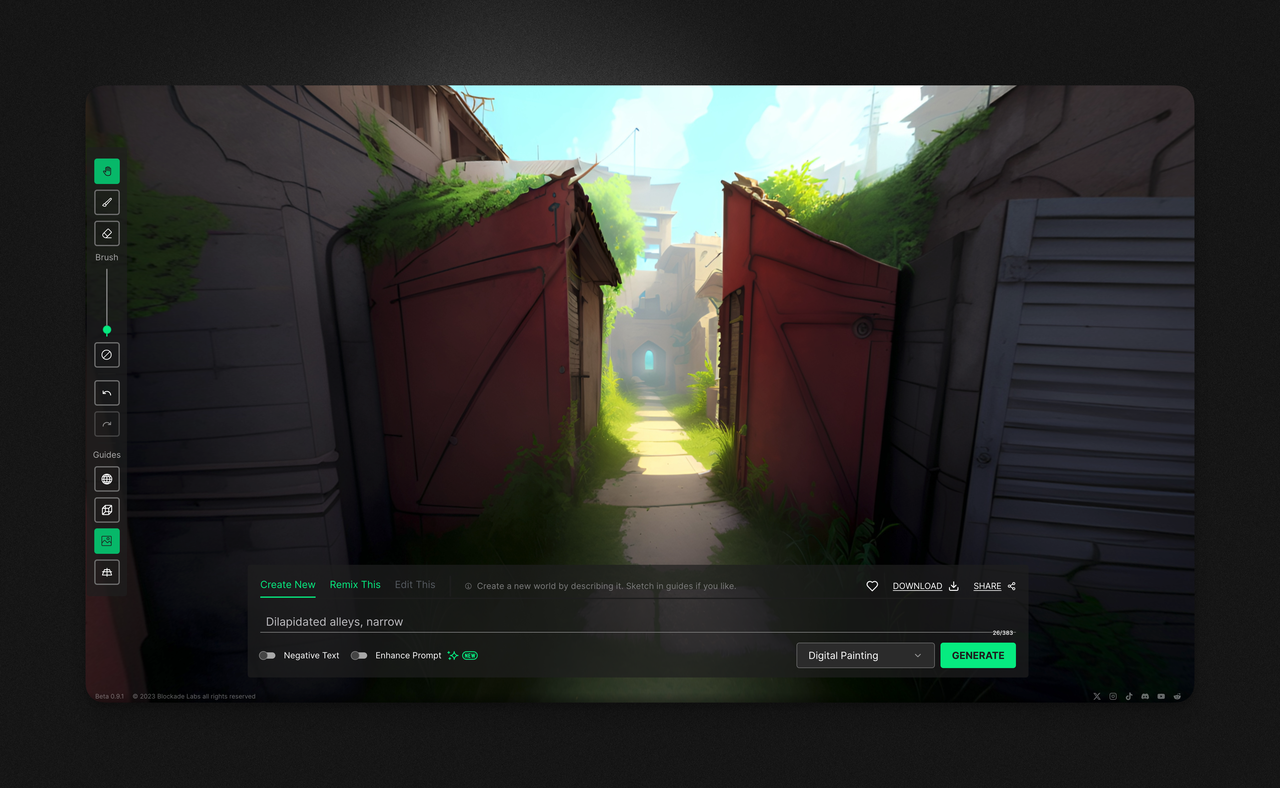
We're not quite done yet. In the bottom right corner, go to "Select a Style" and choose a style that suits your needs. Here, I've chosen Digital Painting under the Illustrative category. Click on GENERATE, and in just a few minutes, your scene will be successfully generated. The results often look very impressive!
Import into Blender
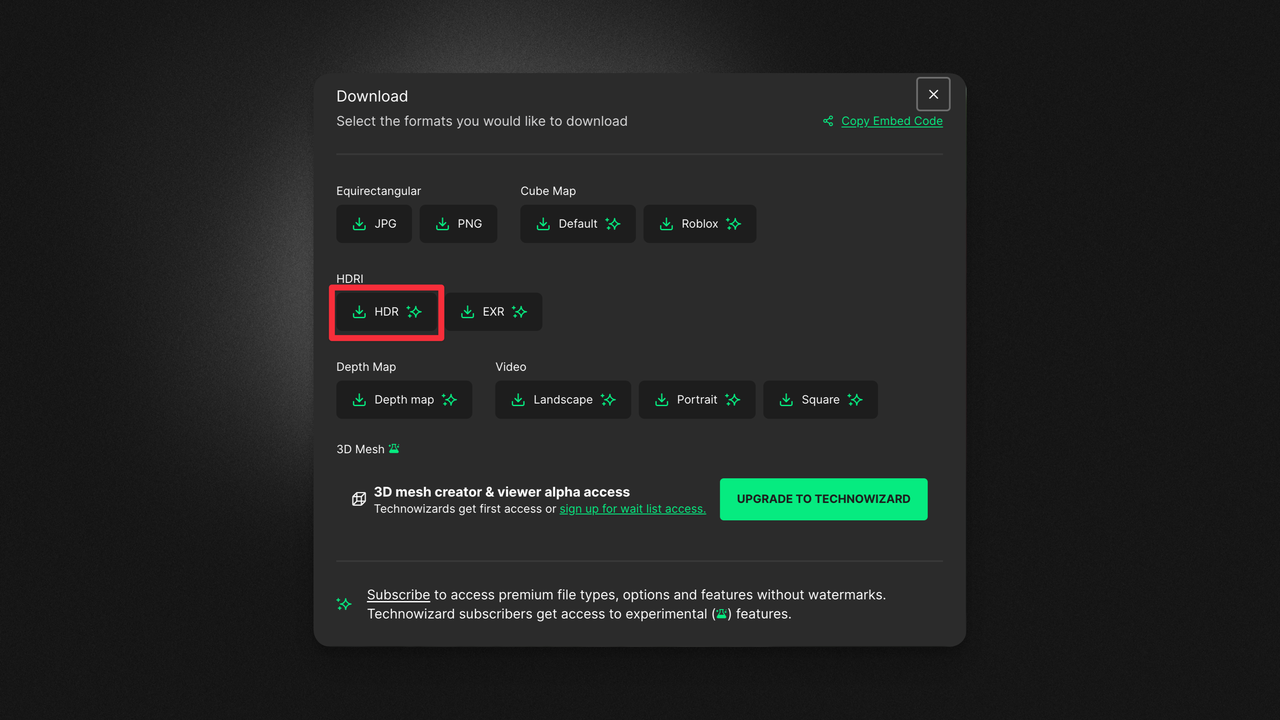
To save and import the scene into Blender, click on the DOWNLOAD button located to the right of the heart symbol. One option is to download the HDR file, as shown in the image.
Next, return to Blender and at the location marked as number 1 in the image (World Properties), add an "Environment Texture." Then click the "Open" button in the panel and add the .hdr file we just downloaded.
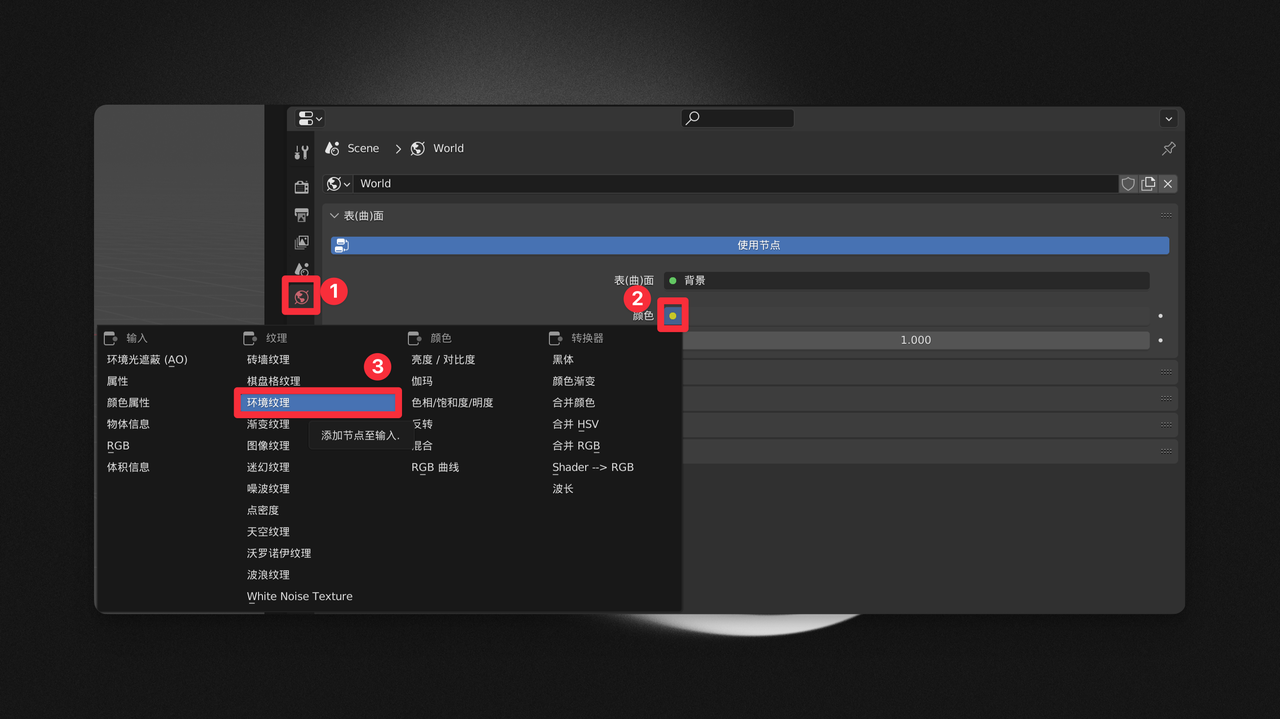
Make adjustments
Now that the world environment has been successfully added, a new issue arises: our model character appears to be floating, and the size doesn't seem quite right. Let's continue to address these issues.
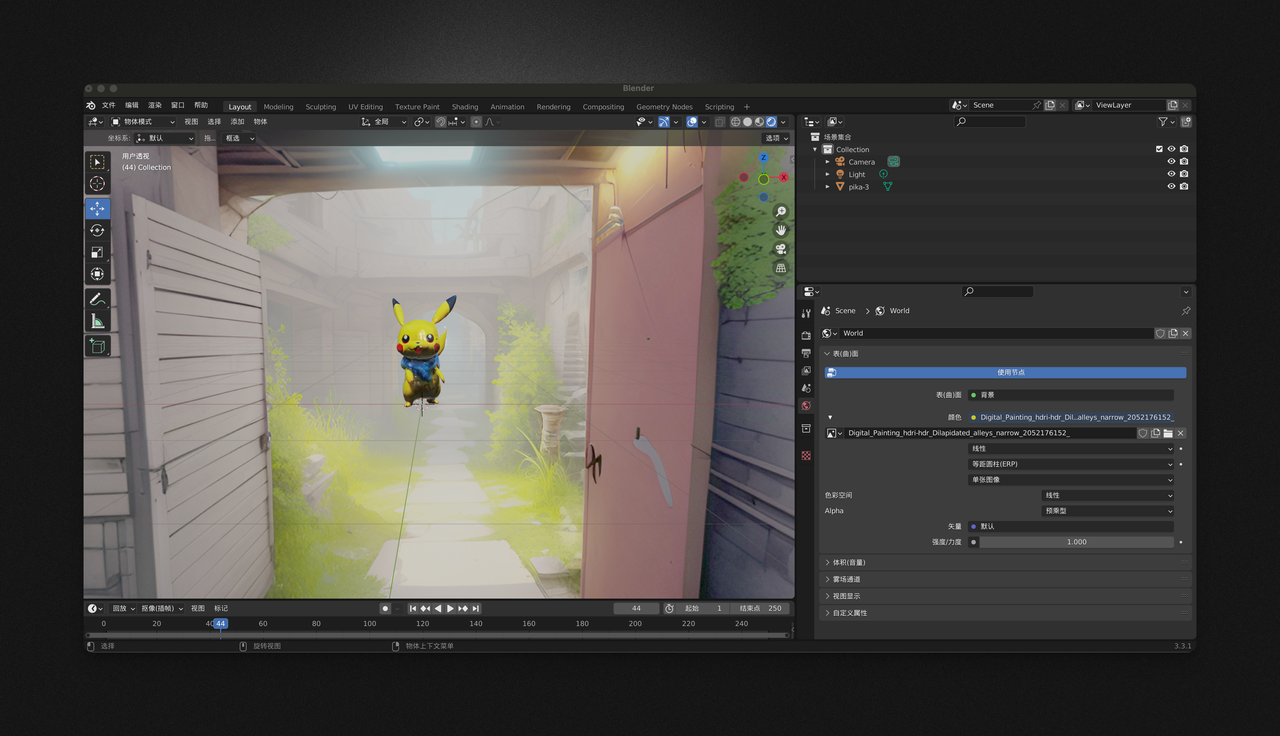
To address the issue of the floating model and its size, there are two methods: manual adjustment and using a plugin to simplify the process. I generally opt for the more efficient approach, so I recommend searching for, downloading, and installing the Hdri Maker plugin. After enabling this plugin in Blender's preferences, return to the main interface, press 'N' to open the tool panel, select it, and click on "Dome Light" -> "Add Dome."
Note that there are five different modes for the dome: Dome, Dome V3, Cylinder, Cube, and Dome V2. You should experiment with these to see the differences in effects. Zoom into the sphere with your mouse wheel, and you'll see that the Pikachu model now properly touches the ground. However, the surrounding environment might still appear somewhat distorted, and Pikachu's size may require further adjustment.
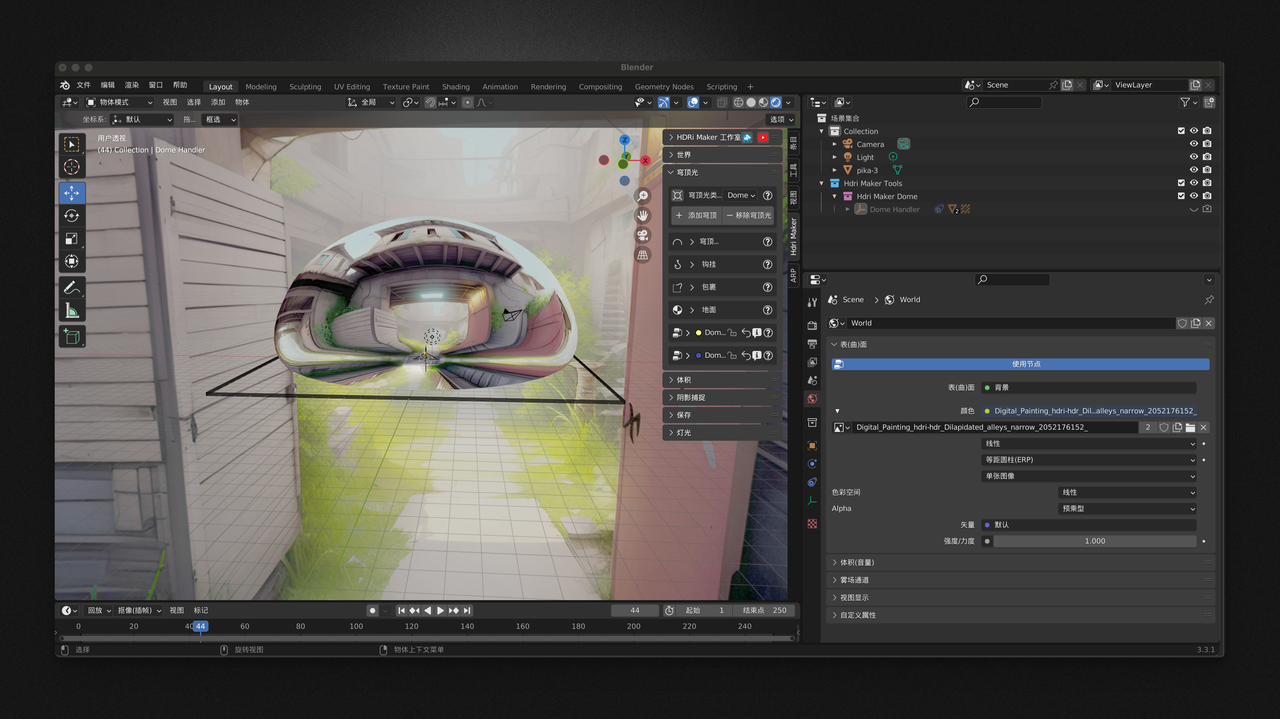
To adjust the size of the environment, let's go through how to scale the dome. Expand the "Dome..." (Dome Light Properties) dropdown menu, and use the "Scale Dome" slider to adjust the size of the dome. Next, expand the "Dome Color" menu and adjust the highlights, roughness, and metallicity according to your preference.
Then, expand the "Dome Vectors" menu. This part is relatively important. Adjust the "Angle," "Position," "Scale," and "Adjust Boundary" to eliminate distortions. The "Blur Strength" is typically used in conjunction with "Blur Distance." For instance, if your texture background is too chaotic, this blurring effect can help mask it, preventing the background from looking too artificial. Make some simple adjustments as shown below. (Note that there are still some issues with the adjacent wall.)

To adjust the camera position, which essentially determines the viewpoint for your final rendered output, select the Camera in the right-side layer panel. As the name suggests, this is the perspective from which your scene will be rendered and exported.
After selecting the Camera, press the shortcut key 'G' to adjust its position. Then, check whether the X, Y, and Z axes align with your expectations to decide how to further adjust it.
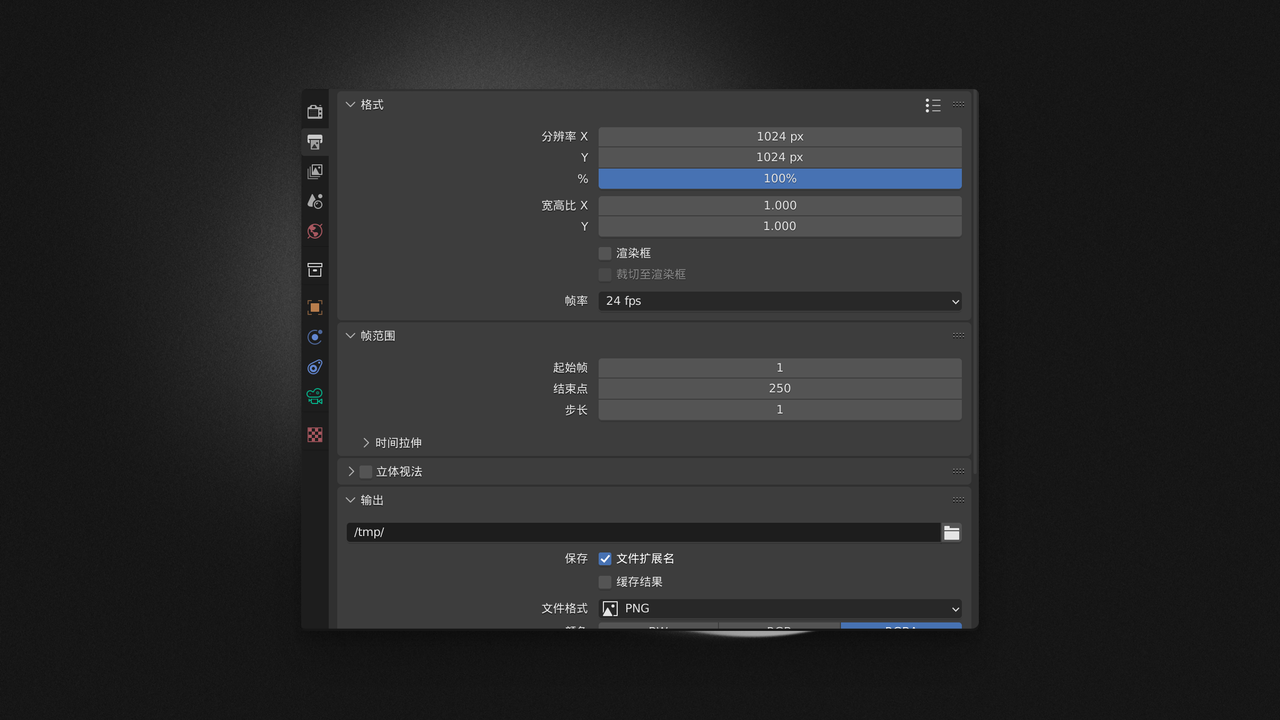
In the Output Properties panel, you can set the Camera's aspect ratio, resolution, and other parameters. To adjust the field of view, use the shortcut key 'G' to move your camera's position, or adjust the aspect ratio. Additionally, while using 'S' to scale the camera won't affect the actual field of view (as in photography, the distance between you and the subject, as well as the actual focal length of the camera, determines the field of view), scaling can be helpful for your own visual reference.
Focal length and other parameters can be found in the "Object Data Properties" panel on the right side when the camera is selected (look for the Camera ICON).
That's all for this session. In the next one, we'll talk about how to quickly perform rigging and retargeting, helping you to harness the power of Tripo AI to its fullest potential!
Explore Tripo AI and join us on our media platforms:
- Official Website: https://www.tripo3d.ai
- Twitter: https://twitter.com/tripoai
- Medium: https://medium.com/@thegodtripo
- Discord: https://discord.gg/chrV6rjAfY
Original Article: https://medium.com/@thegodtripo/ultimate-tripo-ai-guide-vi-how-to-build-a-scene-without-any-artistic-background-9e3d3b05e2bc
Written by Lyson(Twitter@lyson_ober) and edited by Oliver
Advancing 3D generation to new heights
moving at the speed of creativity, achieving the depths of imagination.

