
User Guide(VII): Mastering Rigging: A Tutorial of Mixamo and Auto-Rig Pro in Blender with an Introduction to Tripo Auto-rigging Feature
Introduction
Welcome to this dedicated exploration of rigging in Blender! In this section, we'll discuss rigging techniques, focusing on essential considerations for animation process. One of the tools I often use is the Auto-Rig Pro plugin, celebrated for its impressive customizability, user-friendly interface, and precise results.While alternative solutions like Mixamo offer automatic rigging options, they come with their own set of challenges and potential errors, but I'll still guide you through both. Additionally, we'll touch upon the importance of selecting a model in a T-pose, a strategic decision aimed at optimizing efficiency in the rigging process. And more importantly, we're introducing the new auto-rigging feature of Tripo AI!
How to use Mixamo
- Click on UPLOAD CHARACTER to upload your model.
- In the AUTO-RIGGER step, move the circles on the left side as indicated by the colors in the right image.
- Check the Use Symmetry box. When you move a circle, like the one on the left wrist, the system will automatically mirror and move the circle on the right wrist.
- Uncheck Use Symmetry if you want to position each part independently.

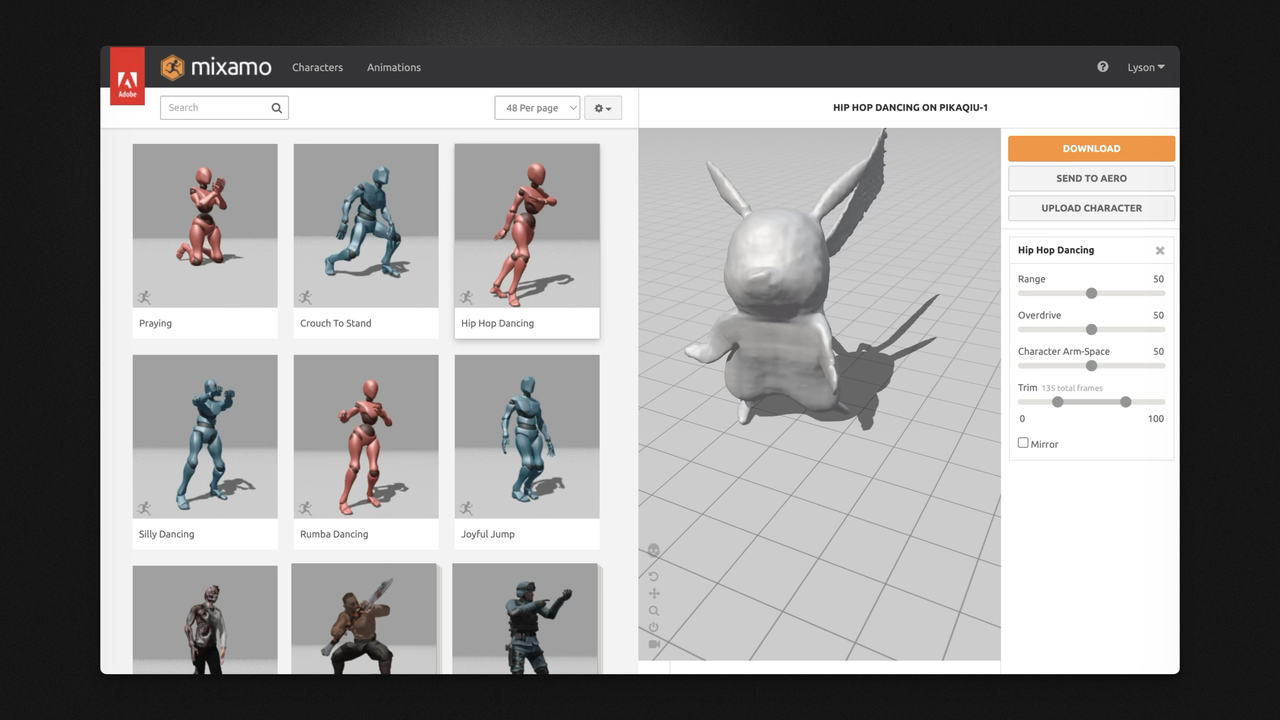
After successfully binding the rig in Mixamo, you can choose from a library of animations on the left side. Clicking on an animation will display a preview on the right side. Once you find an animation that you're satisfied with, click on DOWNLOAD to download the FBX file, which you can then import into Blender for use.
How to use Auto-Rig Pro in Blender
After downloading and installing the plugin, you'll see four menu tabs:
- Auto-Rig Pro
- Auto-Rig Pro: Smart
- Auto-Rig Pro: Remap
- Auto-Rig Pro: Export
First, you need to initially calibrate your model. Ensure the model's front is facing the negative Y-axis and that it's symmetrically aligned. You can enter Quad View mode using the shortcut Control + Option + Q. Ideally, your model should be in a T-pose, but since our workflow starts with AI-generated models, we'll begin from this state to help deepen your understanding.
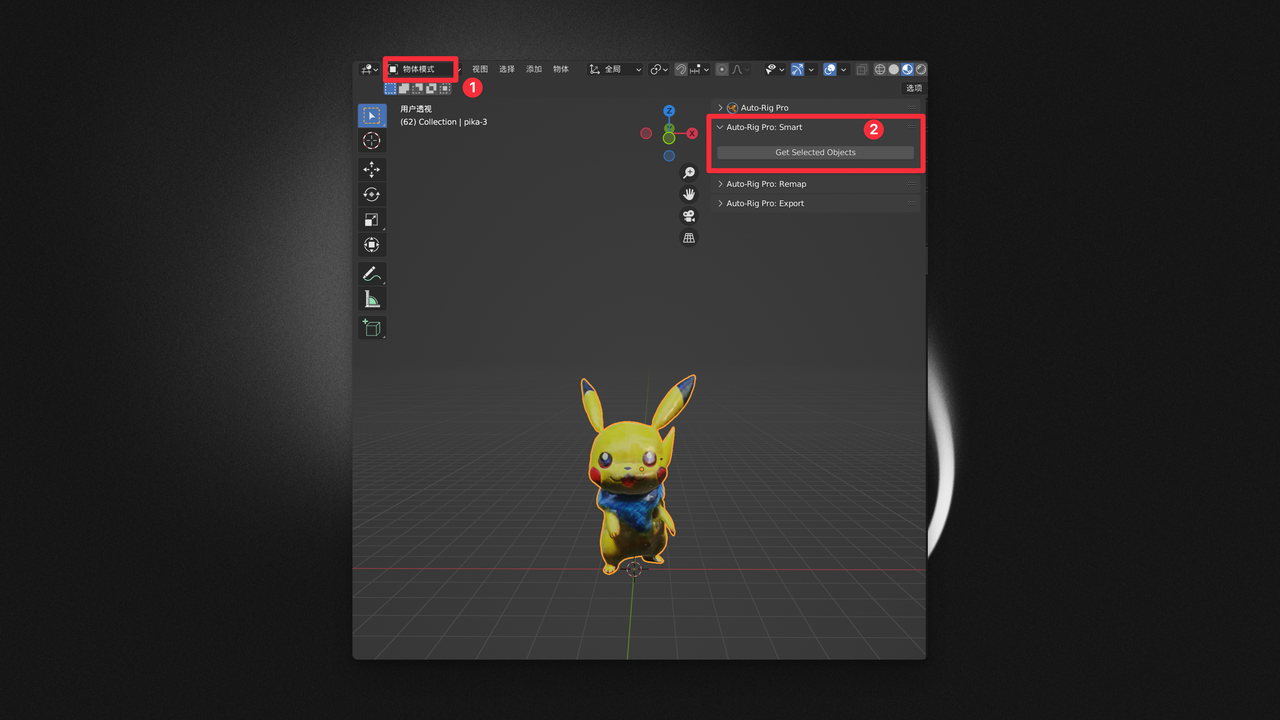
In "Object Mode," select your model (e.g., Pikachu, as indicated by number 1). Then click on Get Selected Objects -> Full body / Facial Only (choose Full body for this example) -> Confirm.
The next step in using Auto-Rig Pro is to position the rigging points as indicated by the "Add ..." prompts. This requires patience to ensure that each point is correctly positioned from every angle. Start with "Add Neck." If you accidentally move a point to the wrong position, select that point and press 'G' on your keyboard to move it.
If you've enabled the "Mirror" option, points like "Shoulders" will be positioned on both sides simultaneously, which is why a T-pose can save a lot of time. In this example, we'll uncheck the mirror option and position each point individually.
| Add Neck | 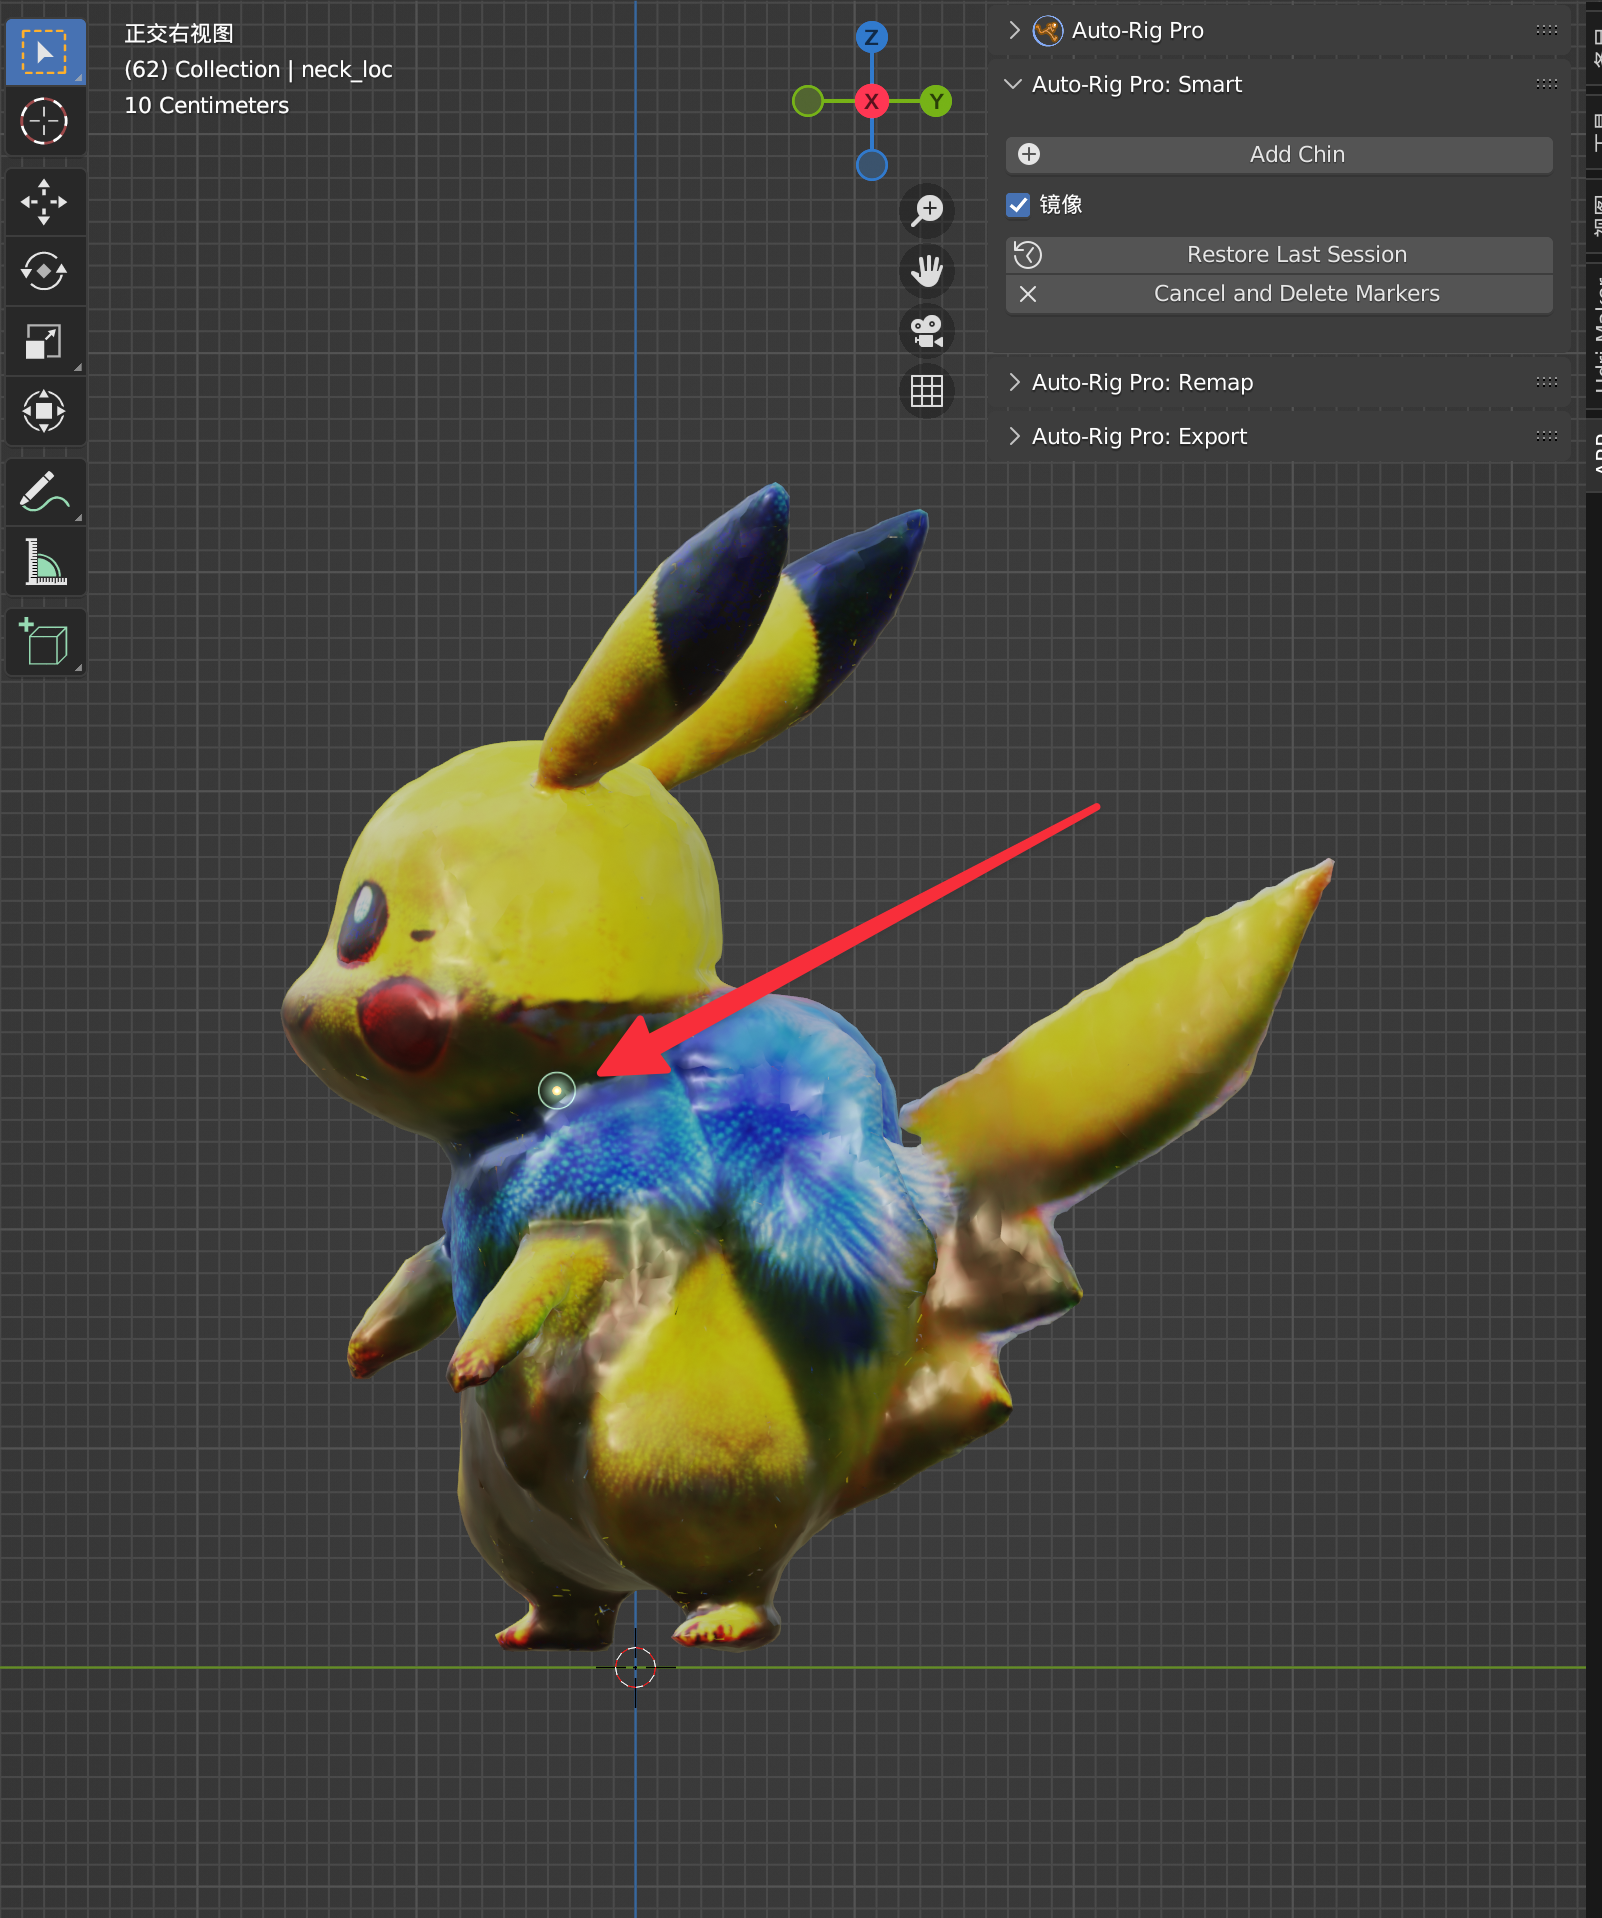 | 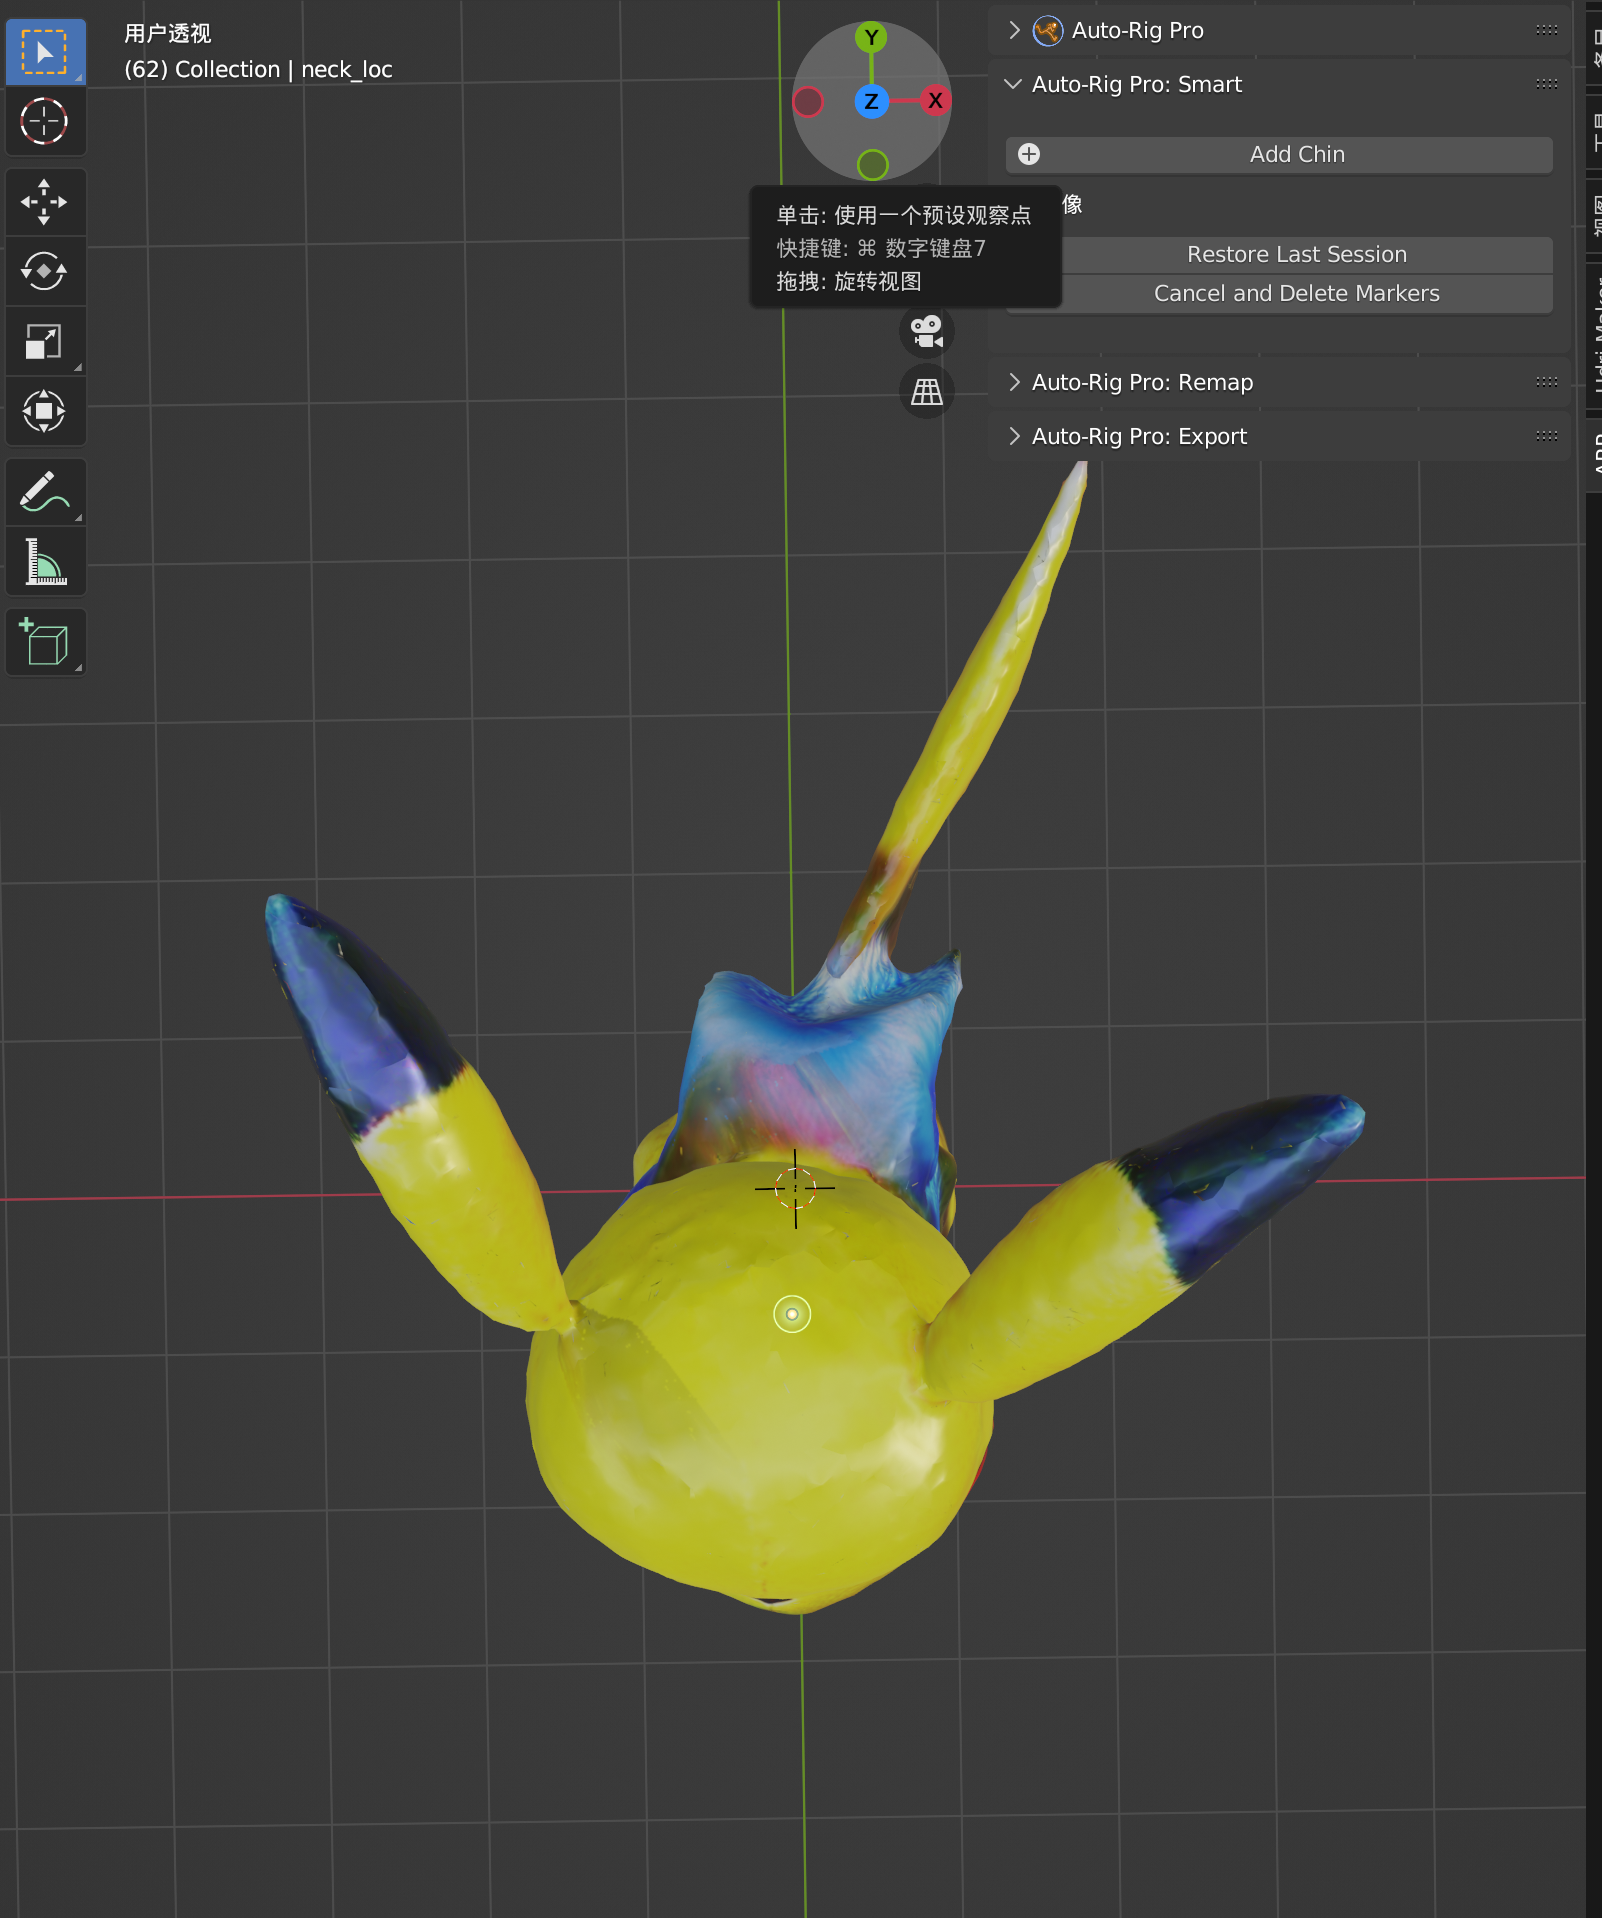 | 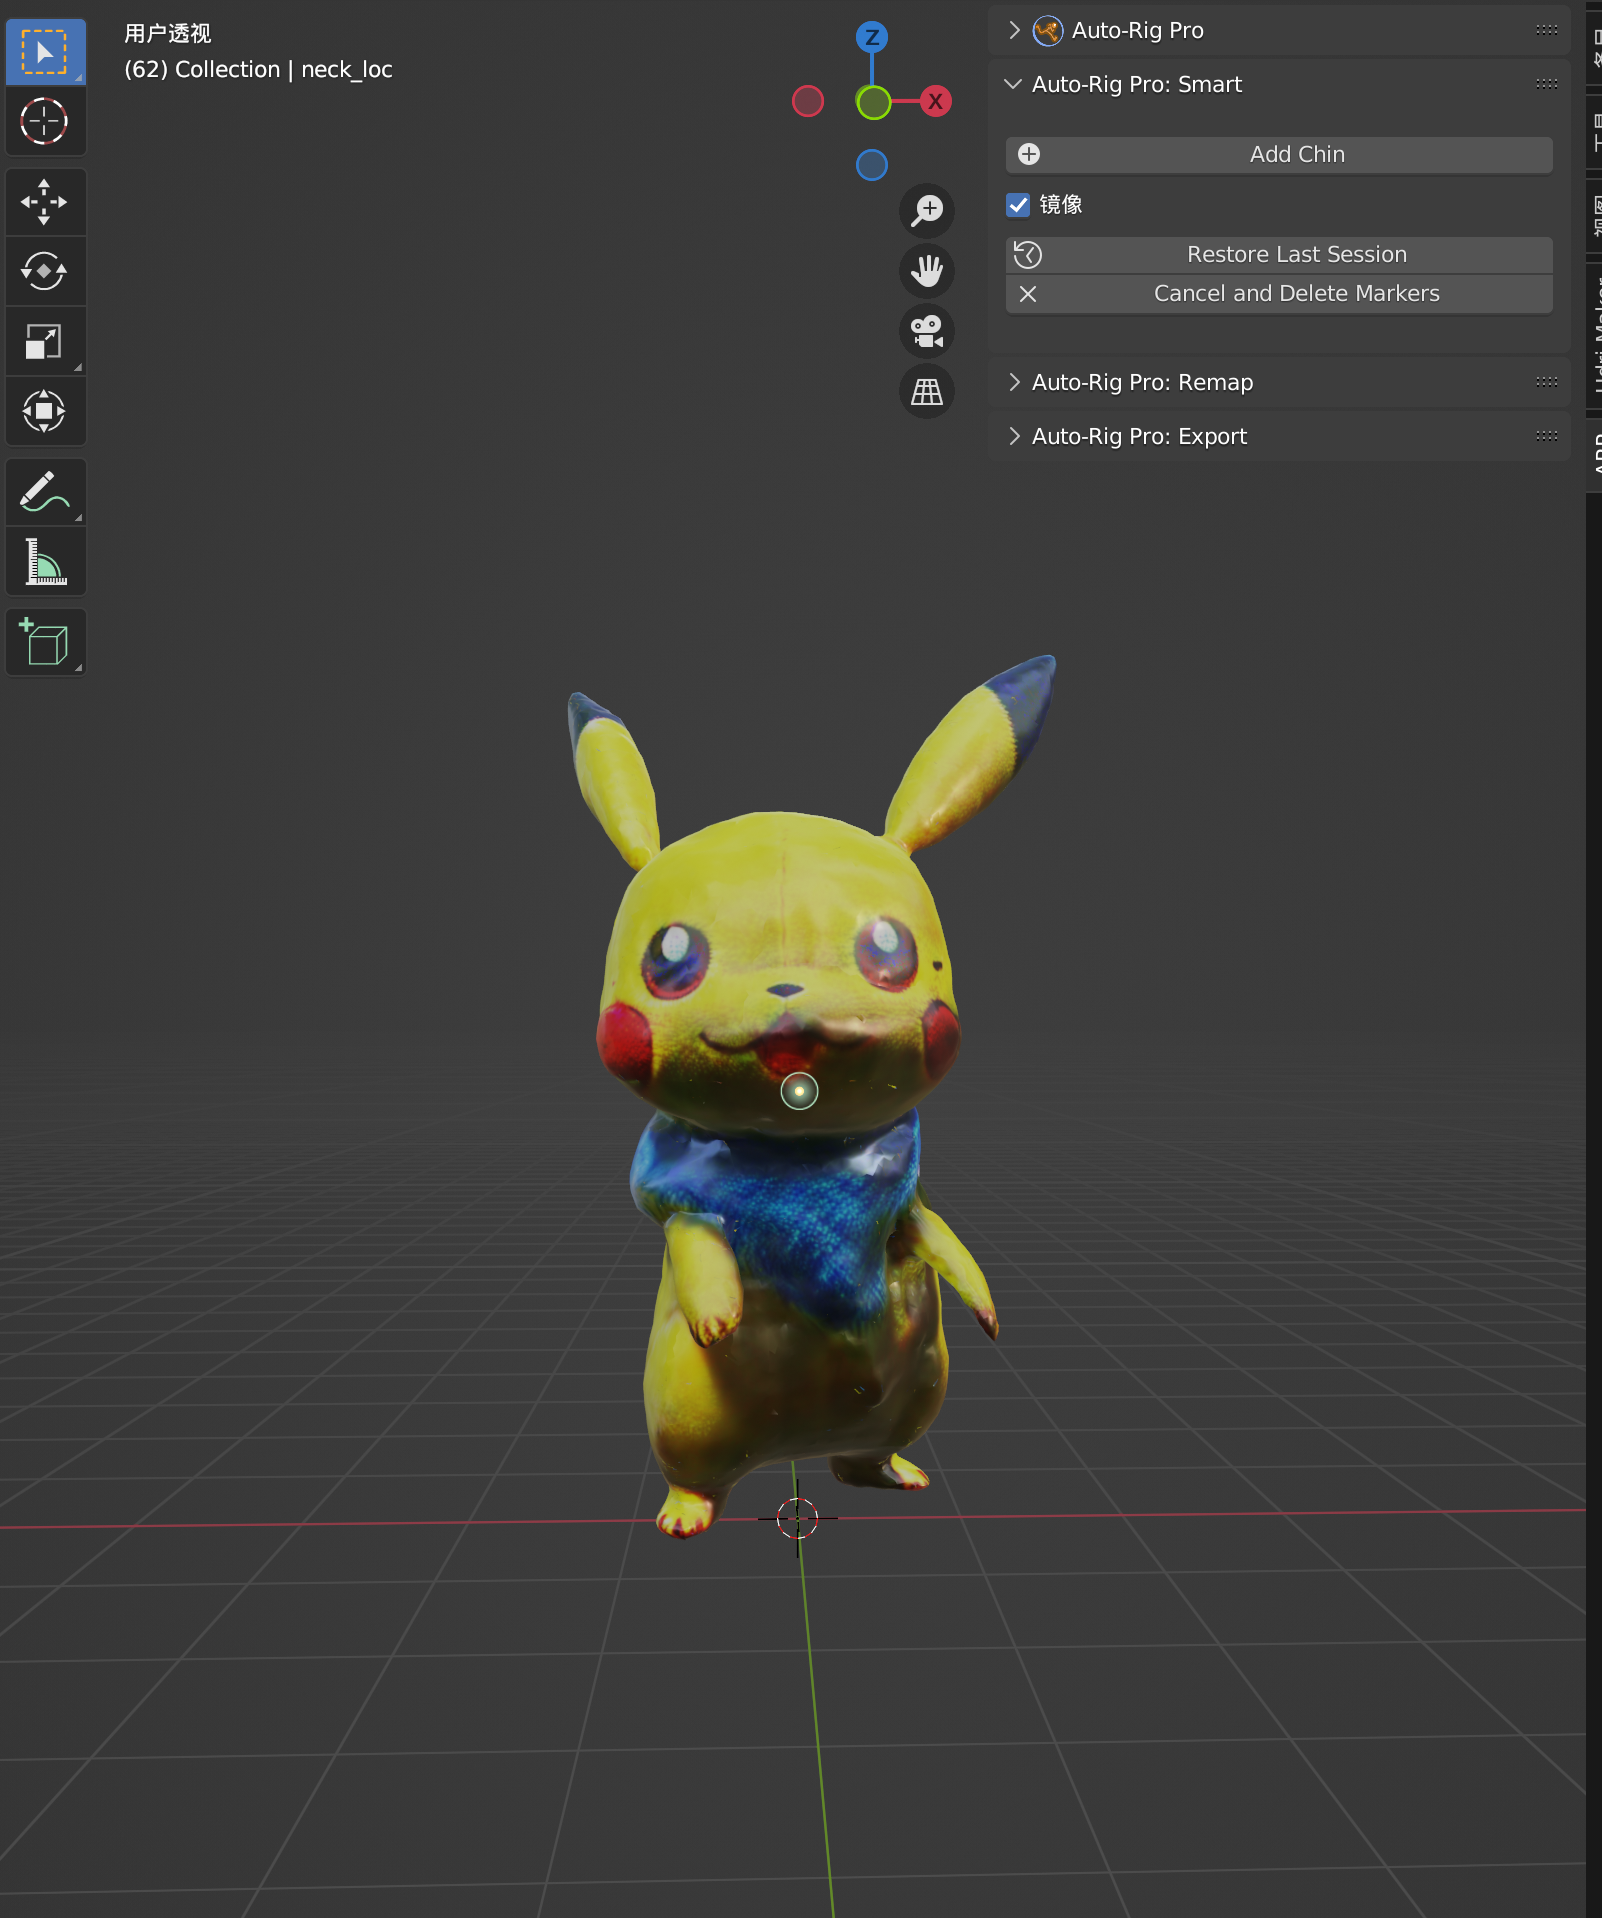 |
|---|---|---|---|
| Add Chin | 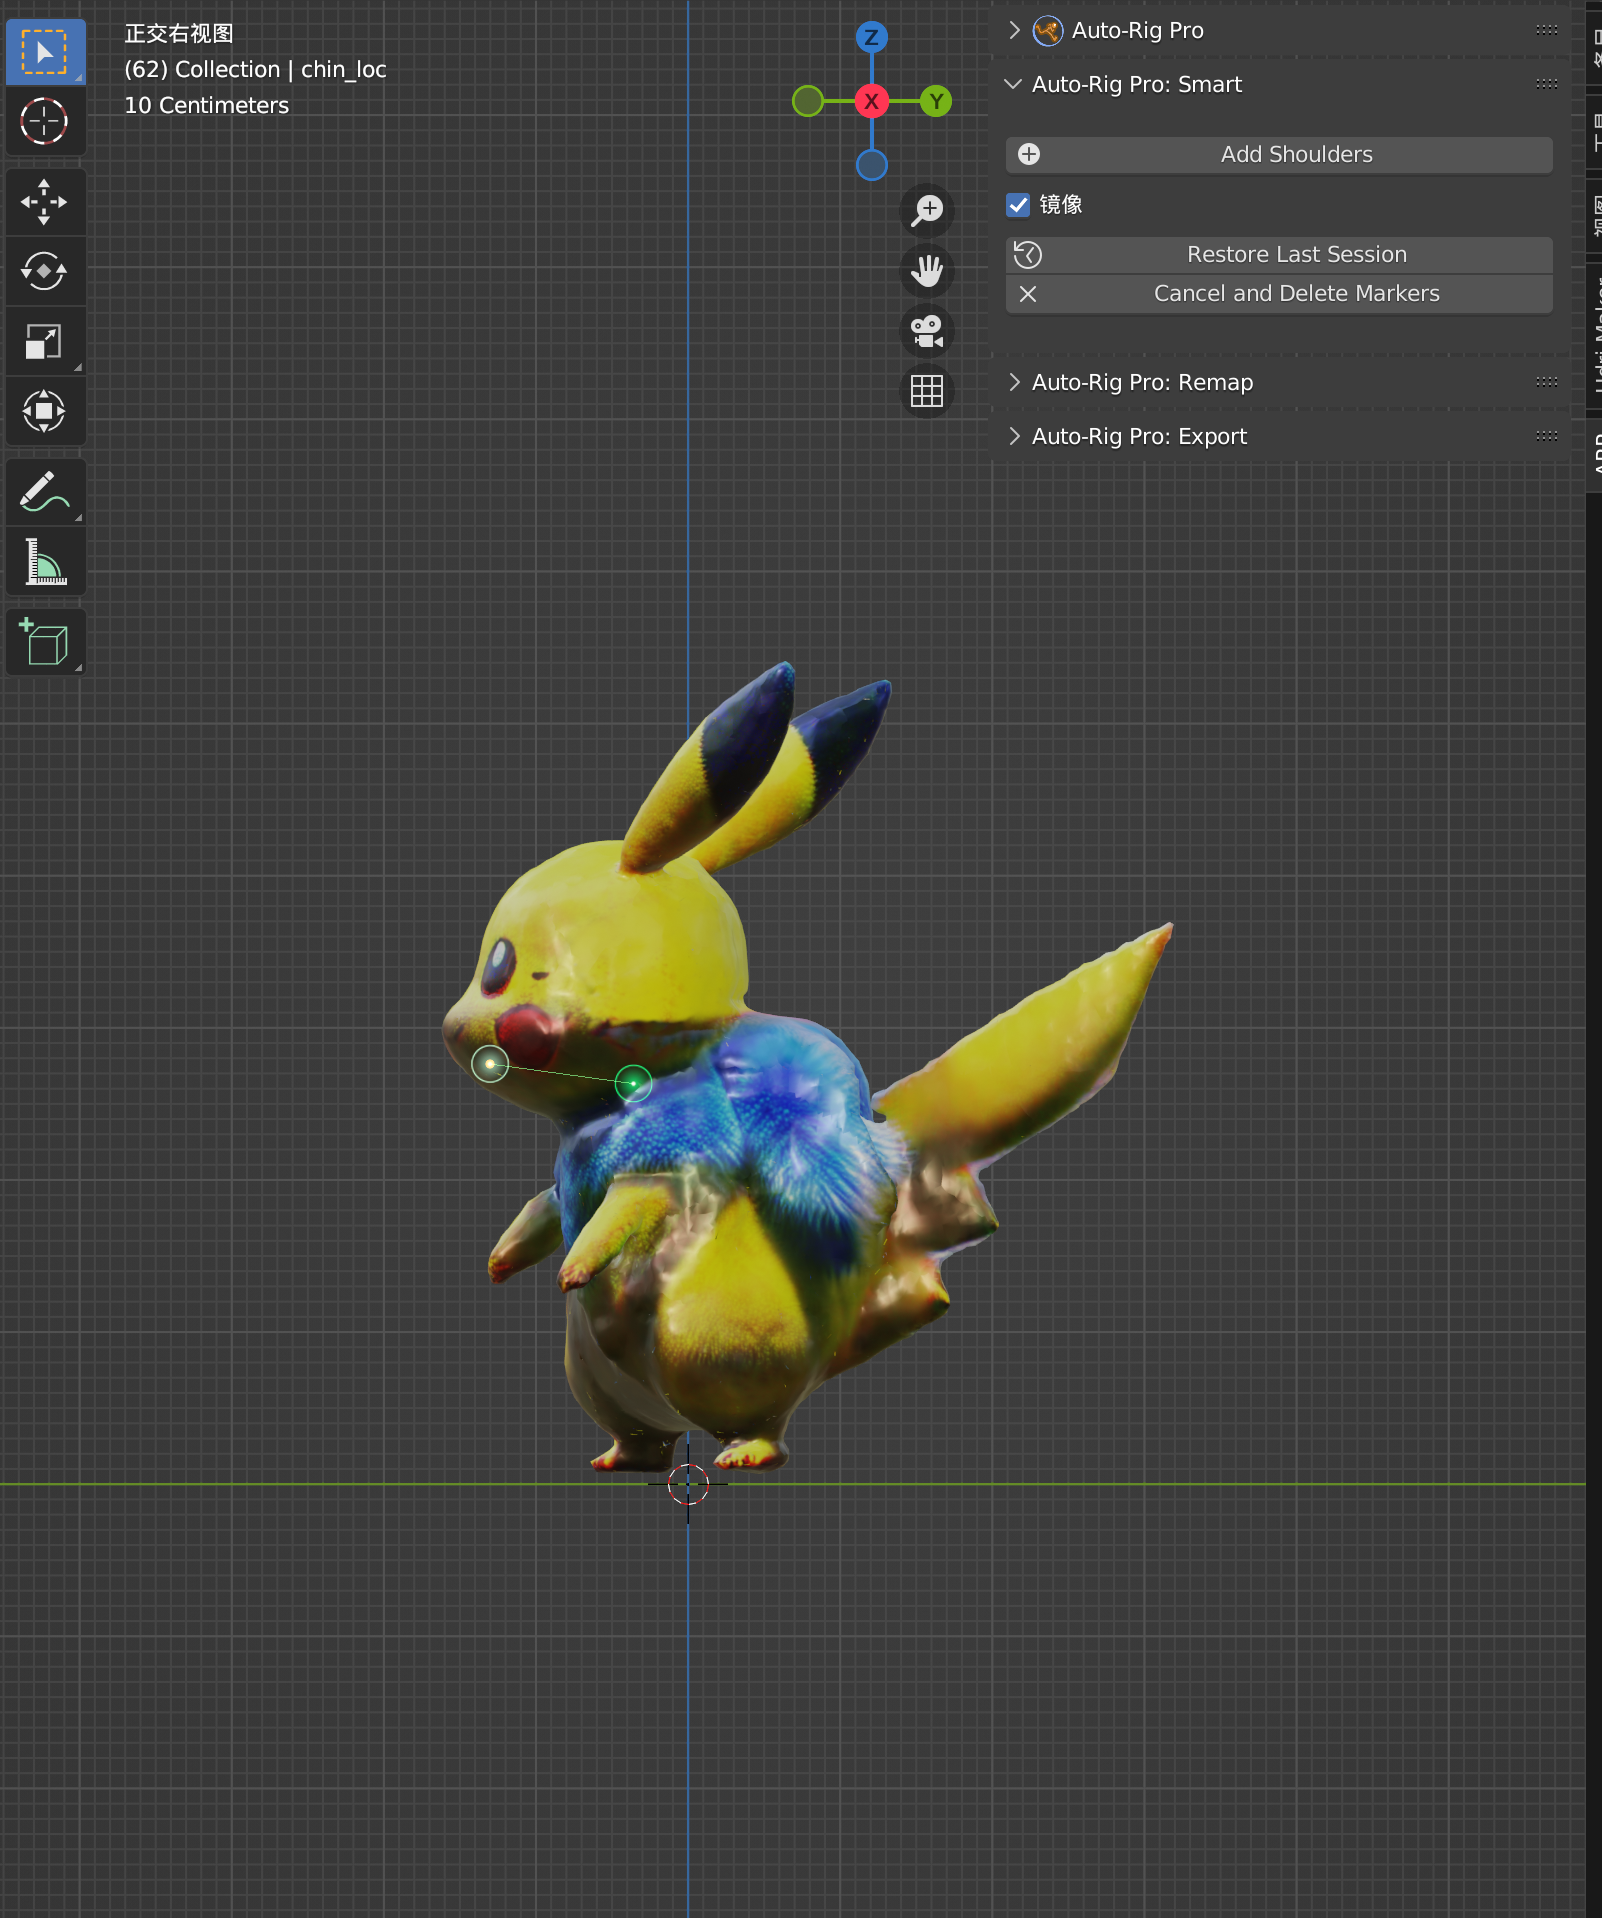 | 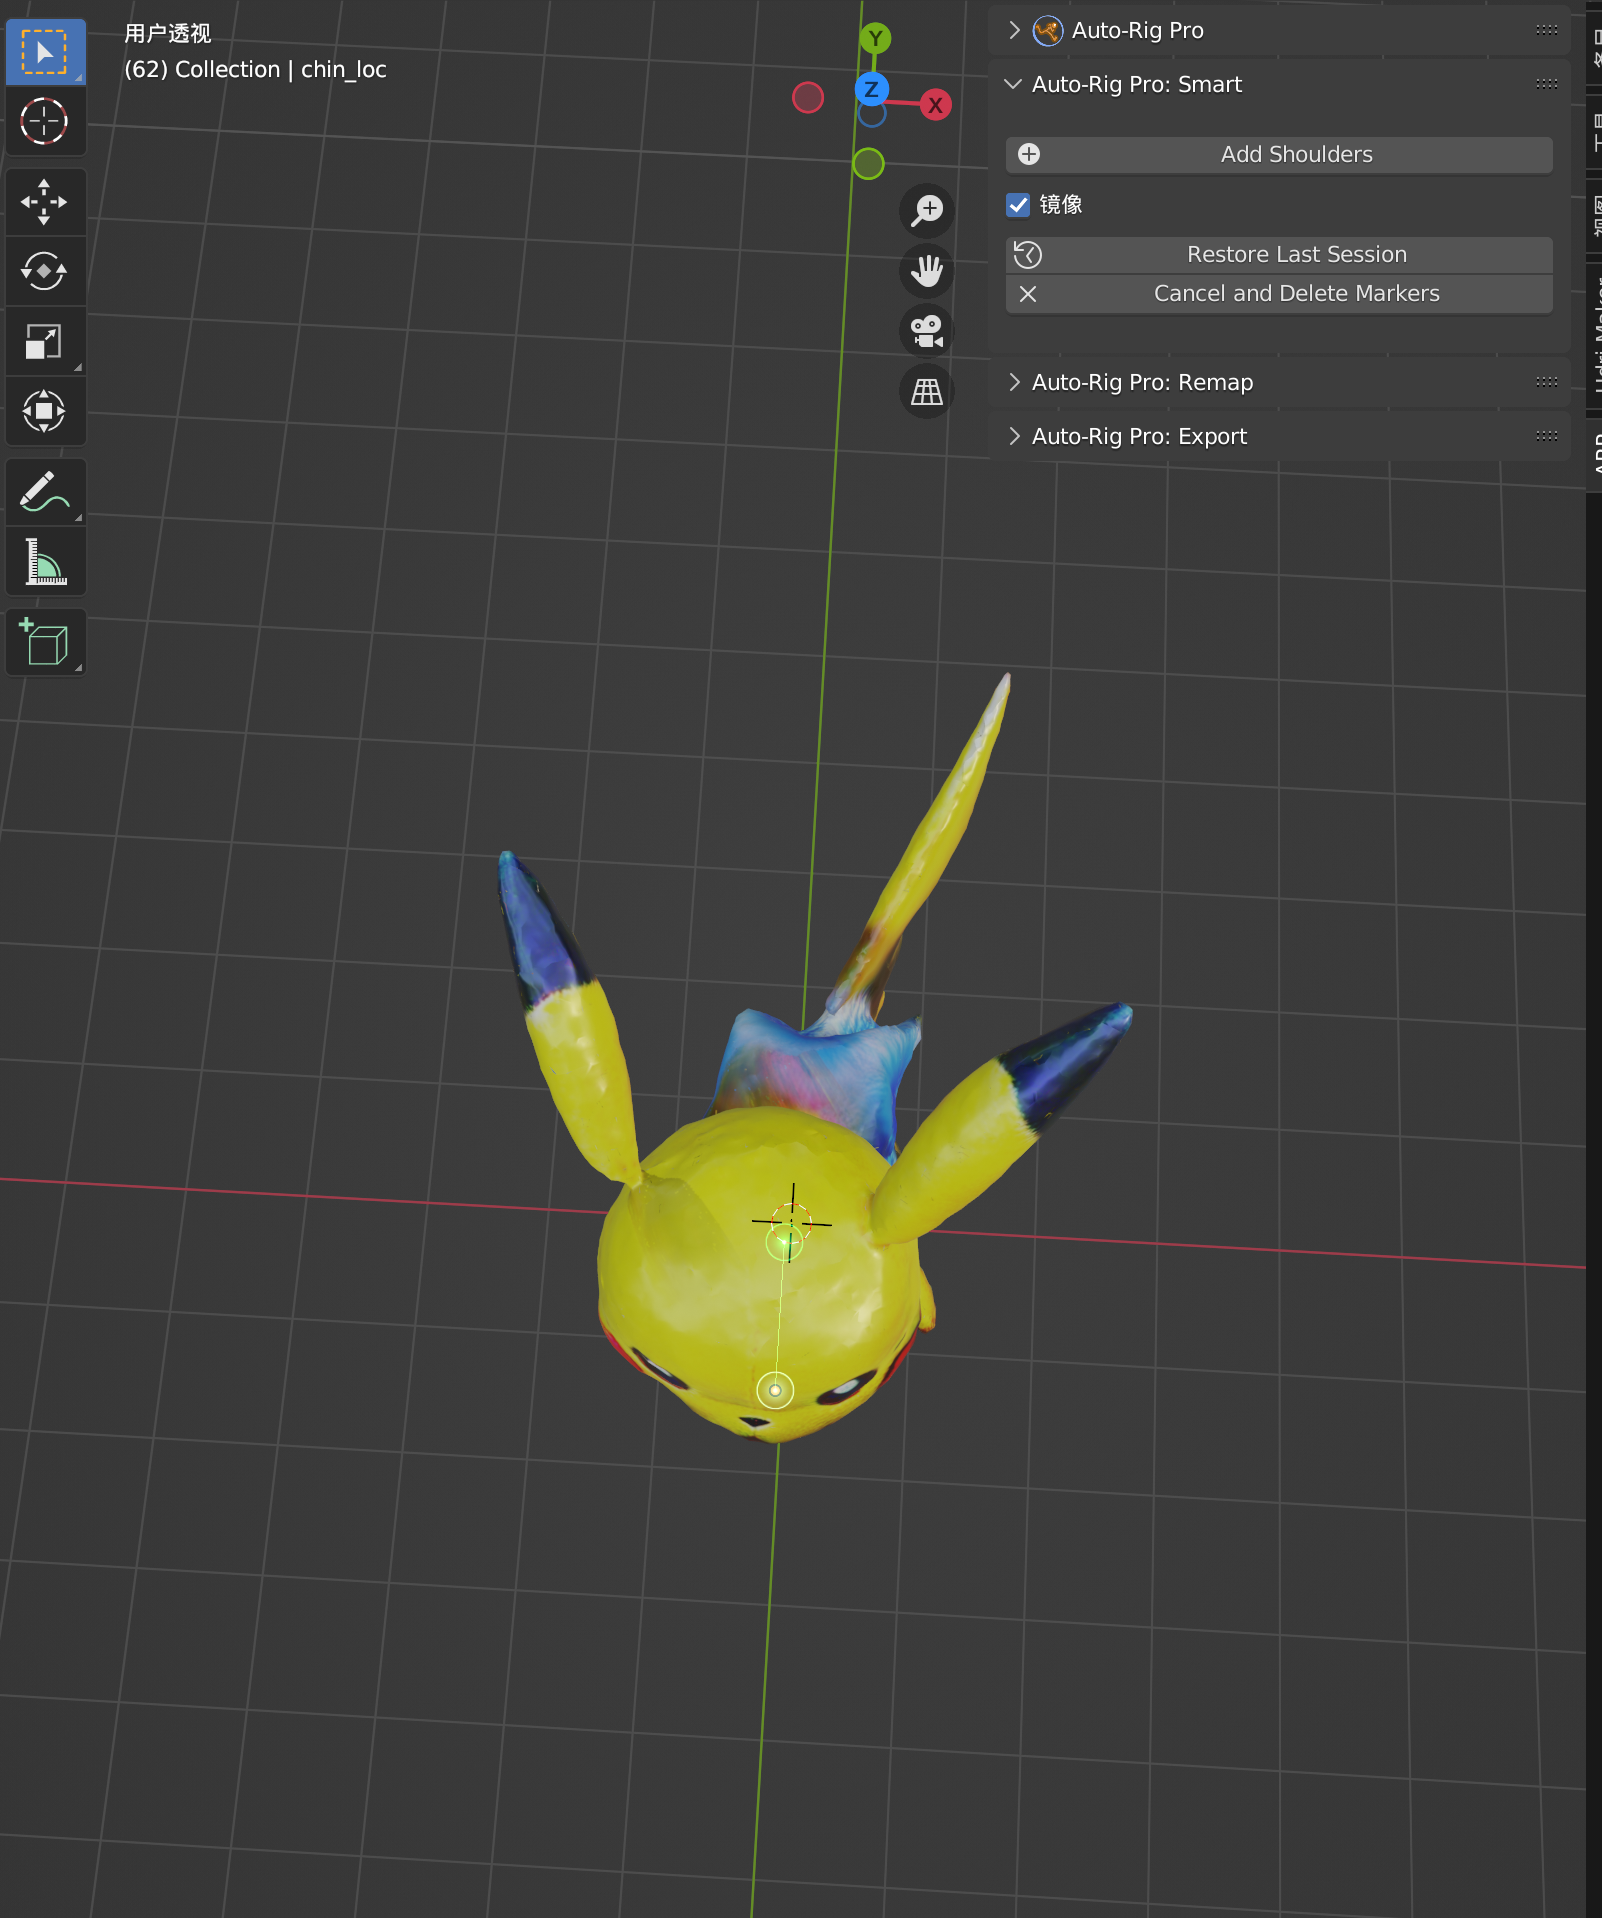 | 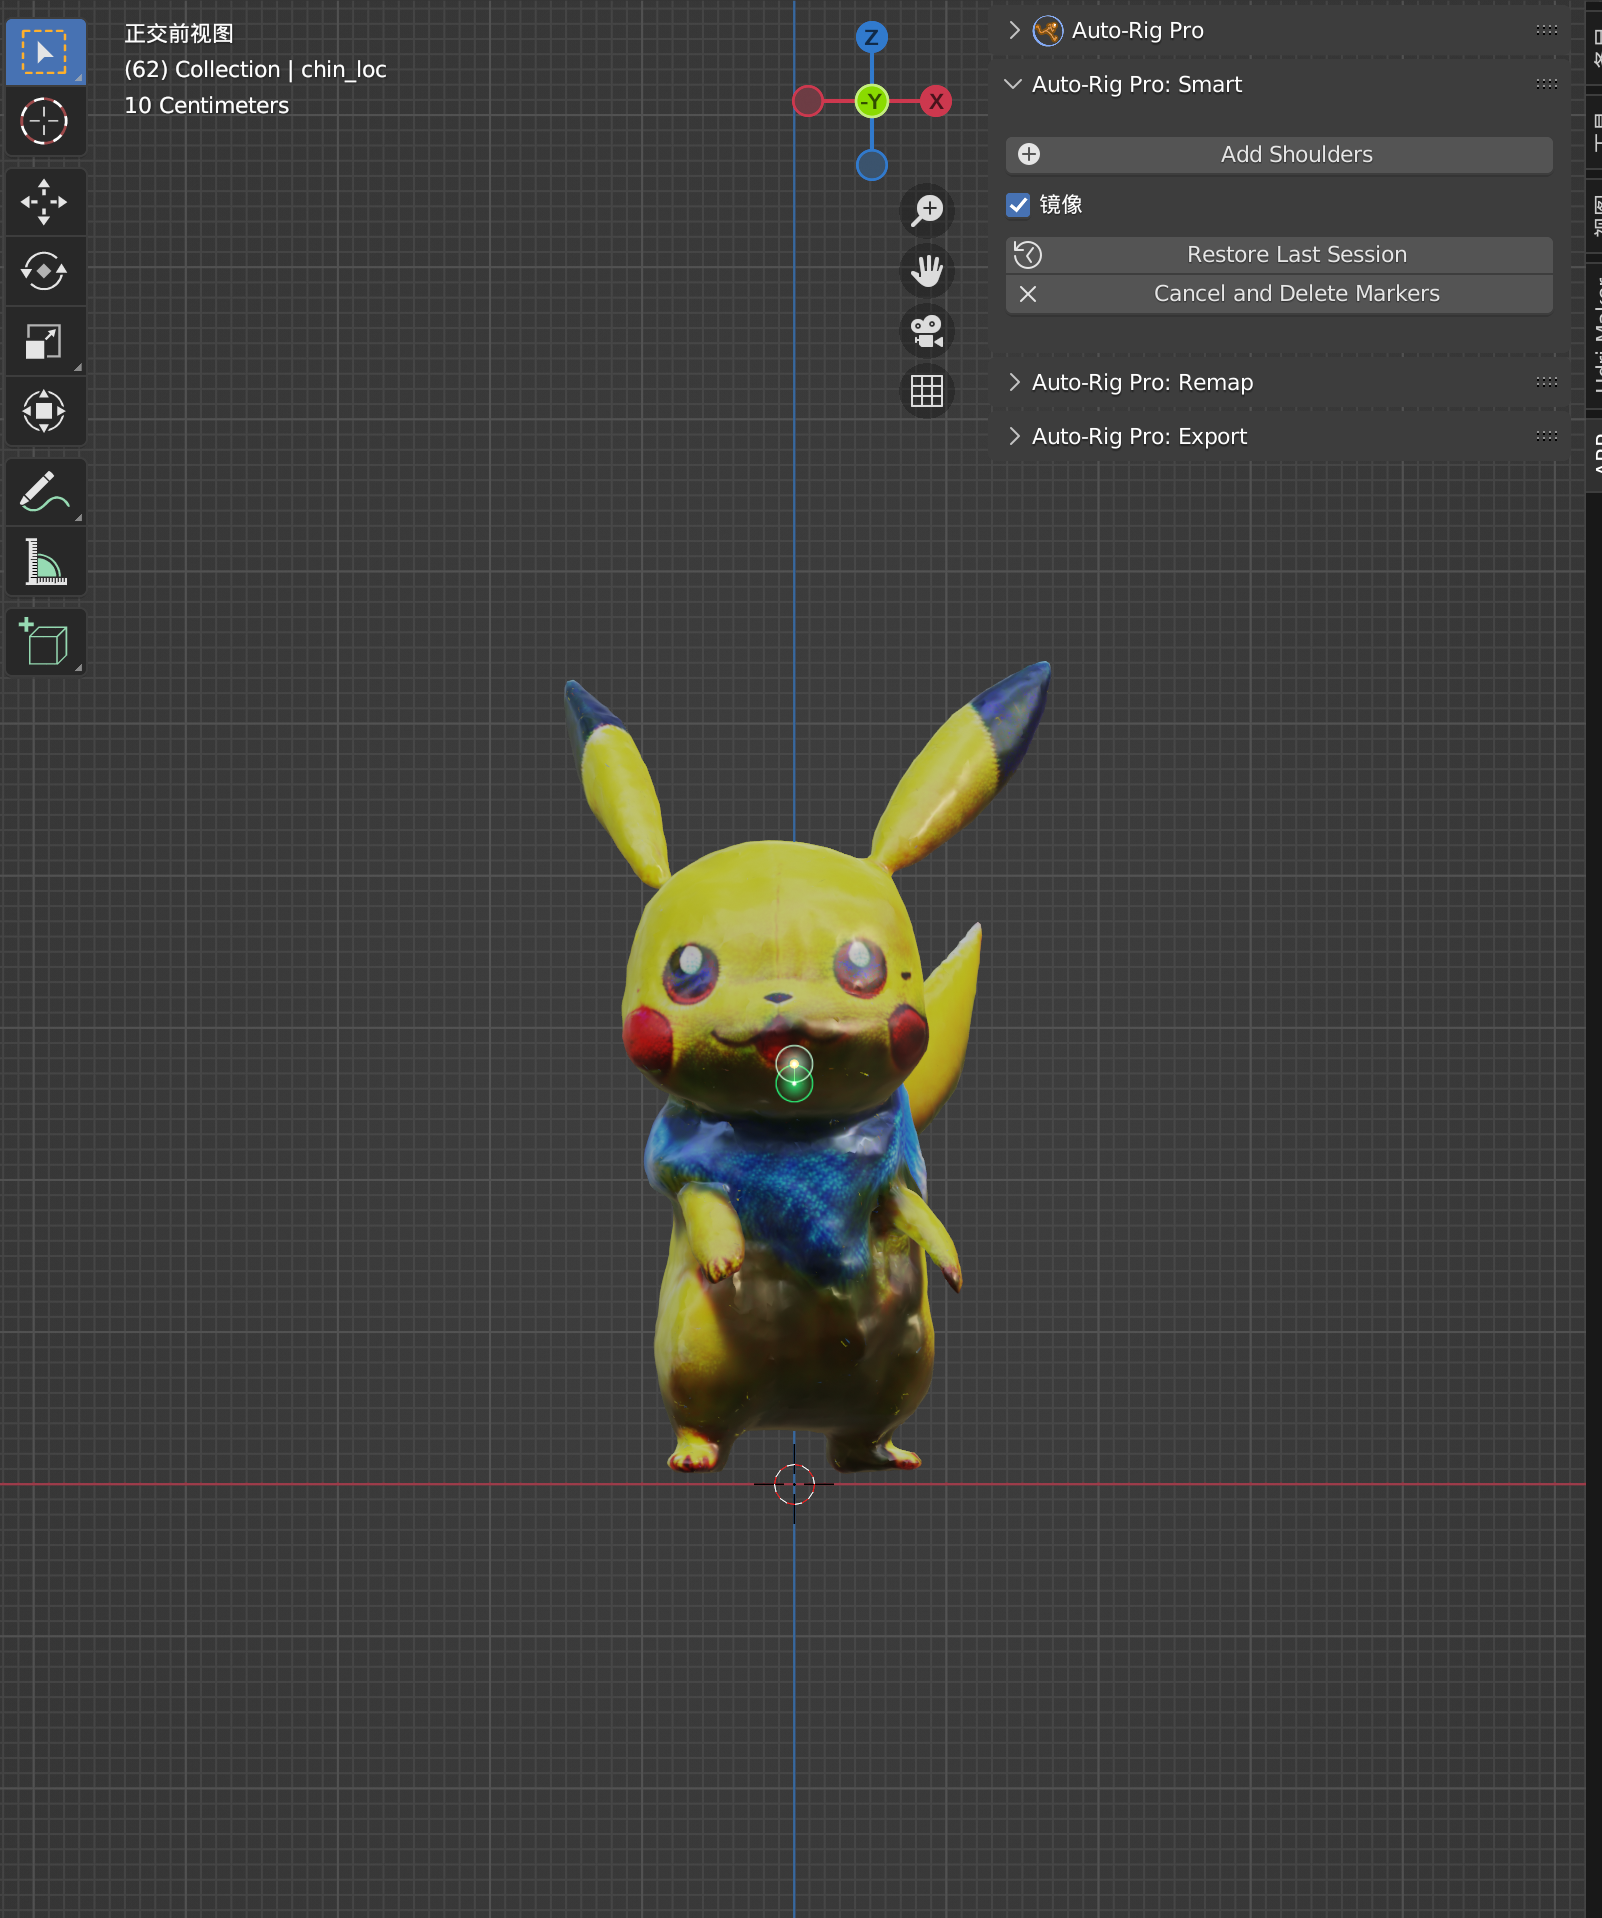 |
| Add Shoulders | 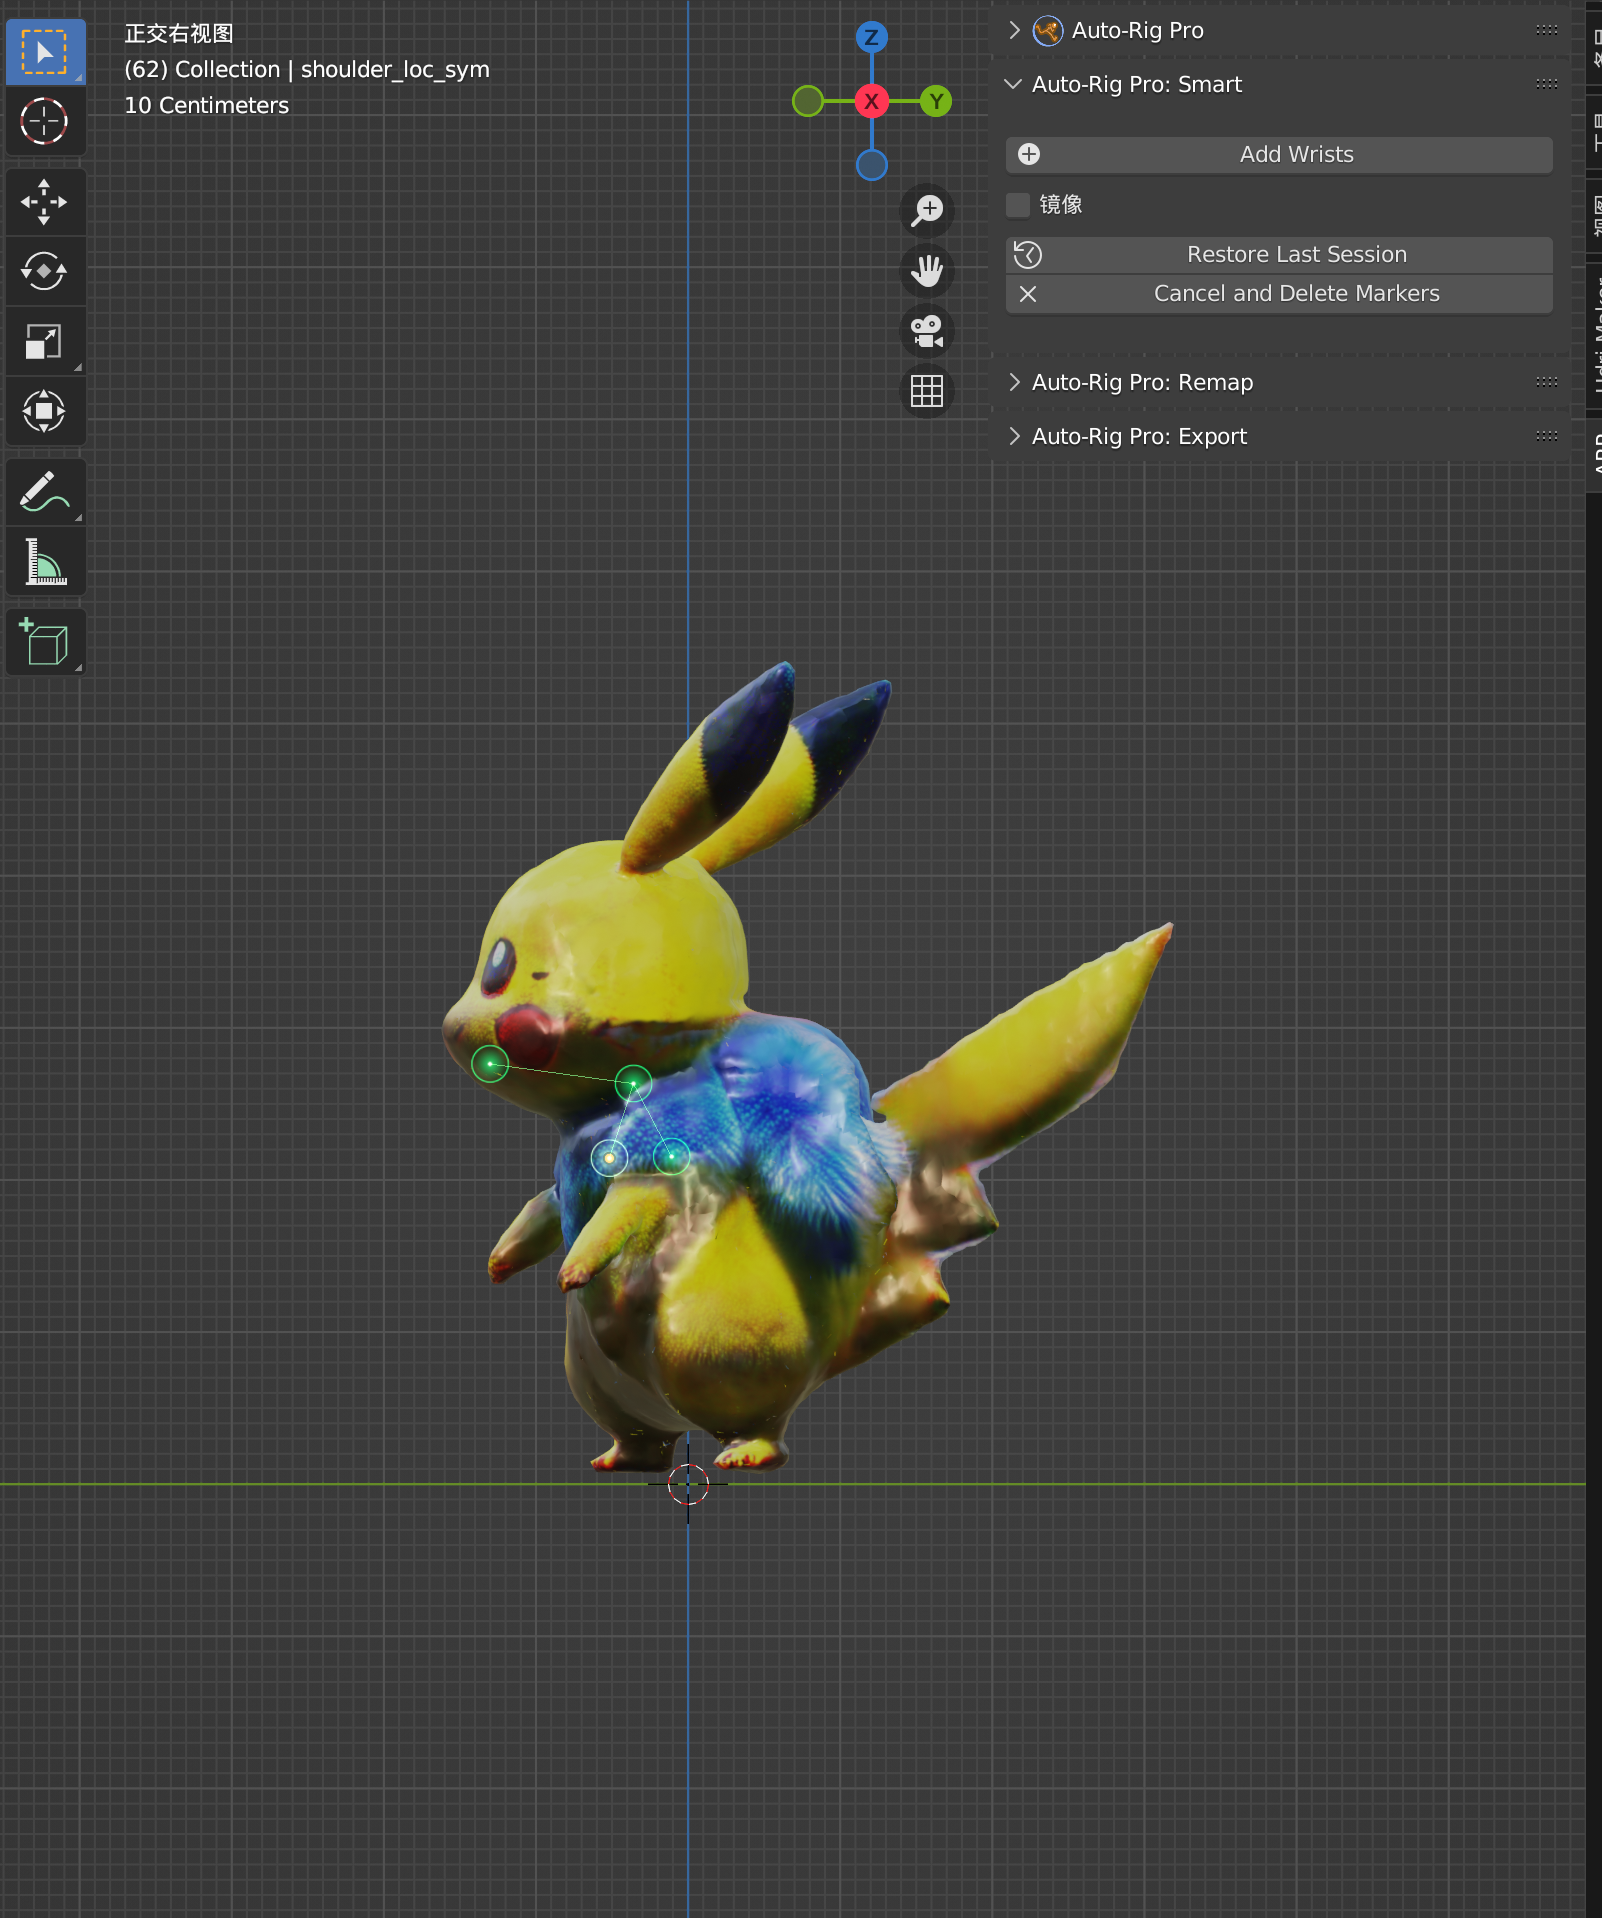 | 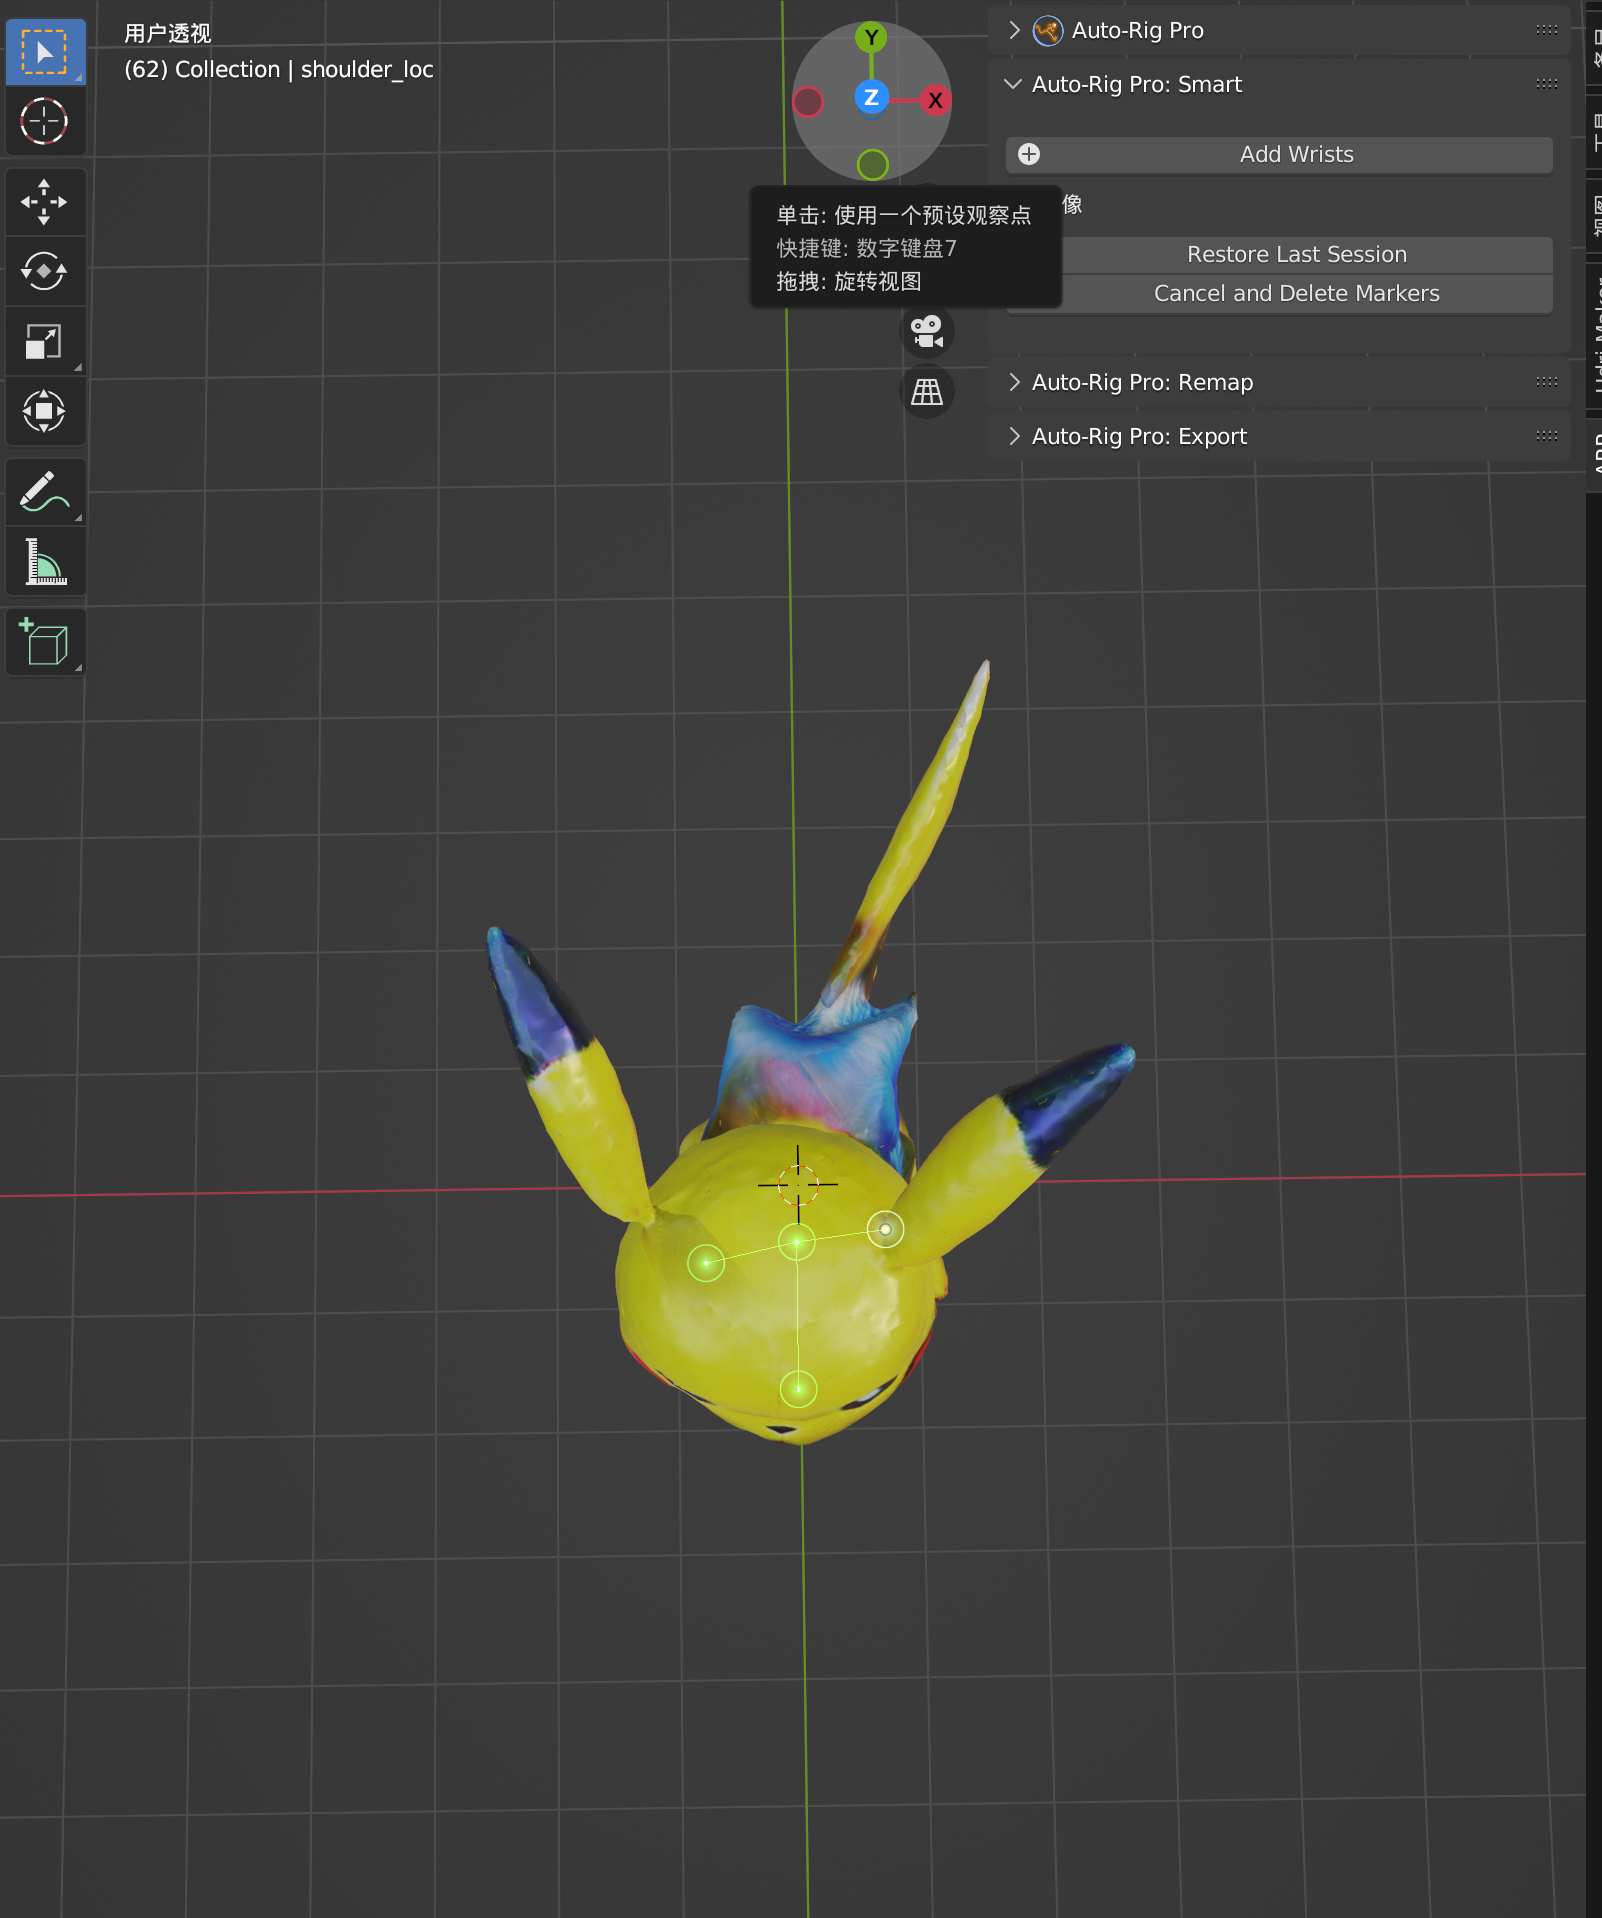 | 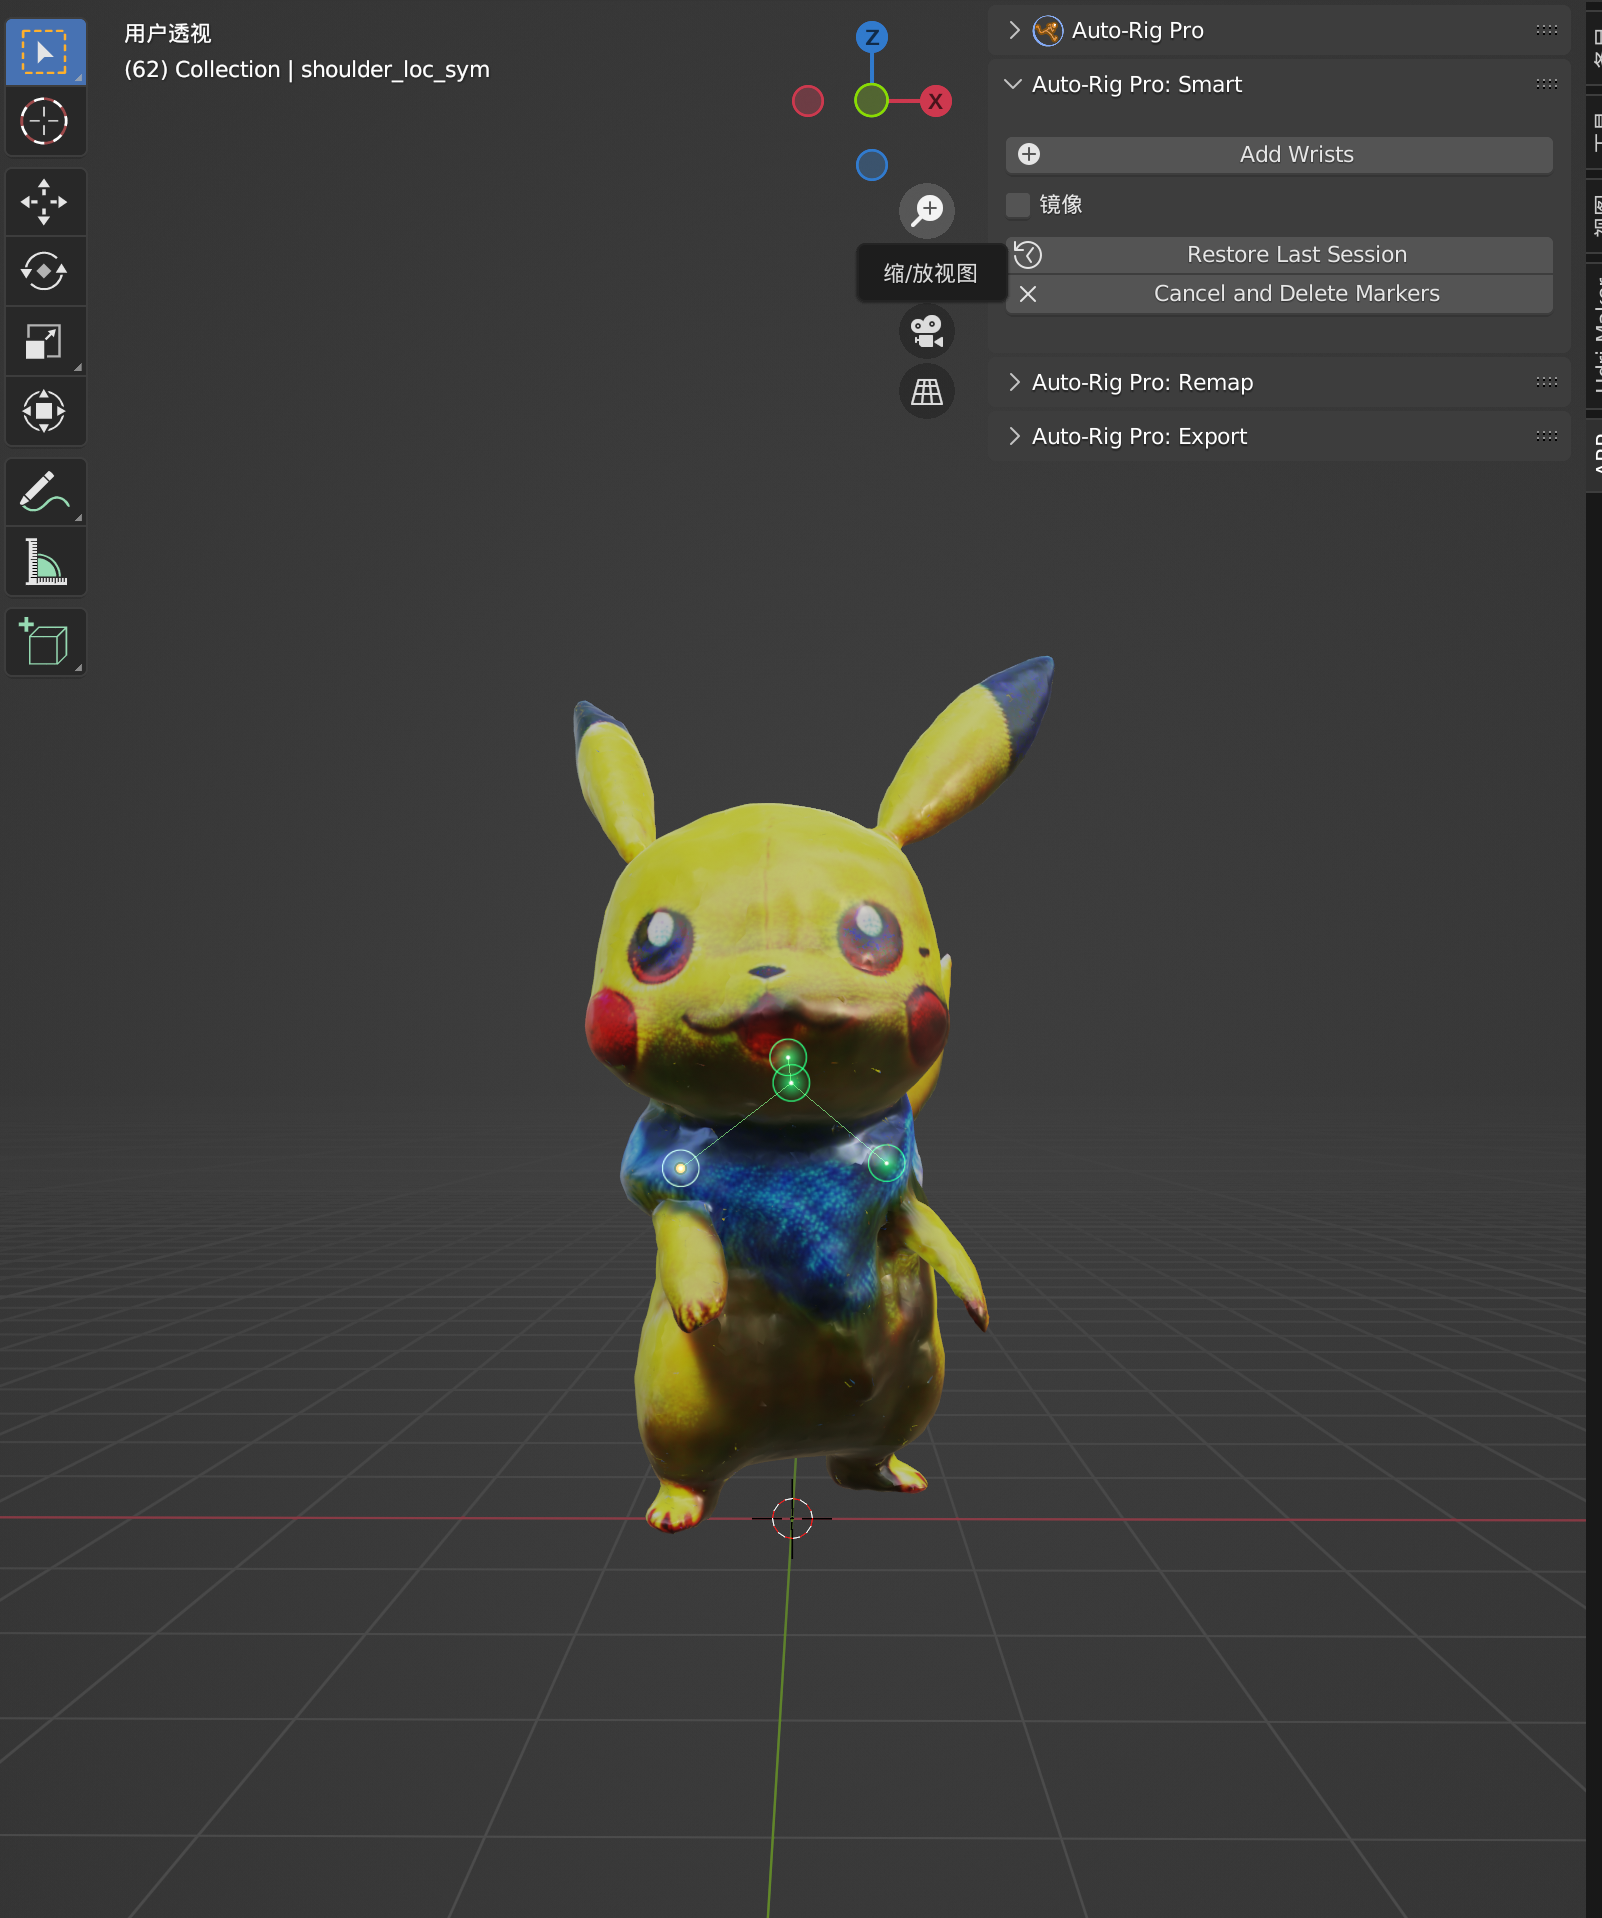 |
| Add Wrists | 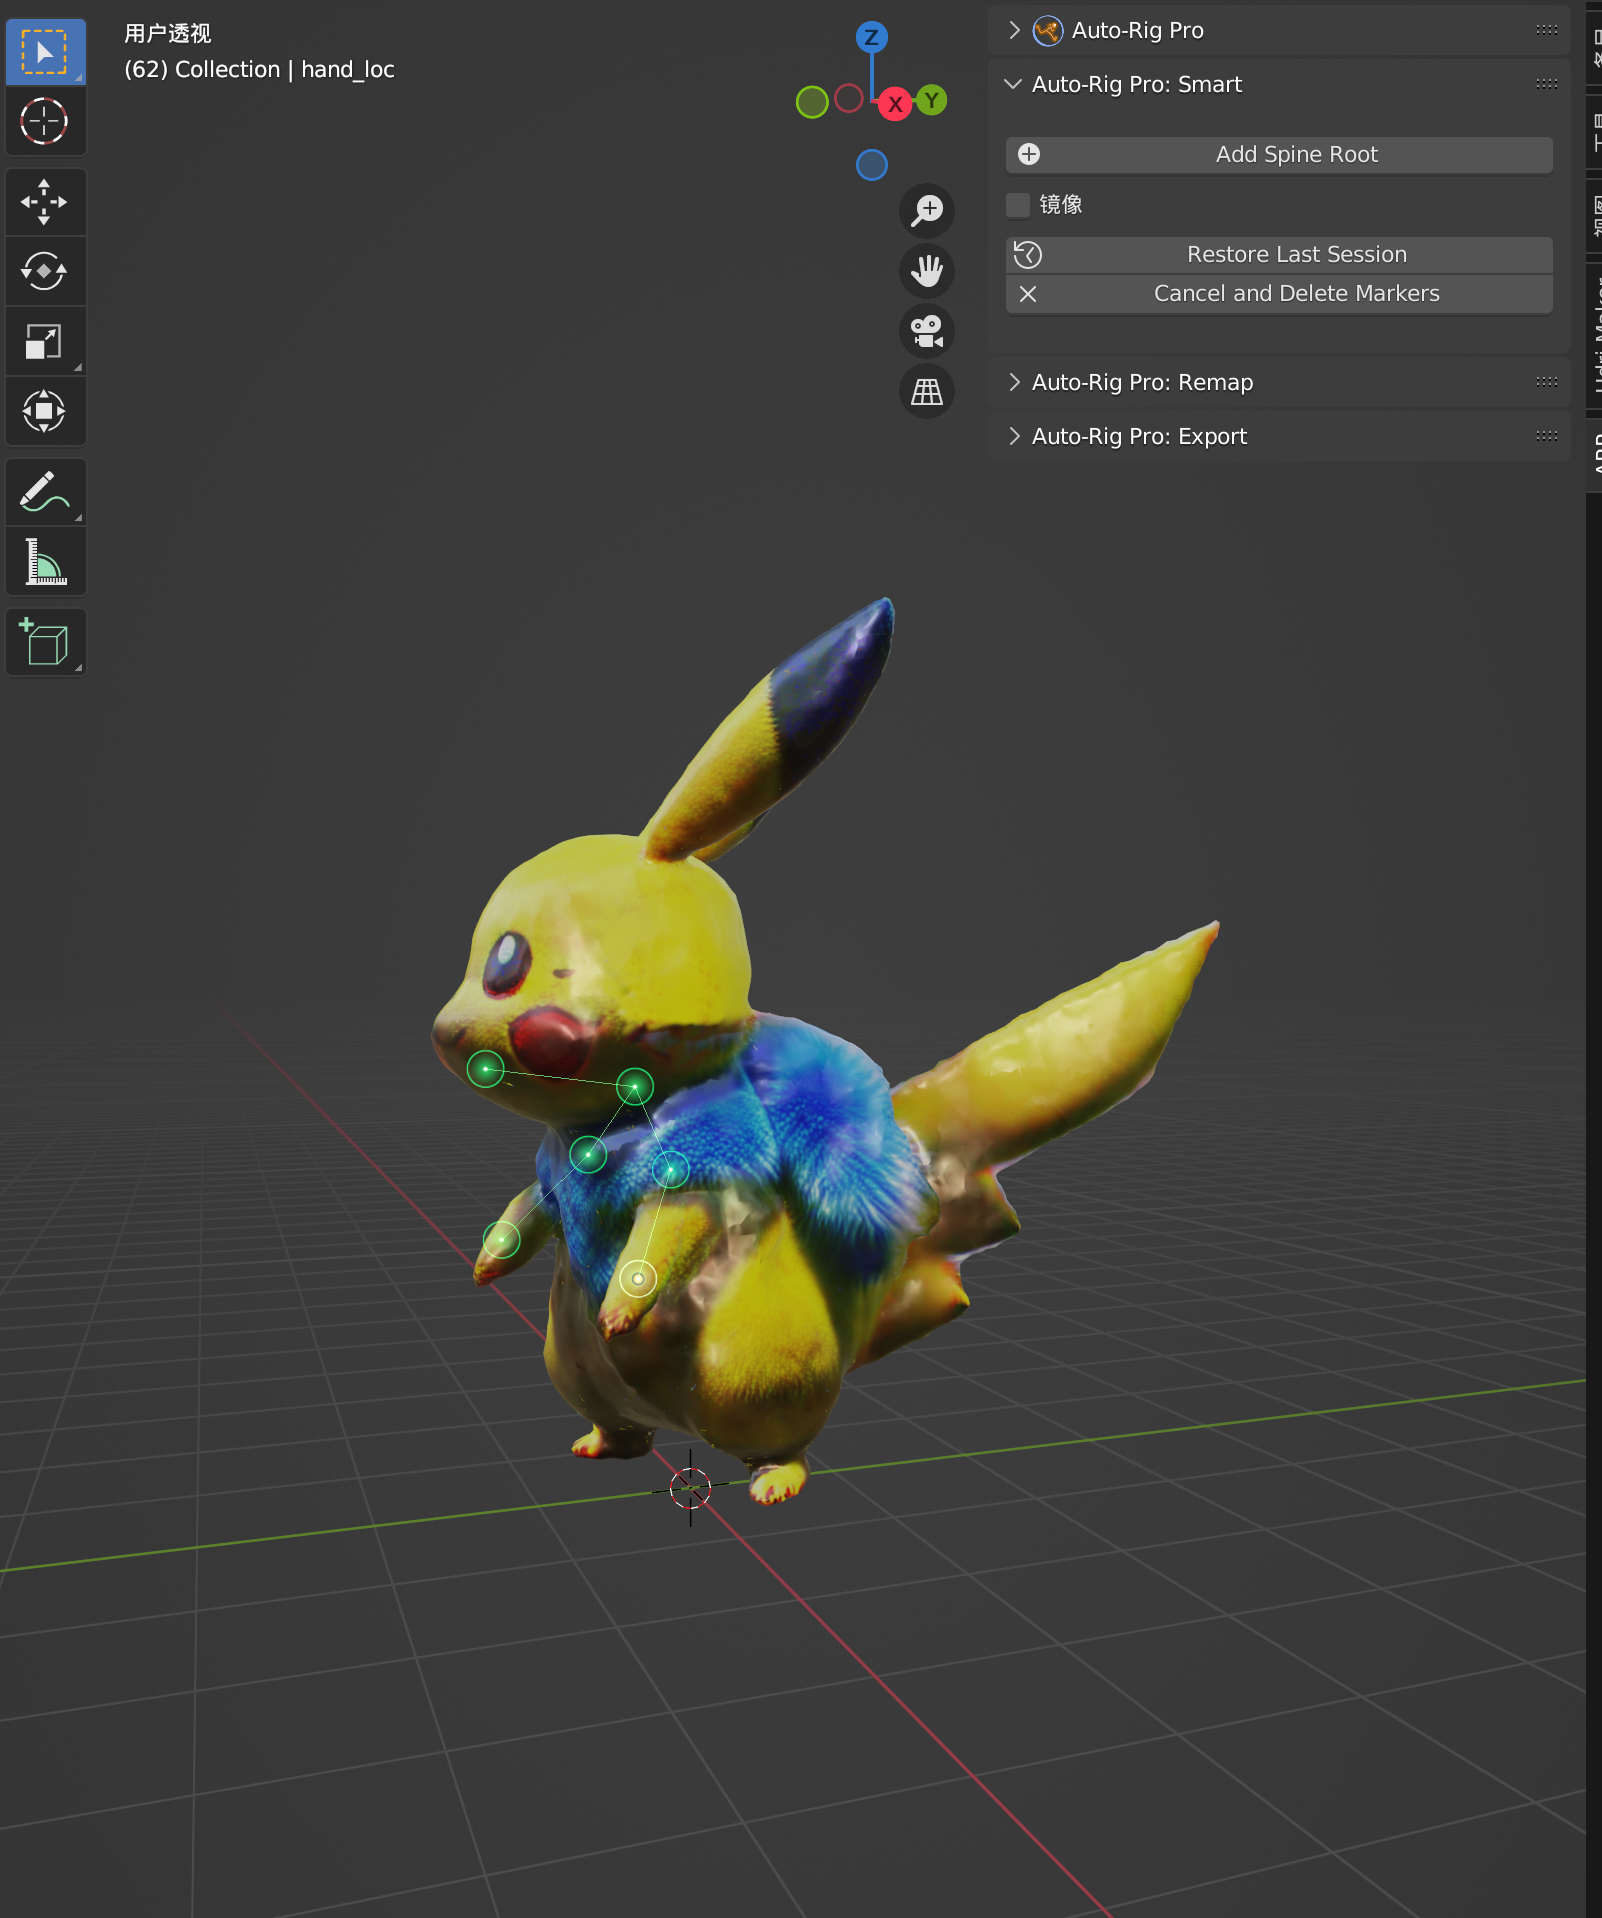 | 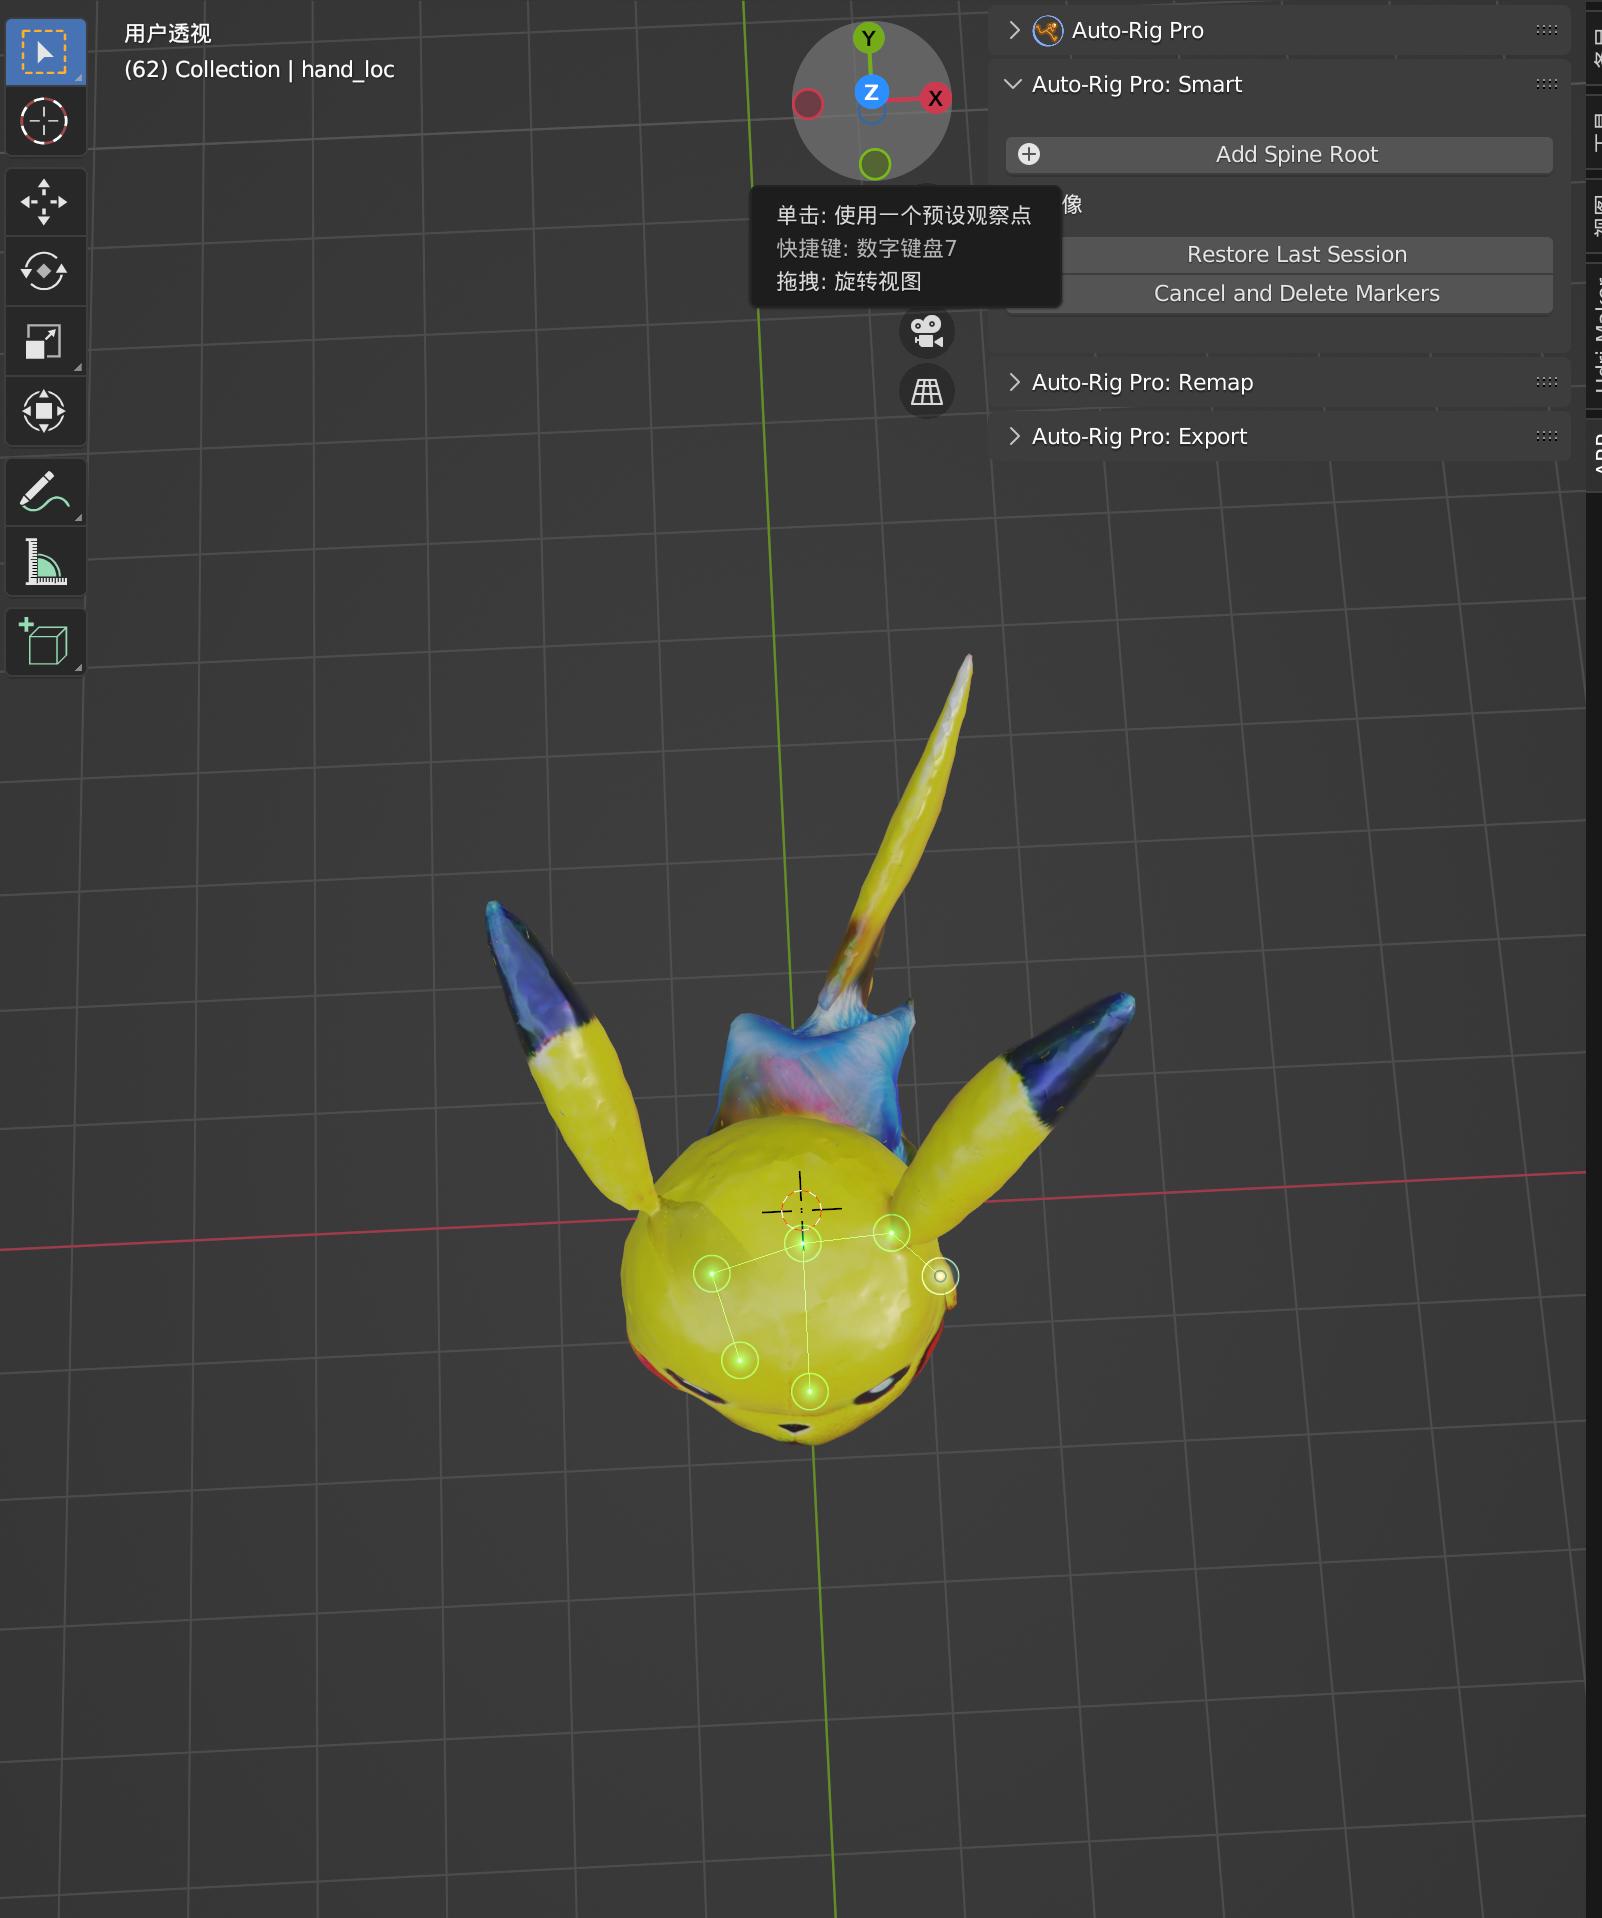 | 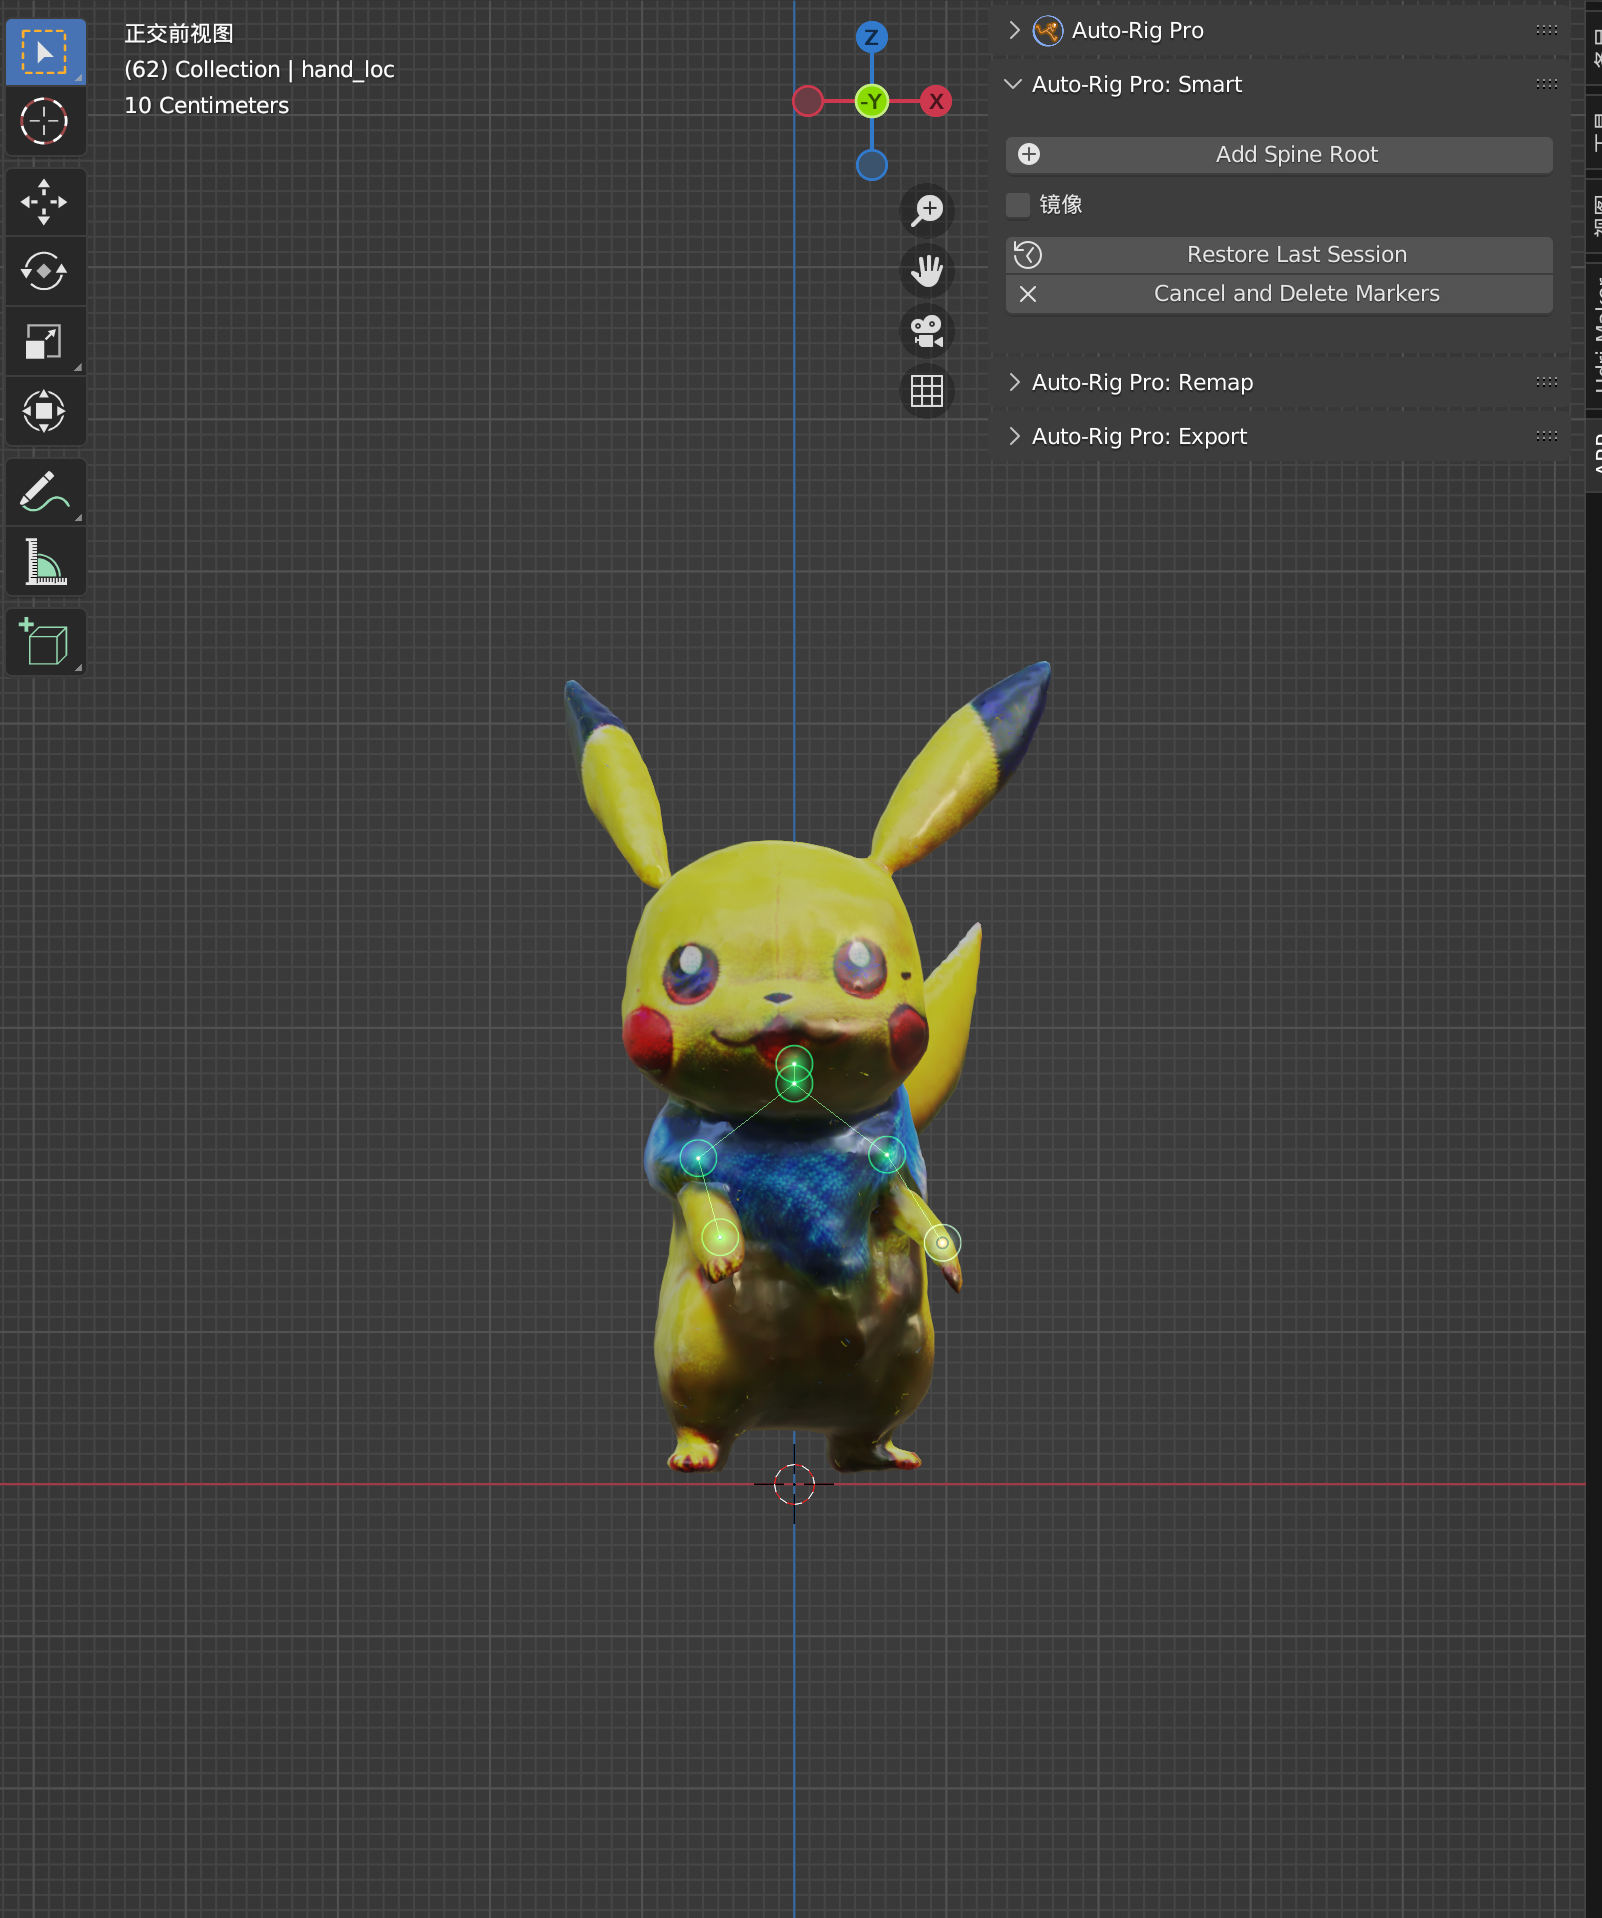 |
| Add Spine Root | 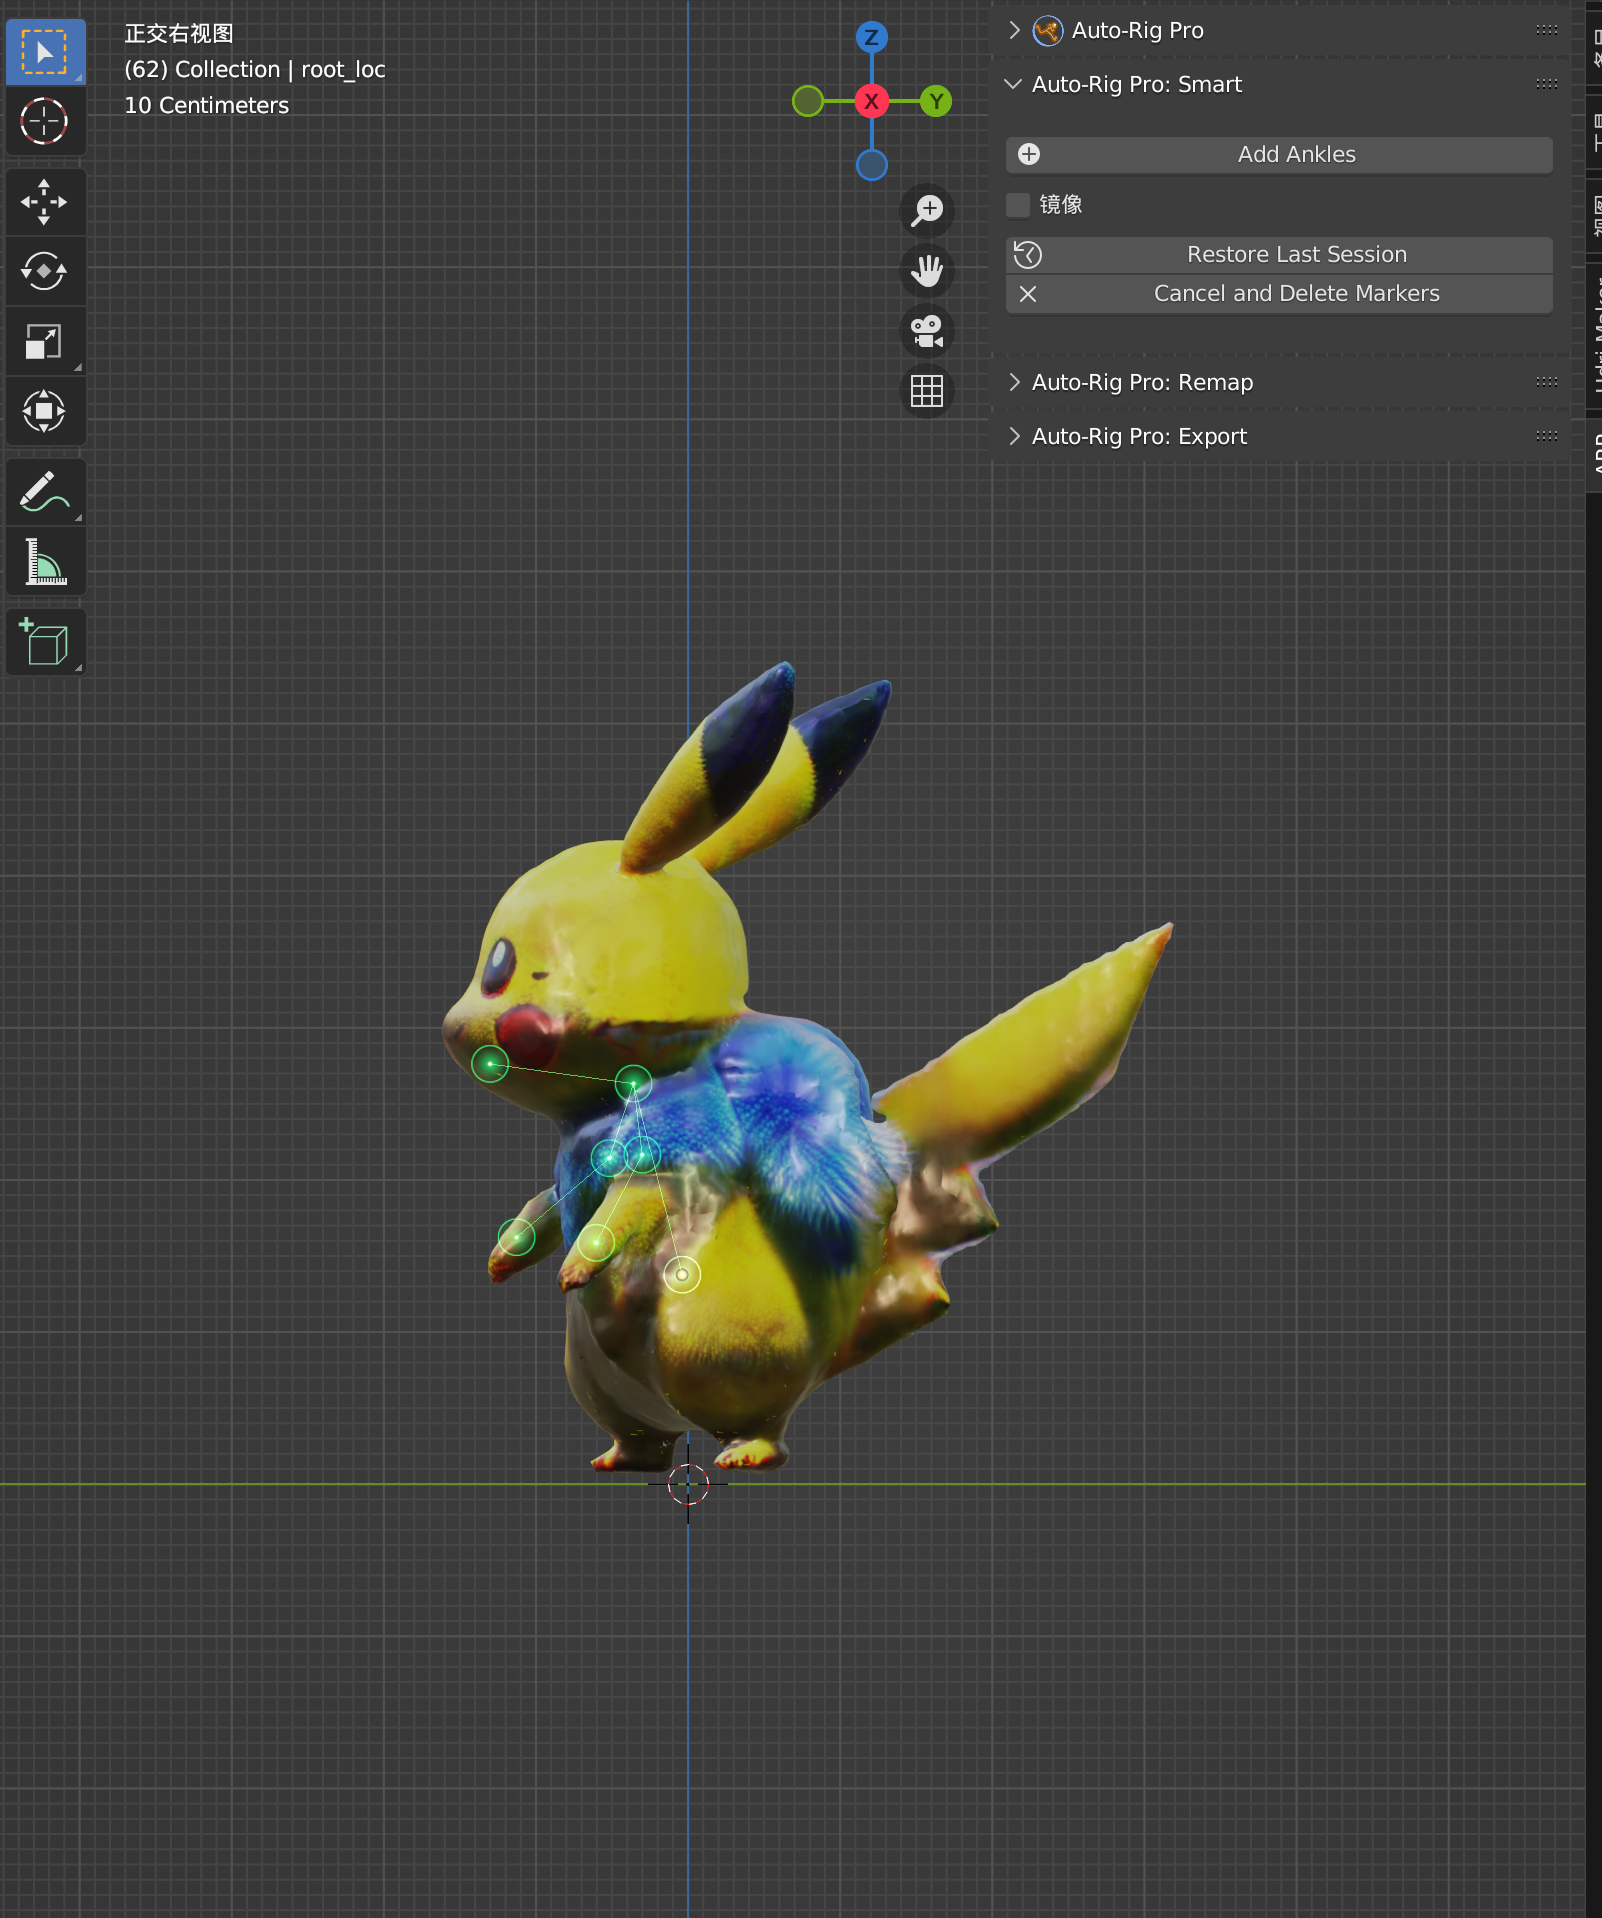 | 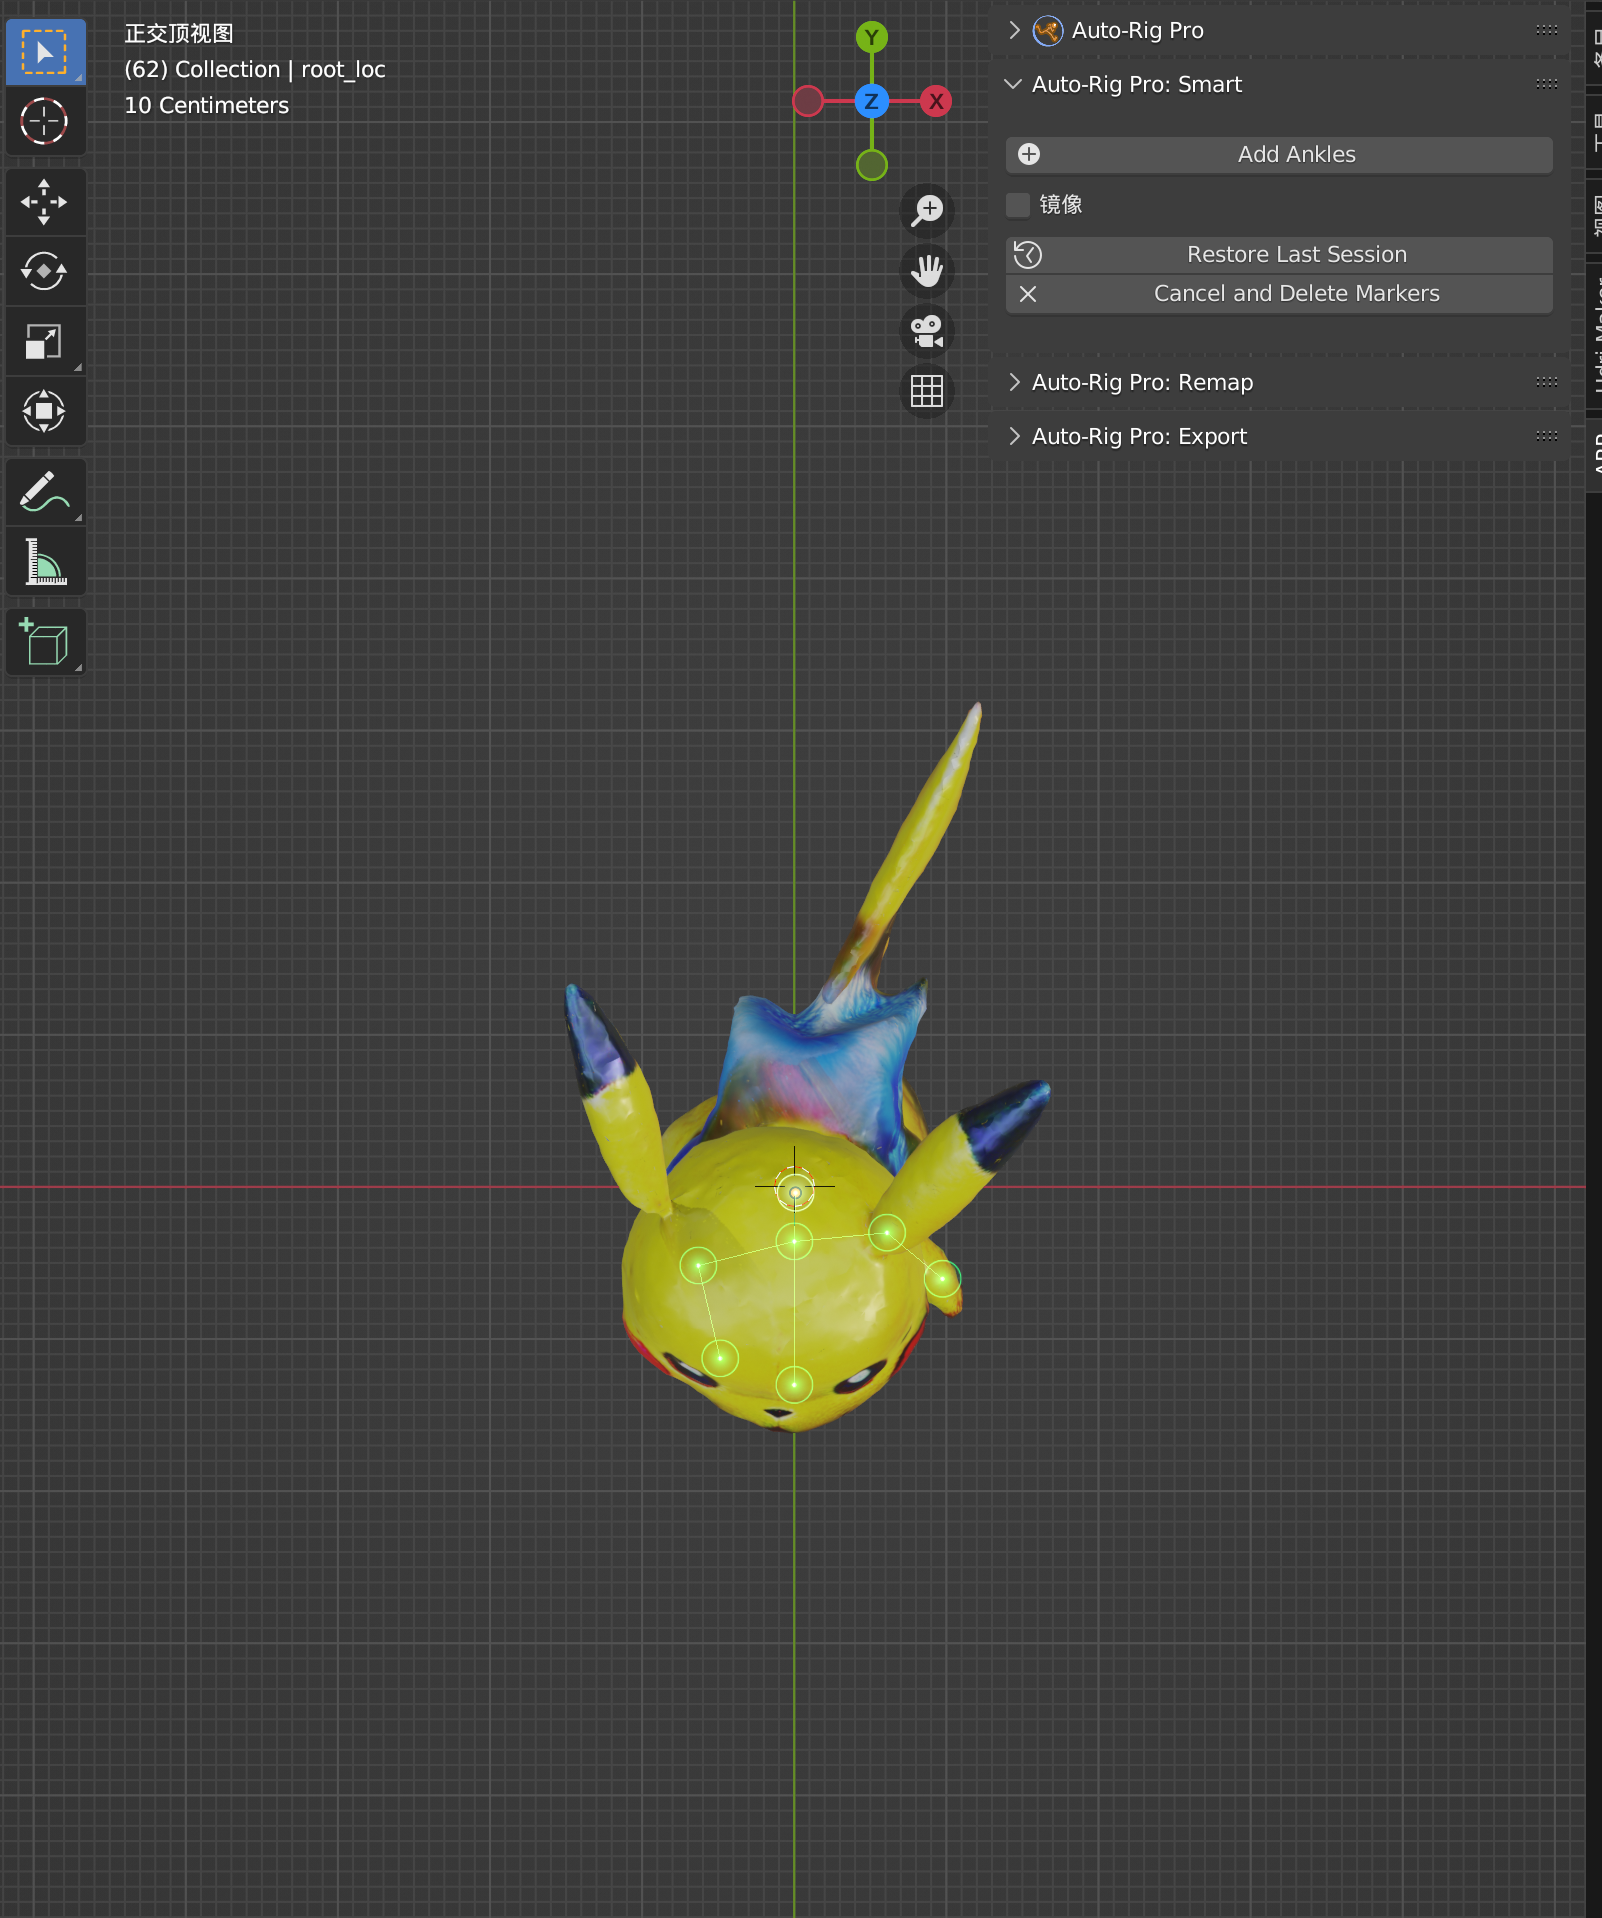 | 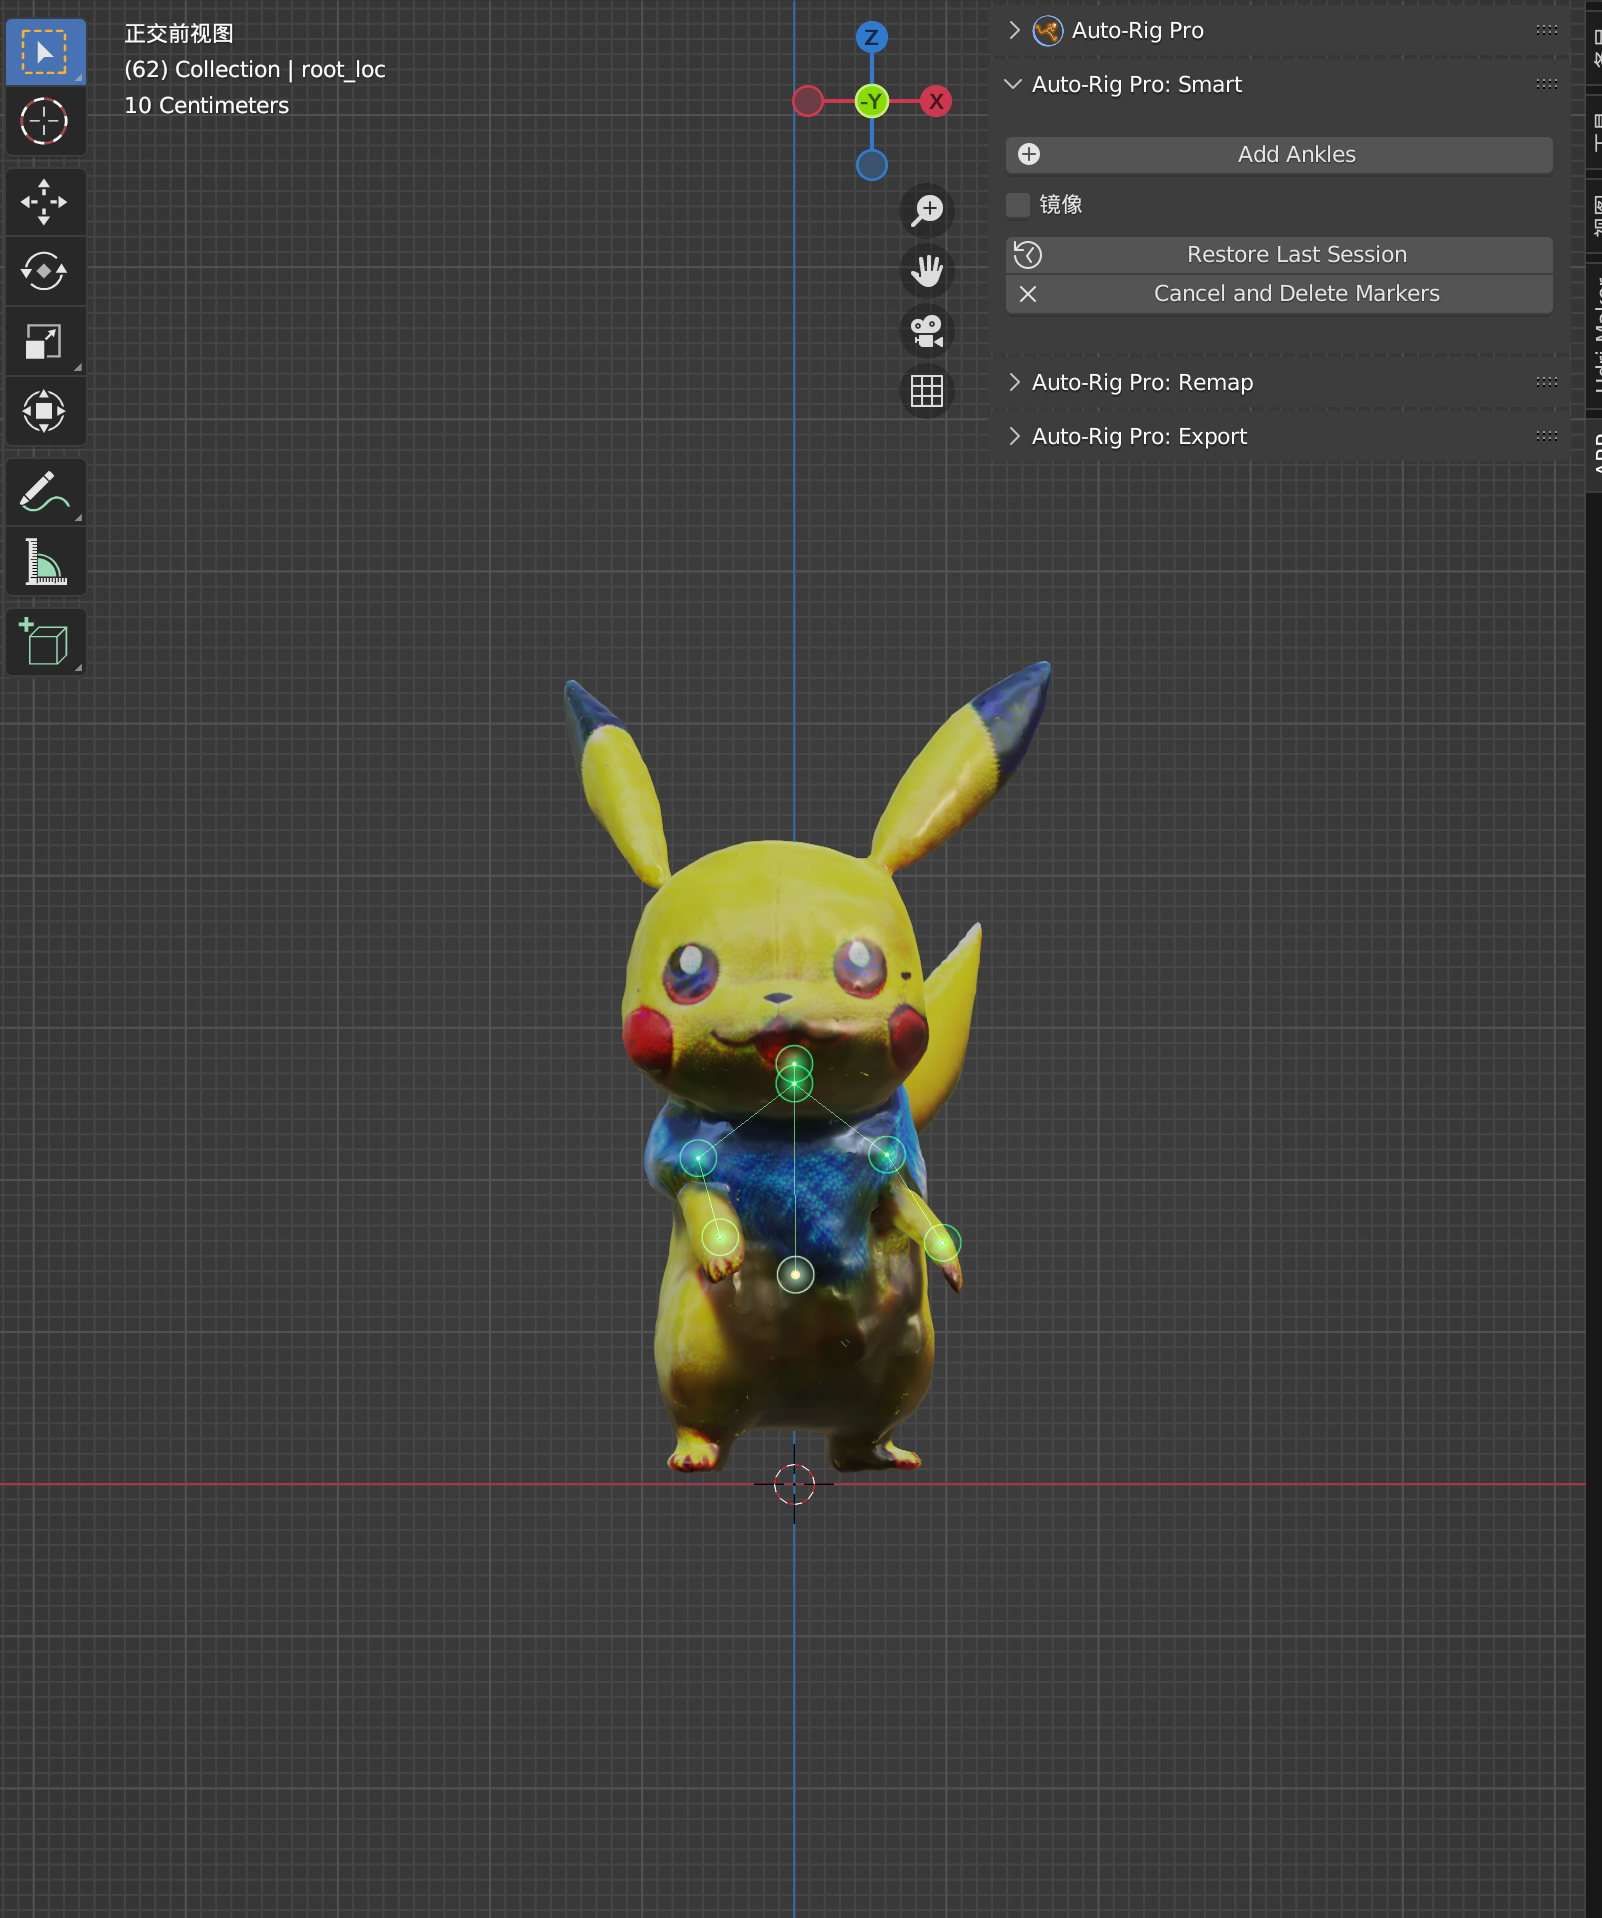 |
| Add Ankles | 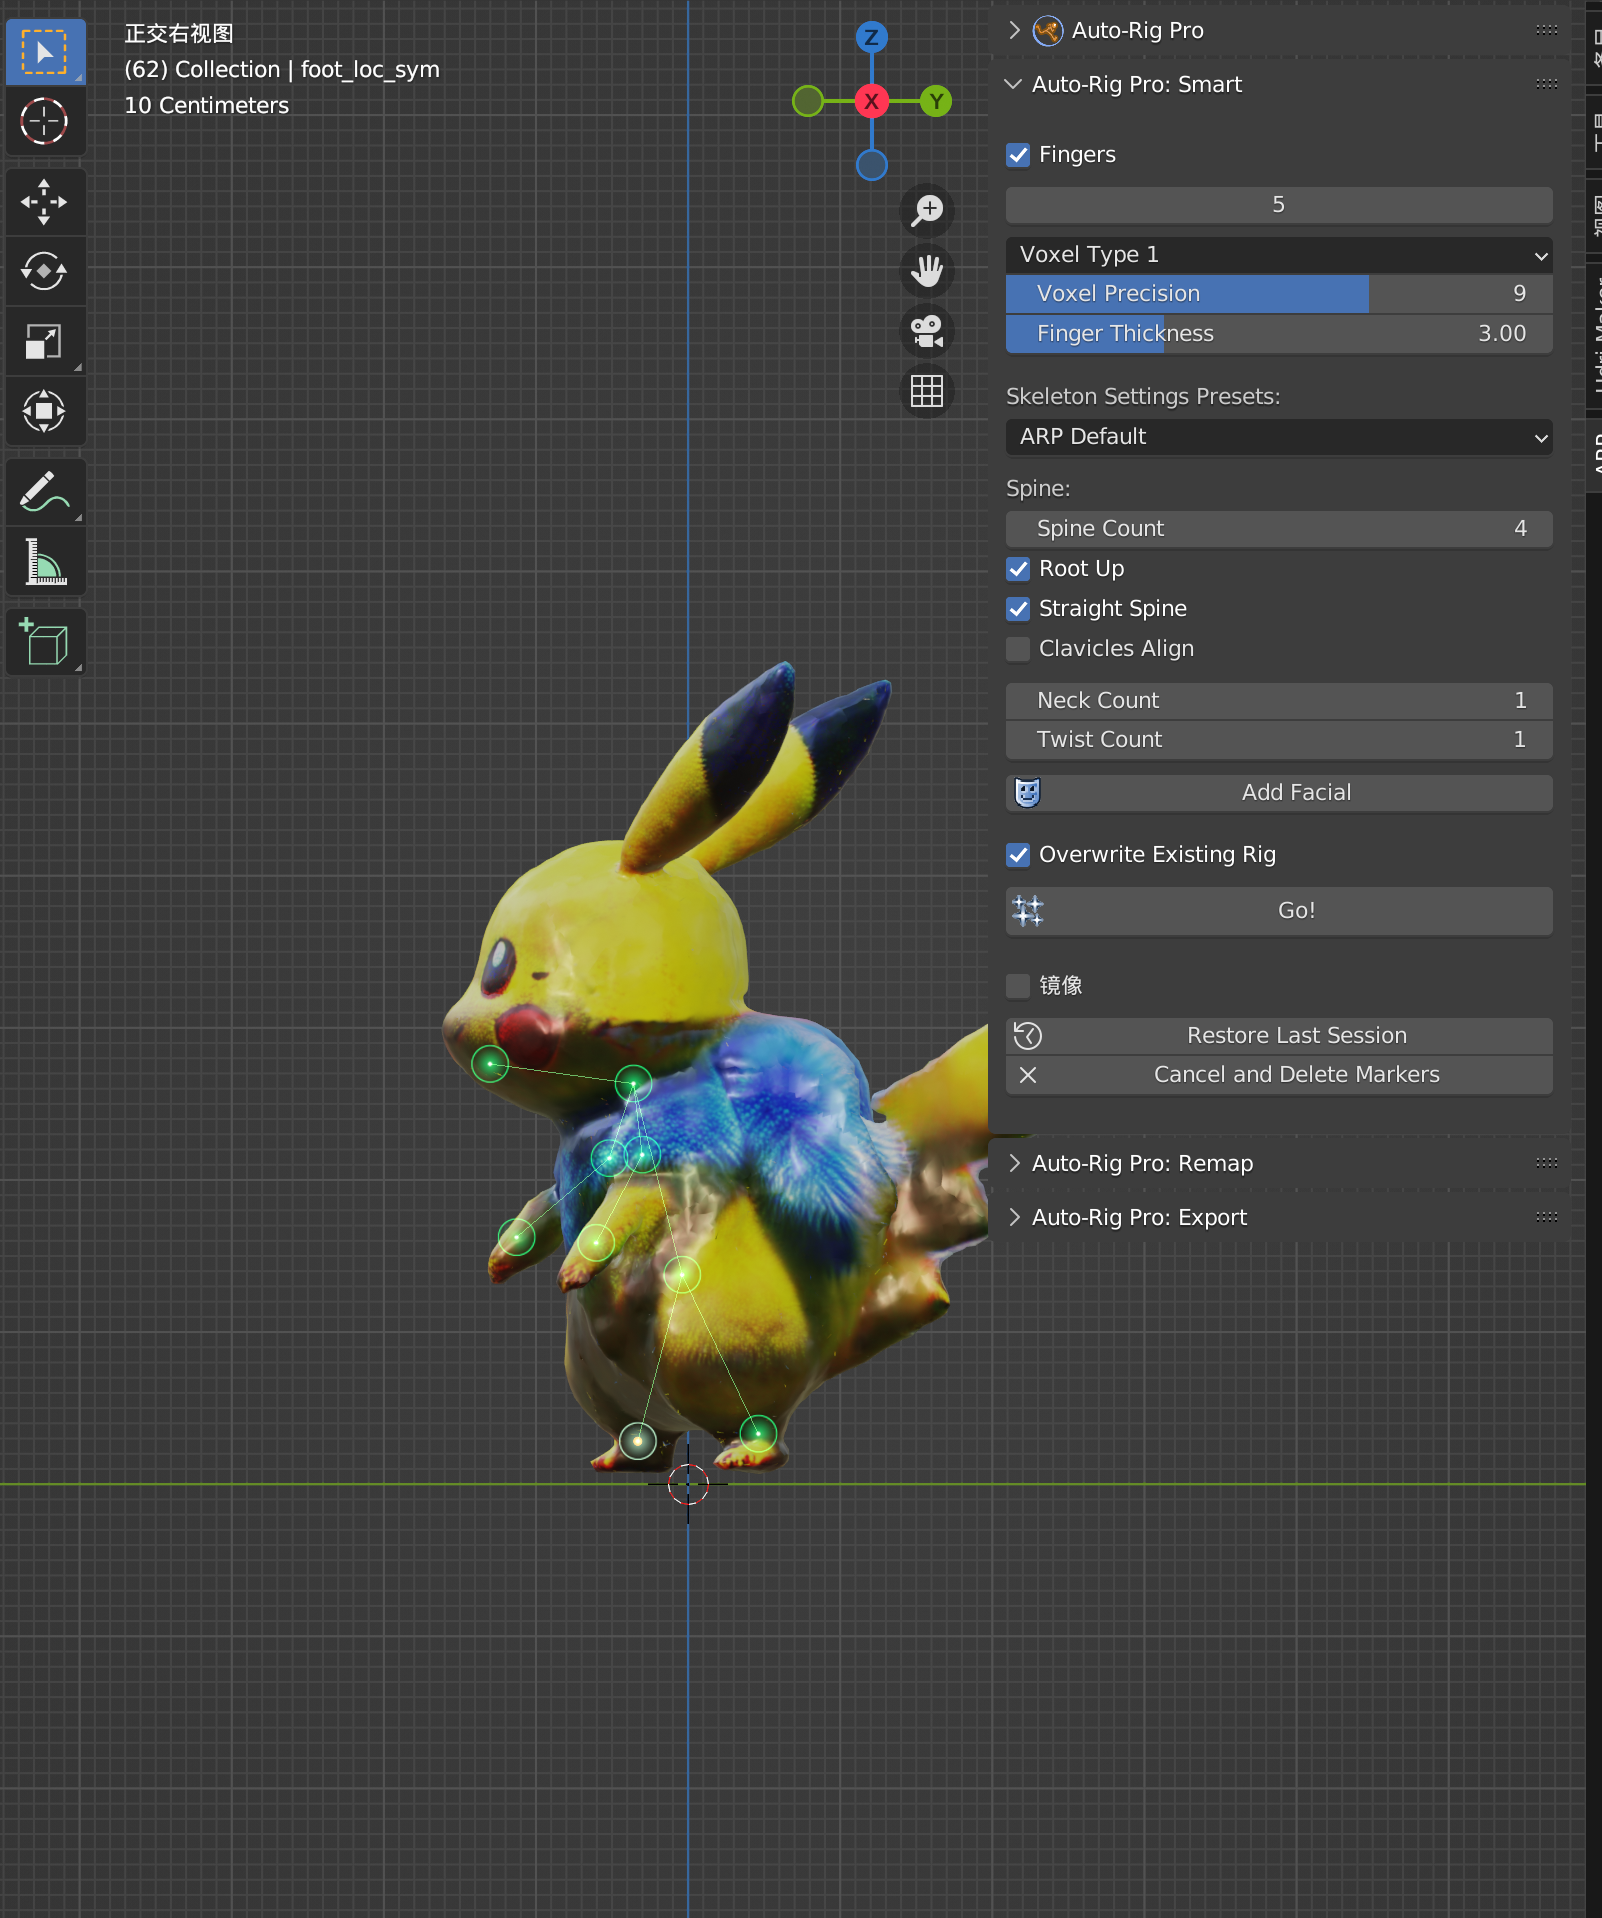 | 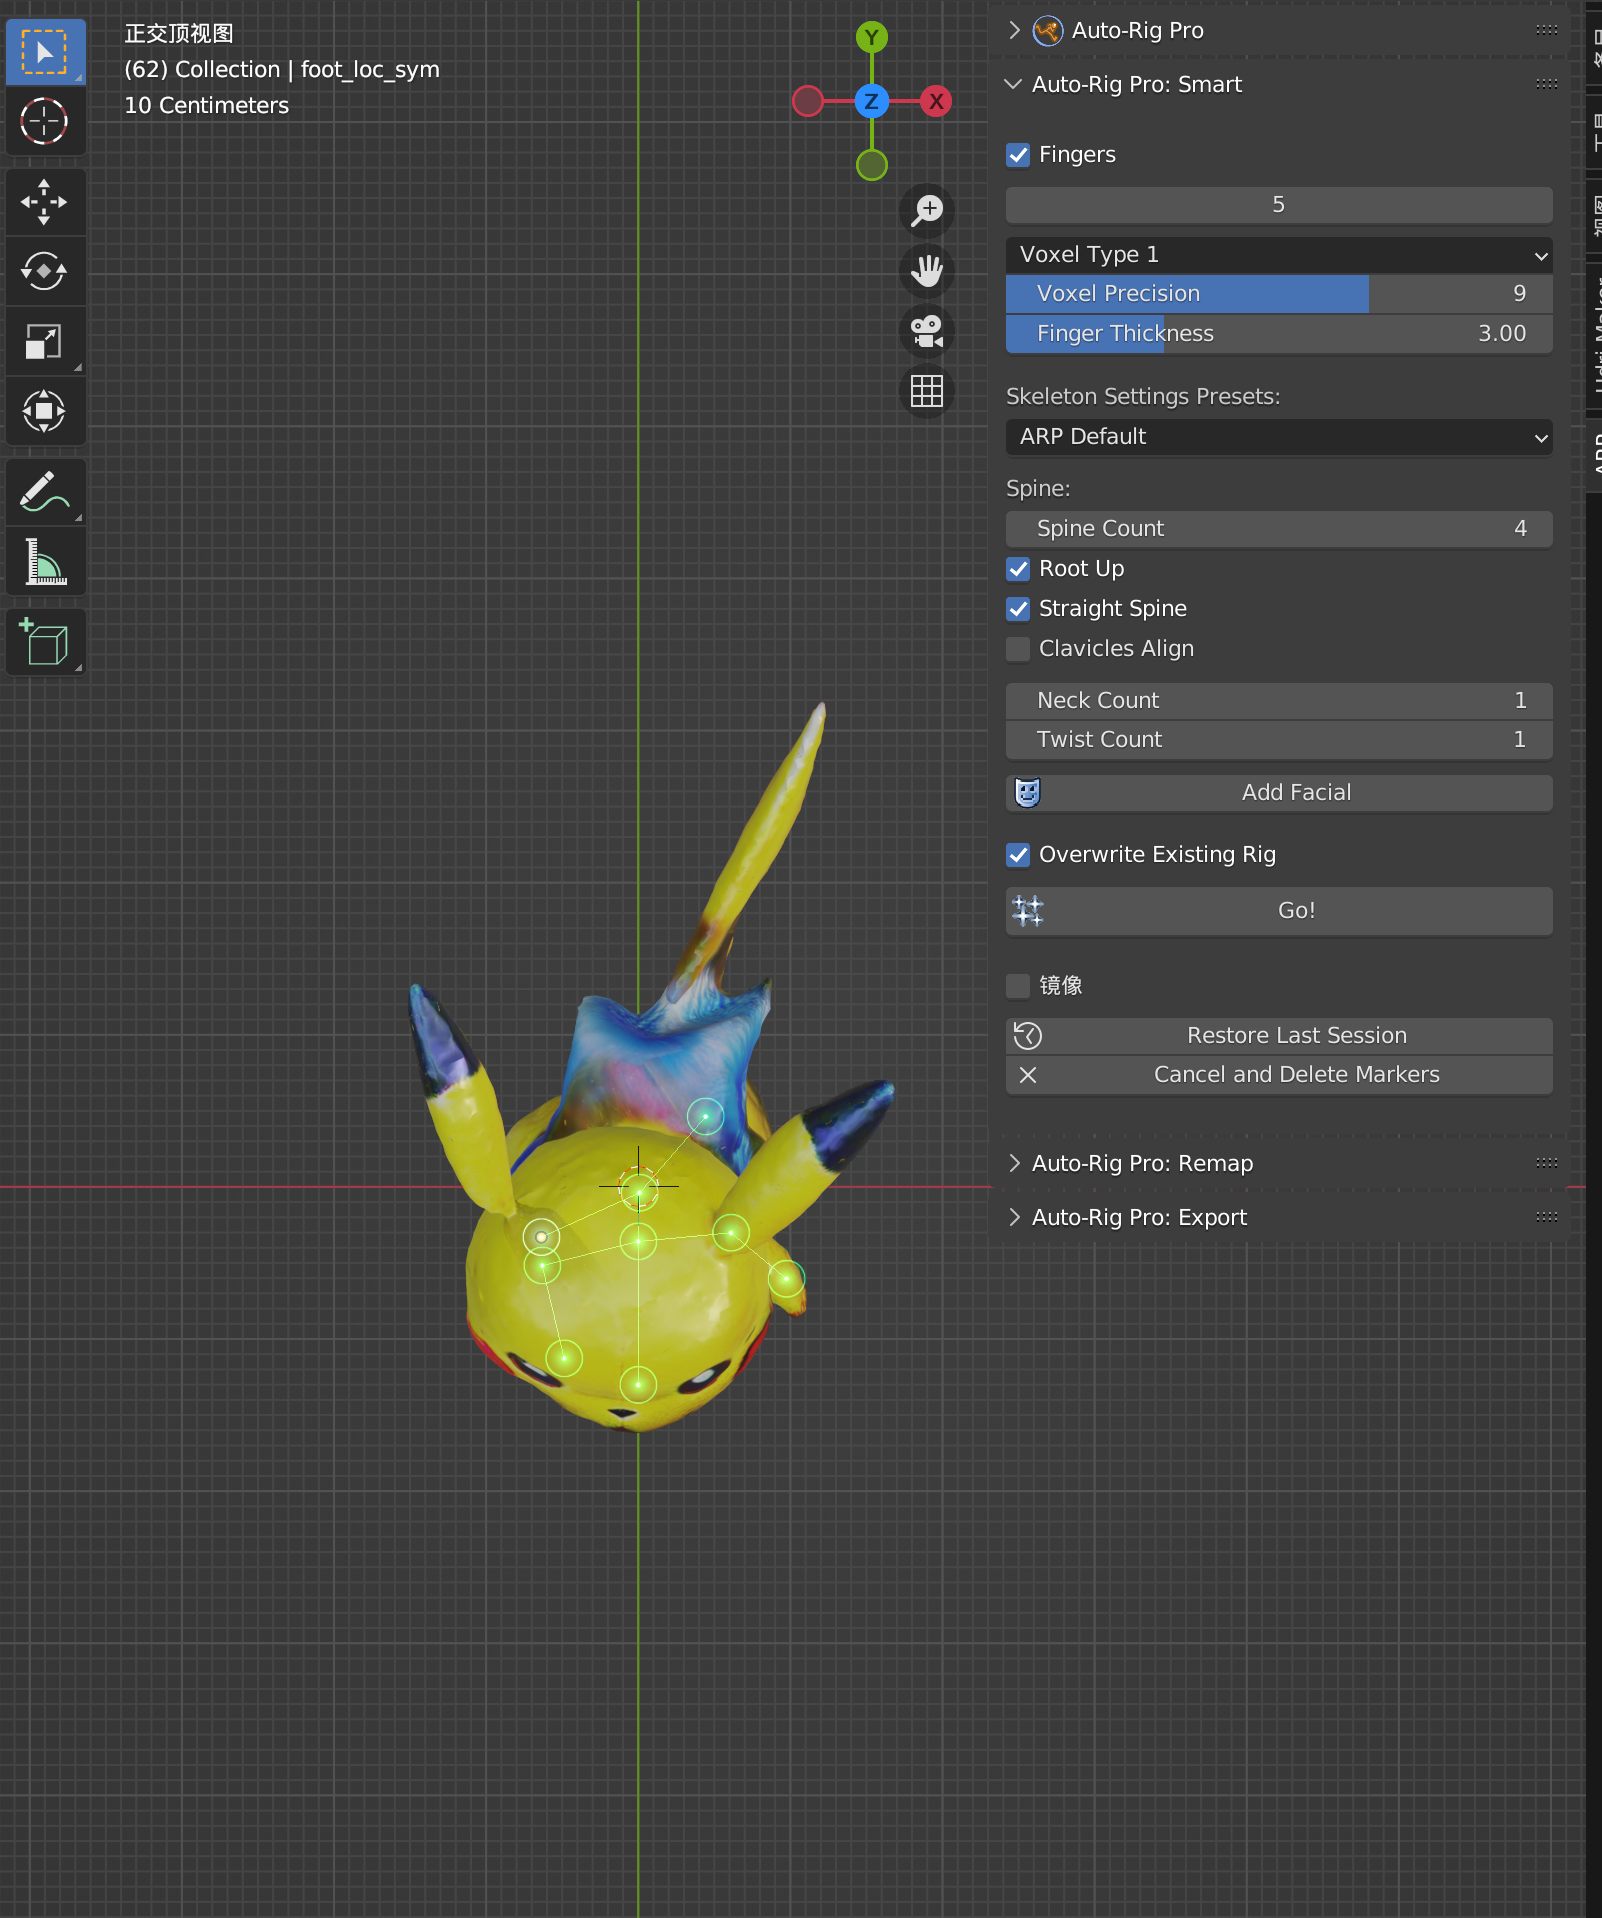 | 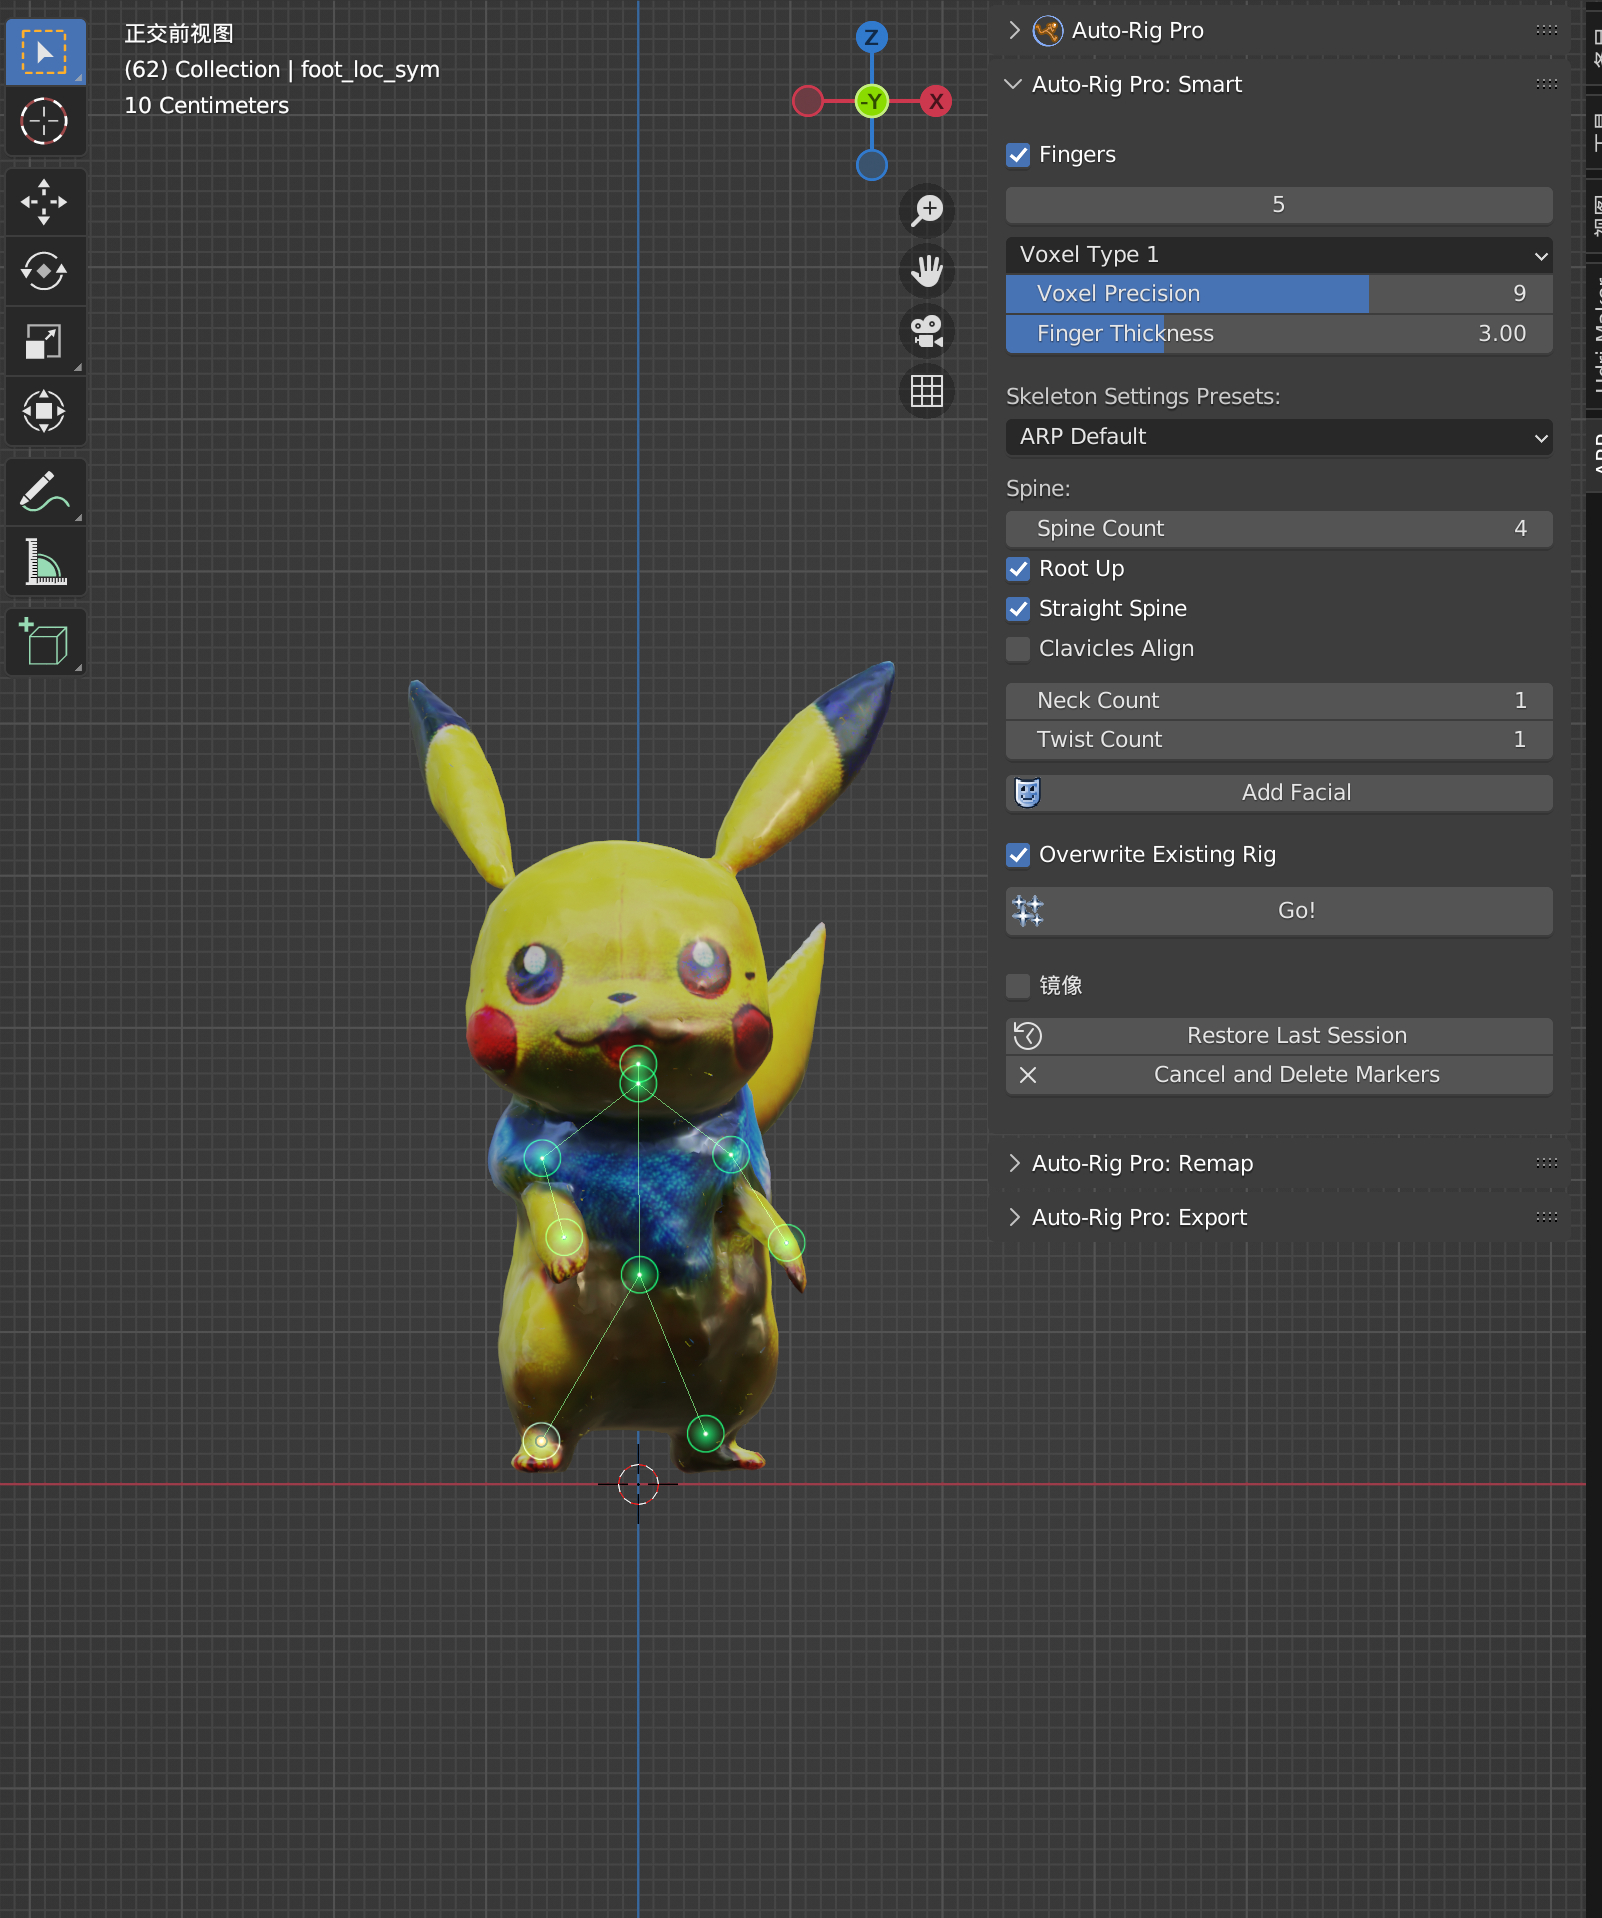 |
Next, uncheck the "Fingers" option, as we won't need to position the fingers for this example. Click the "Go!" button and wait for a moment. You'll see that the skeleton has been created! However, it's important now to check if the generated nodes are correct and if there are any parts with disproportionate sizes. To adjust the positions, use the 'G' shortcut key. Select the small spheres at the joints of the generated skeleton and move them to the appropriate positions.

Next, navigate to the Auto-Rig Pro menu and under the Rig tab, click on "Match to Rig." You'll see something like the image shown, with a circle above the head known as the control rig.
Then, move to the Skinning tab. In "Object Mode," select your model, hold Shift and select the control rig, and then click on 'Bind' in the menu bar to bind the controller to the model.
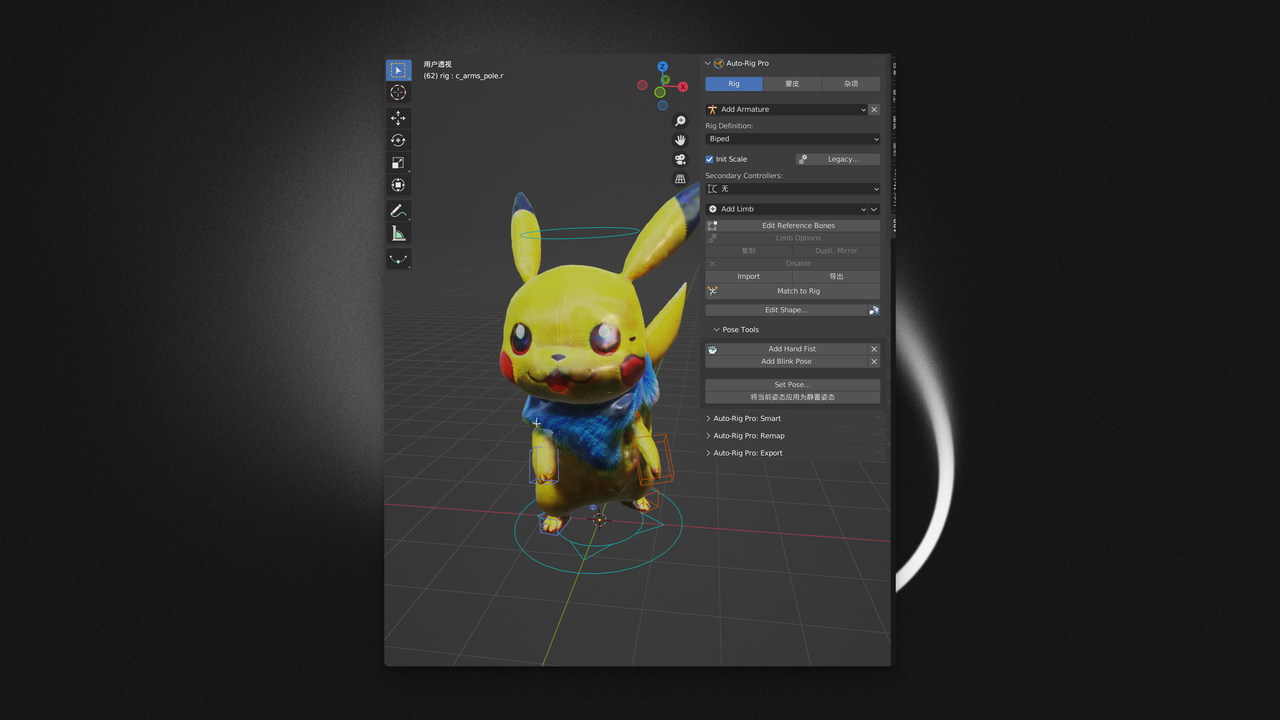
If you want to view all the controllers, even those obscured by the body, first select the control rig above the head. Then, in the "Object Data Properties" on the right side, check the option "In Front." This will make the control rig visible through the model, ensuring that you can see and access all controllers regardless of their position relative to the model.

Finally, it's a good idea to do a quick check to ensure that the controllers are correctly positioned. For example, to check the head, switch to "Pose Mode," select the control rig above the head, and use the shortcut key 'R' to rotate the head and see if it moves as expected.
Introducing Auto-rigging in Tripo AI
If you find Auto-Rig Pro is still a bit complicated and are seeking another solution, check out the latest launched auto-rigging feature in Tripo! Auto-rigging your humanoid models in one click is now available via Tropo's Discord server. Here's an introduction video:
Explore Tripo AI and join us on our media platforms:
- Official Website: https://www.tripo3d.ai
- Twitter: https://twitter.com/tripoai
- Medium: https://medium.com/@thegodtripo
- Discord: https://discord.gg/chrV6rjAfY
Original Article: https://medium.com/@thegodtripo/ultimate-tripo-ai-guide-vii-rigging-in-blender-82fbd289749d
Written by Lyson(Twitter@lyson_ober) and edited by Oliver